2026 FFmpeg Guide - How to Reduce Video File Size with FFmpeg
FFmpeg can compress video size on Windows, macOS, or Linux for YouTube, Facebook, Instagram, email, etc. For novice users, however, it's difficult to get started with FFmpeg. Forums like StackExchange and superuser are flooded with questions about compressing video in FFmpeg. For example,
"I have a 1080p video 3 minutes long and want to bring it down to 100MB in size. Tried changing bit rate ffmpeg -i input.mp4 -b 1000000 output.mp4, also tried ffmpeg -i input.mp4 -vcodec libx265 -crf 20 output.mp4 Tried changing -crf between 18 to 24, used both libx264,265 but it all resulted in nearly same output size, sometimes it even got bigger instead of smaller."
To compress videos in FFmpeg, you should make sure the common-line is right. Start with the common-line examples below using FFmpeg. You can also reduce video size using FFmpeg in Python. If you can't handle FFmpeg, or FFmpeg compression performance is not satisfying, try the FFmpeg alternative below.
Can't Handle FFmpeg? Try Video Compression Software
FFmpeg is not easy to get started for novice users. To make video compression easier and more efficient, use a solid video compression tool, Winxvideo AI.
- Simply drag file size slider bar to get your desired output size, 10%, 50%, or 70%; 1GB input - 102MB output!
- Convert H264 to HEVC to get 64% bit rate reduction, 1GB input - 368MB output!
- Lower 4K to 1080p, 1080p to 720p, 60FPS to 30FPS or cut off video clips to further compress video size.
- Blazing fast compression speed with the support for hardware acceleration.
Table of Content
Part 1. Top FFmpeg Commands for Maximum Compression (2026)
FFmpeg is the gold standard for video transcoding. To achieve the best compression ratio while maintaining visual quality, using the right Constant Rate Factor (CRF) and Preset is key. Here are the most effective commands for modern web and storage needs:
Goal |
FFmpeg Command Line |
Standard MP4 (H.264) |
|
High Efficiency (HEVC) |
|
Target Size (Two-Pass) |
|
Technical Note: A lower CRF value means higher quality (0–51 range). For H.264, 18–28 is the "sweet spot."
Part 2. How to Reduce Video Size with FFmpeg (Command-Line)
1. Set up FFmpeg on Windows, macOS, or Linux
If you haven't installed FFmpeg on your computer, here's how to download FFmpeg and finish the setup process on your computer. For Windows users, Windows Powershell is recommended over Command-Line. Open Windows Powershell from the start menu, and start with the compression command-line in FFmpeg.
On Windows
- Download the zip file of the latest version (V4.3.3 released on 2022-04-16). Unzip the FFmpeg zip file by using any file archiver on your Windows PC.
- Rename the extracted folder to ffmpeg and move into the root of C: drive.
- Run cmd as an administrator and run the following command: setx /m PATH "C:\ffmpeg\bin;%PATH%"
- Restart your Windows PC and run the command to check whether FFmpeg is installed. ffmpeg -version
Hot search: How to encode AVI with FFmpeg, How to Change Resolution with FFmpeg
On Mac
- Go to FFmpeg official download page. Click the Mac icon under the Get packages & executable section.
- Click the popping up link Static builds for macOS 64-bit. Head to the FFmpeg section.
- Click Download as ZIP. After the download completes, click the zip file on your Mac to unzip it.
- Copy and paste the ffmpeg file to a location. On the main menu, select Plugins > Animation Plugin > Animation Plugin pane.
- Click the drop-down icon of the Load Animated Avatar, select the animated avatar, select MP4 under Output.
- Click Browse button in the FFmpeg Library. Specify where FFmpeg is located and click it to open. Now, ffmpeg is added to the animation plugin and installed successfully on your Mac.
2. Input video compression command-line
There are few ways to make video size smaller, such as a more efficient codec format (H.265 compresses data 30% smaller than H.264), lower bitrate or fps, shorter video length. Here we take some typical command-line examples to show you how to compress MP4/MOV/WebM/4K video size using FFmpeg.
Command-line - Compress and Convert MP4 to WMV
ffmpeg -i input.mp4 -b 1000k -vcodec wmv2 -acodec wmav2 -crf 19 -filter:v fps=fps=24 output.wmv
Command-line - Compress and Convert MP4 to Webm for YouTube, Ins, Facebook
ffmpeg -i source.mp4 -c:v libvpx-vp9 -b:v 0.33M -c:a libopus -b:a 96k \
-filter:v scale=960x540 target.webm
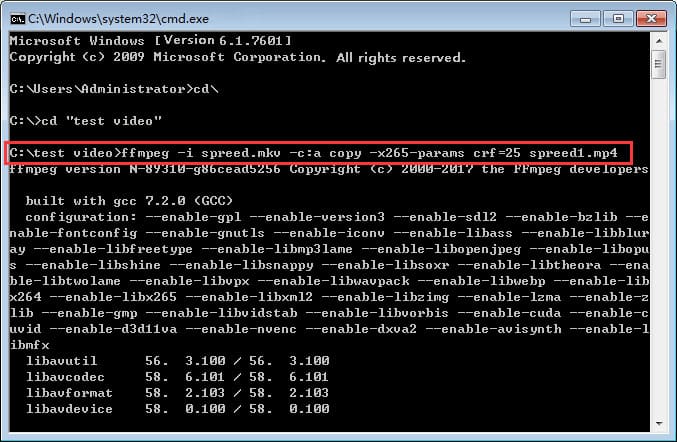
Command-line - Compress and Convert H.264 to H.265 for Higher Compression
ffmpeg -i input.mp4 -vcodec libx265 -crf 28 output.mp4
Command-line -Set CRF in FFmpeg to Reduce Video File Size
ffmpeg -i input.mp4 -vcodec libx264 -crf 24 output.mp4
Command-line - Reduce video frame size to make 4K/1080P FHD video smaller
ffmpeg -i input.avi -vf scale=1280:720 output.avi
Command-line - resize video in FFmpeg to reduce video size
ffmpeg -i input.avi -vf scale=852×480 output.avi
You can resize your video to a specific size 480p, 720p, 1080p, etc. in FFmpeg.
If you need to resize video in FFmpeg but keep the original aspect ratio, specify only one component, width or height, and set the other component to -1, for eample, ffmpeg -i input.jpg -vf scale=852:-1 output_852.png
To make the command line clearer, below are what some common FFmpeg command-line options specify, including -c:v, -b:v, -c:a, -b:a, CRF. These options are frequently used for reducing video size in FFmpeg.
- -c:v: video codec
- -b:v: video bitrate
- -c:a: audio codec
- -b:a: audio bitrate
- -filter:v: a filter to video stream
- -f is used to explicitly specify the container format, -f mp4, -f wmv, -f webm, etc.
CRF (Constant Rate Factor): set the CRF to lower the bit rate but retain better quality. The lower crf, the higher the bitrate. According to test, setting crf to 24 reduce a 250MB video to 70MB without losing the quality noticeably. Use ffmpeg -i input.avi -vcodec libx264 -crf 24 output.avi, a 1GB video can be compressed to 200MB.
3. Start reducing video file size in FFmpeg
Hit enter and the video compression process should begin. Now, FFmpeg is running to do the video compression job. The video processing progress is showing at the bottom. Tips: compressing 4K UHD videos in FFmpeg is CPU intensive, you'd better shut down other programs running background on your device.
4. Done!
When the video compression completes, the output video file should appear at your specified location. Check for the output video file size and figure out the FFmpeg video compression ratio.
Related: How to Compress Video Media File Size in PowerPoint, Adobe Tutorial: How to Compress Video in Adobe Media Encoder
Part 3. How to Compress Video Size using FFmpeg in Python?
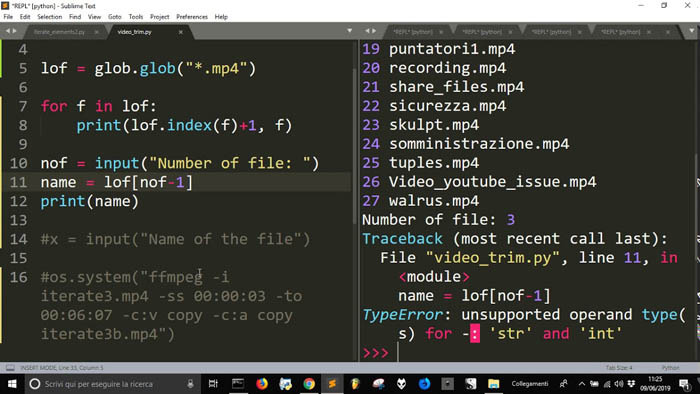
FFmpeg-python is only a Python wrapper for FFmpeg. You still need to install FFmpeg on Windows or macOS computer. Then make the following script for reducing (MP4/MKV/MOV/WebM, etc.) video size in Python. Subprocess is the only module being required. Make sure you run the command in run() function. It's more complicated to compress video size using FFmpeg in Python. If you can't handle FFmpeg in Python, resort to other easy-to-use free video compression software.
import subprocess
result = subprocess.run('ffmpeg -i output.mp4 -b 800k output.mp4')
print(result)
Some users encounter System cannot find the file specified error when compressing a video using FFmpeg in python. The error message says "FileNotFoundError: [WinError 2] The system cannot find the file specified". The error means users don't have FFmpeg installed or the installation doesn't finish. You have to install FFmpeg because ffmpeg-python is just a Python wrapper for FFmpeg.
Pro Tip: Moving Beyond the Command Line for Faster Results
While FFmpeg offers unparalleled control, it requires a steep learning curve and constant manual trial-and-error to find the perfect balance between bitrate and clarity. For high-volume tasks or videos that require visual restoration, even experienced developers often look for a more streamlined tool.
This is where Winxvideo AI complements your technical toolkit. It acts as an advanced, AI-powered wrapper for professional transcoding, combining the precision of FFmpeg with a Level-3 GPU Acceleration engine. It’s designed for those who need FFmpeg-level results without the manual coding, plus the added benefit of AI High-Quality Engine to restore details that traditional CLI tools might lose during compression.
Operational Need |
Manual FFmpeg Workflow |
Winxvideo AI Workflow |
Hardware Support |
Manual flag configuration (NVENC/VAAPI). |
Auto-detects & leverages full GPU. |
Visual Enhancement |
Limited to basic filters. |
AI Super-Resolution, Frame Interpolation, Stabilization, Vocal Removal, Face Recovery, etc. |
Batch Efficiency |
Writing complex .bat or .sh scripts. |
One-click Batch Resizing UI. |
Free download Winxvideo AI to compress videos in batches with simpler process
Part 3. Technical FAQs on FFmpeg Compression
1. Why is FFmpeg compression so slow on my machine?
FFmpeg defaults to CPU encoding (libx264/libx265), which is mathematically intense. To speed it up, you must invoke hardware acceleration (like h264_nvenc for NVIDIA). If configuring these drivers feels overwhelming, Winxvideo AI simplifies this by automatically utilizing your hardware’s full potential, delivering speeds up to 47x faster than standard CPU encoding.
2. How do I compress a video to a specific size with FFmpeg?
You must use "Two-Pass Encoding." First, calculate the required bitrate (Total Size / Duration), then run the first pass to analyze and the second to encode. If you want to avoid the math, Winxvideo AI features a smart bitrate calculator that hits your target size (like Discord's 25MB) with much higher precision.
3. Does FFmpeg lose quality during compression?
Yes, FFmpeg uses lossy compression by default. To minimize this, you should use the -crf flag. However, FFmpeg cannot "improve" an already poor-quality video. For low-resolution or grainy footage, the AI High-Quality Engine in Winxvideo AI can actually enhance the clarity while shrinking the file—something standard CLI tools cannot do.