


How to Fix Low-Resolution Pictures on PC/Mac/iPhone/Android/Online
 Mike Rule
Updated on
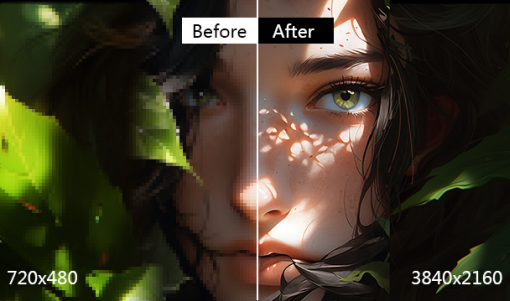
Many users on online communities like Reddit, Quora, and Google forums seek solutions for improving low-resolution photos. A common reason is the desire to print these photos, but low resolution translates to poor print quality. Fear not! There are several methods to fix low-resolution photos, including using powerful software like Photoshop, convenient online tools, and even emerging AI-powered image enhancers like Winxvideo AI. This guide will provide detailed instructions and helpful tips to ensure your photos print beautifully.
But before diving into the step-by-step tutorials, let's take a quick look at what makes a good photo resolution for printing. Understanding this will help you determine the ideal resolution to convert your image to for stunning results.
What is a Good Photo Resolution for Printing?
The secret to getting stunning photo prints lies in image resolution, measured in DPI (dots per inch). For most pictures, a sweet spot of 300 DPI delivers crisp, high-quality results. This is perfect for personal prints you cherish, framed photos you display proudly, or even professional prints.
However, if you're aiming for monumental prints or capturing every intricate detail in an image, you might want to consider going above 300 DPI. Be aware that this will increase the file size significantly.
On the other hand, for large prints viewed from afar, like posters or banners, a slightly lower resolution of around 200 DPI is often perfectly acceptable. You might even be able to get away with a bit lower resolution for casual home printing if minor quality loss isn't a major concern.
When choosing a photo resolution for pringting, there are a few factors to consider:
- Print size: The bigger the print, the higher the resolution you'll need to maintain quality.
- Viewing distance: Photos viewed from afar can have a slightly lower DPI.
- Printing service requirements: Some printing companies may have specific DPI recommendations, so it's always a good idea to check with them beforehand.
By considering these factors and referring to the table below, you can choose the best photo resolution for your printing project and get stunning results that meet your specific needs.
| Image Dimensions (pixels) | Maximum Print Size for High Quality (inches) [at 300 DPI] | Maximum Print Size for Acceptable Quality (inches) [at 200 DPI] |
|---|---|---|
| 1200 x 1800 | 4 x 6 | 6 x 9 |
| 1600 x 2400 | 5.3 x 8 | 8 x 12 |
| 2000 x 3000 | 6.7 x 10 | 10 x 15 |
| 2400 x 3600 | 8 x 12 | 12 x 18 |
| 3000 x 4000 | 10 x 13.3 | 15 x 20 |
| 3200 x 4800 | 10.7 x 16 | 16 x 24 |
| 4000 x 6000 | 13.3 x 20 | 20 x 30 |
| 5000 x 7500 | 16.7 x 25 | 25 x 37.5 |
For projects needing flawless detail, explore SDXL resolutions that prepare your images for professional upscaling.
Now that you understand ideal photo resolutions for printing, let's explore how to fix low-resolution photos!
How to Fix Low-Resolution Photos on PC/Mac
Method 1. Use Photoshop
For users comfortable with image editing software, Adobe Photoshop provides powerful tools for fixing low-resolution photos. In this first method, we'll explore the two main approaches Photoshop offers to increase image resolution, each with its own advantages and limitations.
1. Increasing resolution while maintaining image size (resampling)
This method involves instructing Photoshop to add new pixels between existing ones to achieve your desired resolution (typically 300 DPI for printing). Here's how to do it:
Step 1. Launch Photoshop and open the photo with low resolution.
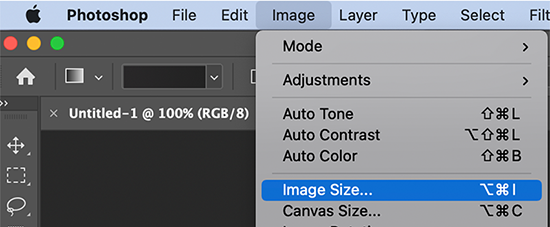
Step 2. Go to Image and select Image Size.
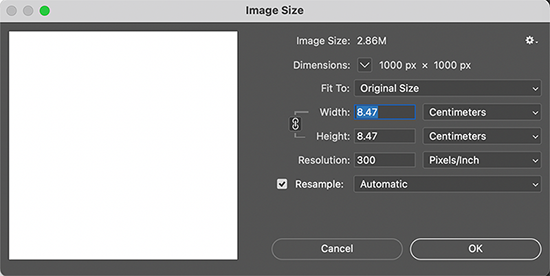
Step 3. Check the "Resample" box.
Photoshop offers various resampling methods when the "Resample" box is checked. You can experiment with different methods to see which one delivers the best results for your specific image.
- Automatic: Photoshop will automatically choose the method based on the image type and scaling direction (up or down).
- Preserve Details (enlargement): Adds a noise reduction slider to smooth the image during enlargement.
- Bicubic Smoother (enlargement): Prioritizes smooth transitions while enlarging.
- Bicubic Sharper (reduction): Maintains sharpness during image size reduction.
- Bicubic (smoother gradients): Enlarges or reduces images with smooth color transitions.
- Nearest Neighbor (hard edges): Replicates existing pixels but may appear less precise.
- Bilinear: Adds pixels based on the average color of surrounding pixels.
Step 4. Set the "Resolution" to the desired value (e.g., 300 PPI) and then click "OK".
By doing this, you should get a higher resolution photo while maintaining the image size.
Note: Photoshop essentially invents new pixel data to fill the gaps. This process, called resampling, can introduce artifacts and blur the image, especially with significant upscaling. Experts generally recommend limiting resampling by 5-10% to maintain acceptable quality.
2. Increasing resolution while reducing image size (unchecking resample)
This method prioritizes maintaining image quality over document size. Here's how to do it:
Step 1. Launch Photoshop and open the photo with low resolution.
Step 2. Go to Image and select Image Size.
Step 3. Uncheck the "Resample" box.
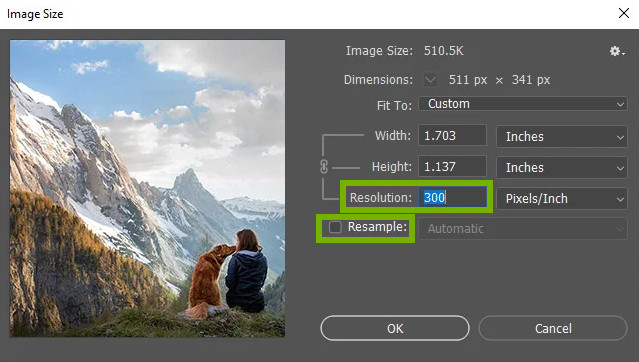
Step 4. Set the "Resolution" to the desired value (e.g., 300 DPI) and click "OK".
While the image quality stays relatively intact, the downside is that the overall dimensions (width and height) will decrease proportionally to the increased resolution. This might be suitable for small image placements within a design but may not work for large prints.
For example, imagine you have a low-resolution image of a flower that's currently 8 inches wide and 10 inches tall (8" x 10") but only has a resolution of 72 DPI. You want to use it in a brochure but need it to be 300 DPI for printing.
Unchecking "Resample": If you increase the resolution to 300 DPI without resampling, the image quality will stay good, but the dimensions will shrink. In this case, the new size would be roughly 1.92 inches wide by 2.4 inches tall (1.92" x 2.4"). While the quality is preserved, this size might be too small for a standalone image in a brochure.
This method is ideal for situations where you only need a small portion of the image or the image will be placed within a larger design element (like a collage or infographic).
Which method to choose for fixing low-resolution pictures depends on your specific needs. If maintaining image quality is crucial, consider reducing image size while increasing resolution (uncheck "Resample"). However, if document dimensions are essential, resampling with a small percentage increase might be the way to go, keeping in mind potential quality loss.
Method 2. Without Photoshop
While Photoshop offers a powerhouse of image editing tools, it might not be the most cost-effective option for everyone, especially for occasional users or those seeking a one-time fix. If that sounds like you, there are simpler and more budget-friendly solutions available. One such solution is Winxvideo AI.
Winxvideo AI utilizes a "Super Resolution" feature specifically designed to enhance the quality of low-resolution images and videos. It can not only increase image resolution but also enhance details by automatically reducing noise and blurring.
Winxvideo AI caters to a variety of needs. You can choose to preserve the original dimensions of your low-resolution photos, ensuring they fit seamlessly into existing projects. Alternatively, the software allows you to enlarge your images by up to 4 times their original size while maintaining quality. This is particularly useful if you need a low-resolution image to be suitable for printing or high-resolution display. Furthermore, Winxvideo AI demonstrates impressive versatility by handling various image types, from realistic photos to stylized anime images.
In terms of performance, Winxvideo AI leverages GPU hardware acceleration for fast processing, significantly speeding up the enhancement process. However, if your computer doesn't have a compatible GPU, the software can still function perfectly well using your CPU for processing.
Finally, Winxvideo AI offers a free trial that allows you to process up to 5 images. This is a great way to evaluate the software's capabilities and see firsthand the improvements it can make to your low-resolution photos before committing to a purchase.
Now, let's check how to fix low-resolution pictures with Winxvideo AI.
Step 1. Download and install Winxvideo AI on your computer.
 Free Download
 Free Download
Note: All the AI features including super resolution, stabilization and frame interpolation are currently only available in Windows version.
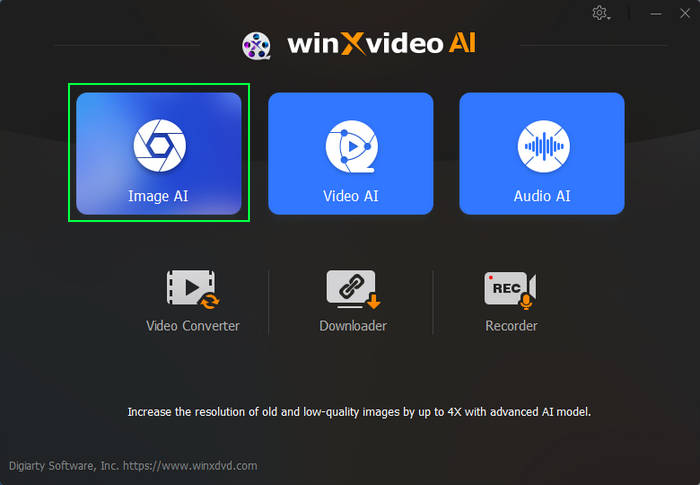
Step 2. Open Winxvideo AI and select "Image AI".
Step 3. Click "Add Image" to import your low-resolution photo. You can even process multiple images in bulk.
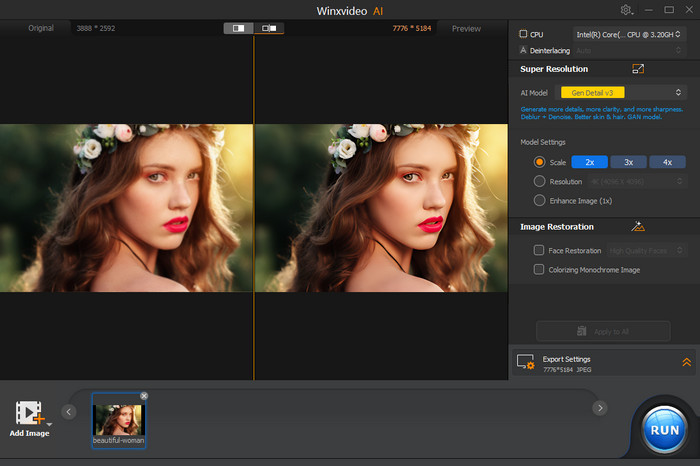
Step 4. Select AI model and model settings.
- Choose "Enhance Image (1x)" to maintain the original size.
- Choose Scale and select "2x", "3x", or "4x" to enlarge your low-resolution picture to a higher resolution.
- You can also select Resolution and choose desired resolution: 1K (1024x1024), 2K (2048X2048), 4K (4096X4096), or 8K (8192x8192).
A preview window displays the expected results.
Step 5. Specify export settings and click "RUN" to save the enhanced image.
As you can see, Winxvideo AI provides a straightforward and user-friendly solution for improving low-resolution photos.
How to Fix Low-Resolution Photos Online
For those who prefer to avoid downloading additional software, online image enhancement tools offer a convenient alternative for fixing low-resolution photos. Here's a breakdown of some popular options:
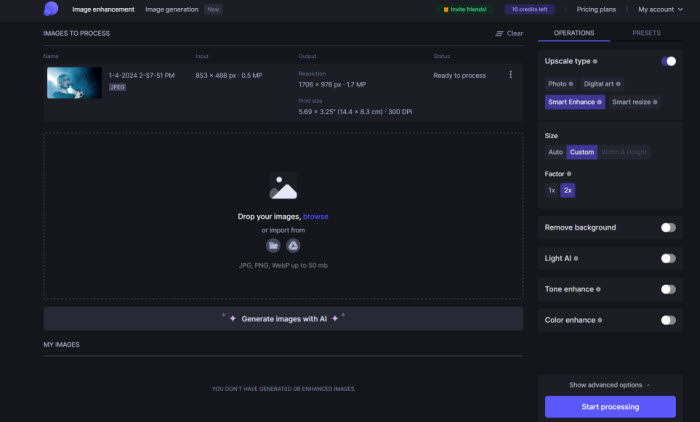
Let's Enhance: This tool provides a free trial with 10 image credits and allows processing images up to 8 megapixels for free accounts. It offers a variety of upscale types (Photo, Digital Art, etc.) to cater to different image styles and supports importing images directly from Google Drive. However, creating an account is required.
Cutout: While Cutout offers basic image enhancement, unlocking the full resolution of the processed image requires paid credits.
Fotor: This tool can enlarge images up to 2 times their original size. However, the free trial version adds a watermark to your images.
Now let's explore the process using Let's Enhance as an example.
Step 1. Open a web browser and visit https://letsenhance.io/. Sign in if you have an account or create a new one.
Step 2. Click the browse button to upload the low-resolution photo you want to fix.
Step 3. Choose upscale type.
Let's Enhance offers various upscale types like Photo, Digital Art, and Smart Resize. Select the option that best suits your image content.
Tips: There's also an option to enhance facial details within the image. Additionally, you can explore the "PRESETS" tab for pre-defined settings tailored to specific uses like Printing, E-commerce, or Real Estate.
Step 4. Specify size and adjustments.
Depending on the chosen upscale type, you might have options to adjust the size factor.
Step 5. Review and export the enhanced image.
The tool will display the estimated resolution and print size of the enhanced image. Once satisfied, click "Start processing" to download the improved version.
By following these steps and exploring the available online tools, you can conveniently address low-resolution photo issues without installing additional software. Remember to check the free trial limitations and pricing details of each tool before committing.
How to Fix Low-Resolution Photos on iPhone/Android Phone
Before you even take the picture, there are steps you can take to ensure your iPhone or Android photos capture the highest possible resolution from the start. This avoids the need for extensive fixes later. But if you already have low-resolution photos, there are still solutions available.
1. Utilize Built-in Camera Settings (Before Taking the Photo)
On iPhone: Open your Camera app and find the Settings (usually a gear icon). Look for options like "Photo Resolution" or "Image Size." Then, pick the highest quality setting your iPhone model offers.
On Android: The exact steps might vary a bit depending on your phone, but generally, open the Camera app and tap Settings (often a gear icon) or swipe down to see more options. Find a menu titled "Picture size" or "Resolution" and choose the highest quality setting available.
2. Enhance Existing Low-Resolution Photos
There are two main approaches to improve existing low-resolution photos on your phone:
Method 1. Use Built-in Editing Tools
Both iPhone and Android offer basic photo editing features within their Photos apps. These tools might include options for sharpening or adjusting contrast, which can sometimes help improve the clarity of a low-resolution photo.
On iPhone: Open the Photos app and select the low-resolution photo you want to edit. Tap "Edit" and explore the editing tools available. Options like "Sharpen" or adjusting "Brightness" and "Contrast" might be helpful.
On Android: Open the Gallery app (or your default photo app) and select the low-resolution photo. Tap "Edit" and explore the available editing options. Similar to iPhone, features like "Sharpen" or adjustments to "Brightness" and "Contrast" might be beneficial.
Method 2. Use Third-Party Apps
There are many third-party photo editing apps available on the App Store (iPhone) and Google Play Store (Android) that can address low-resolution photos. These apps often utilize AI technology to upscale and enhance image quality.
For example, you can use Remini to enhance low-resolution photos on iPhone or Android. Here's how does it work.
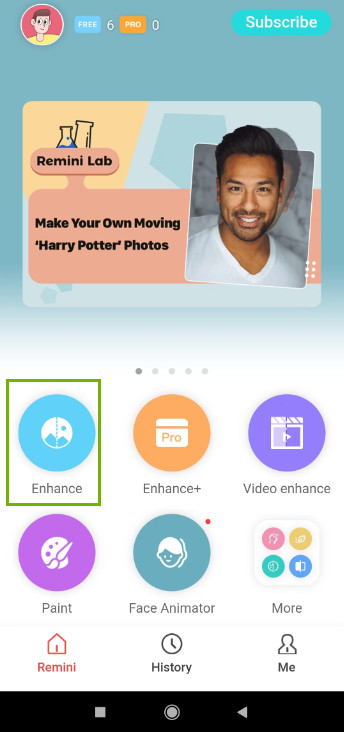
Step 1. Download and install the Remini Photo Enhancer app. It's available for both iPhones and Android phones. Once it's installed, open the app and you'll see an "Enhance" button on the main screen. Tap that button to get started.
Step 2. Choose the low-resolution photo you want to fix from your phone's photo library. Once you've found it, tap the big red checkmark at the bottom of the screen. This tells Remini's clever AI to work its magic and enhance your photo.
Just a heads-up: If you're using the free version of the app, you might see a quick ad before you see the final results.
Step 3. Check it out and save the improved picture.
Once the processing is done, you can see your original photo side-by-side with the enhanced version. This lets you compare how much better it looks! If you're happy with the results, you can download the improved photo or share it directly from the app.
By using these strategies, you can potentially improve the quality of your low-resolution photos taken on your iPhone or Android phone. Remember, the best approach often depends on the severity of the low resolution and your desired outcome.
Tips to Avoid Low-Resolution Pictures
Here are some tips to get rid of low-resolution pictures:
Before You Take the Photo:
Use the highest resolution setting: Most cameras and smartphones offer different resolution options. Choose the highest resolution setting available for your device. This will ensure you capture the most detail possible. (Note: Higher resolution photos will also take up more storage space on your device.)
Ensure proper lighting: Low-light conditions can contribute to blurry or grainy photos. If possible, try to take photos in good lighting. Natural light is often ideal, but you can also use artificial lighting strategically.
Focus accurately: A blurry photo due to improper focus is definitely low-resolution! Make sure your camera focuses correctly on the subject of your photo before taking the shot. Most cameras have a focus confirmation feature (often a green square or beep) to indicate proper focus.
While Taking the Photo:
Maintain a steady hand: Camera shake can also lead to blurry photos. If possible, use a tripod or other stable surface to hold your camera when taking photos. If not, hold your camera firmly with two hands and brace yourself against a solid object for added stability.
Zoom in instead of cropping: The digital zoom feature on most cameras simply enlarges the center portion of the image, resulting in a loss of quality. If you need to get closer to your subject, it's better to physically move closer or use a zoom lens (if your camera has one). Cropping a photo after taking it will also reduce the resolution, so it's best to compose your shot carefully beforehand.
Use the burst mode (optional): Many cameras offer a burst mode that captures multiple photos in rapid succession. This can be helpful in situations where your subject might be moving, as it increases the chances of capturing a sharp image.
After Taking the Photo
Review your photos: Take a moment to review the photos you've taken on the camera's screen. This allows you to check for any issues like blurriness or improper composition before you move on. If necessary, you can retake the photo with adjustments.
During Transfer
Use a cable connection: Transferring photos wirelessly (e.g., Bluetooth) might compress the images to reduce file size, potentially leading to a loss of quality. Whenever possible, use a physical cable connection between your camera or phone and your computer for transferring photos. This ensures the original, uncompressed files are transferred.
Check transfer settings: Some software or cloud storage services might offer options to choose the transfer quality. Make sure you select the option for "original" or "high quality" transfer to avoid any automatic compression.
During Saving:
Choose the right file format: JPEG is a common image format due to its compressed file size, but this compression can lead to some loss of quality. For photos where you want to preserve the maximum detail, consider formats like PNG or TIFF. These formats offer lossless compression, meaning the image quality remains intact, but the file sizes will be larger.
Adjust compression settings: When saving JPEG images, you often have the option to adjust the compression level. A higher compression level will result in a smaller file size but with more noticeable quality loss. Experiment with different compression settings to find a balance between file size and image quality that meets your needs.
Other Situations:
Disable automatic resizing: Some social media platforms or online services might automatically resize uploaded photos to fit their display format. This can lead to a reduction in resolution. If possible, check the settings on the platform and disable automatic resizing if you want to maintain the original resolution of your photos.
Backup your originals: It's always a good practice to keep a backup copy of your original, unedited photos. This way, if you accidentally save a low-resolution version or encounter any issues during transfer or editing, you have the high-quality original to go back to. Consider using external hard drives or cloud storage services with generous storage space for backups.
By following these tips, you can significantly reduce the risk of ending up with low-resolution photos throughout the entire capture, transfer, editing, and storage process.
Conclusion
With the knowledge and tools at hand, you can transform low-resolution photos into stunning prints or vibrant digital displays. Remember, preventing these issues in the first place is ideal, but even low-resolution photos can be fixed with the right approach. Now, go forth and capture (or enhance) those cherished memories!


