


How to Record Screen on Windows 10/11 Laptop | Top 10 Ways
 Mike Rule
Updated on
Step into a realm of endless possibilities as we unveil the art of screen recording on Windows – a skill that transcends mere functionality to become a powerful tool for expression, communication, and productivity. Whether you're a dynamic professional orchestrating impactful presentations, a gaming virtuoso showcasing your triumphs, or a tech-savvy enthusiast providing hands-on guidance, screen recording on Windows is the key to bringing your digital experiences to life.
Picture effortlessly creating engaging tutorials, immortalizing precious moments from virtual gatherings, or crafting compelling visual narratives for your audience. Join us on a journey where your screen becomes a canvas, and recording it becomes an art form that amplifies your creativity and connectivity. Let's embark on this exciting exploration together!
Hot search: How to record Black Myth: Wukong Gameplay >>
Top 10 Ways to Record Screen on Windows 10/11 PC with Audio [2025]
1. Xbox Game Bar
If you're running on Windows 10 or Windows 11 laptop, the best screen recorder Windows 10/11 shortcut goes to Xbox Game Bar, which lets you easily capture gameplay video with system/mic sound, record meeting videos, online webinars, production demonstration without time limit or watermark. And it's built into your Windows 10/11 system, needless to install any 3rd party app. Just press the Windows logo key+Alt+R to enable Xbox Game Bar for laptop PC screen recording.
While Xbox Game Bar stands out for its simplicity compared to other competitors, it is not without its limitations. It functions effectively not only in games but also in other applications like Chrome. However, it has the drawback of only being able to screen record one app at a time and cannot capture activities on the Windows desktop or File Explorer. Therefore, if you're meant to capture the screen of multiple programs simultaneously, such as a video call application and a office program, Xbox Game Bar may not meet your requirements. To summarize, this built-in Windows 10 screen recorder is optimal for recording the activity of a single app.
- Built-in software, no installation, free to use.
- Screen capture video up to 60FPS with sound, no time limit, nor watermark.
- Record only one app at a time.
- Output format limited to MP4 only.
- No screen drawing feature, nor Chroma key feature.
How to use Xbox Game Bar to record screen on Windows 10 with sound
Step 1. Go to the game or app you want to record. Here we'll use Windows 10 screen recording for instance. It also applies to record screen on Windows 11 with sound. You can take it for reference.
Step 2. Initiate the recording process by pressing the Windows logo key along with Alt and R simultaneously. If you have Narrator enabled, you will hear the notification "Recording in progress."
Step 3. Toggle the microphone on and off while recording by pressing the Windows logo key, Alt, and M together. If you wish to view the Game Bar controls, press the Windows logo key and G simultaneously. You will hear the notification "Xbox Game Bar window."
Step 4. Engage in the game or utilize the app until you've captured the desired content, then stop the recording by pressing the Windows logo key, Alt, and R simultaneously. If Narrator is active, you will hear the confirmation "Game clip recorded."

The recorded video is stored in the Videos folder within a subfolder named Captures, saved as an MP4 file. The filename includes the name of the game or app, along with the date and time of the recording.
2. Winxvideo AI
Winxvideo AI is a sure winner that would help you record a full screen on Windows 10/11, capture a selected region, record screen and webcam and record audio without time limit/watermark. It differentitates itself from the above-mentioned Xbox Game Bar thanks to its extensive features, including record screen up to 4K 2160 high quality, draw while recording, add annotations, remove background from webcam video, trim recording file, etc.
What's plus, it would be no brainer for it to record Windows 10 screen with system/microphone sound in a wealth of formats, be it MP4, MOV, MKV or FLV TS, uploadable for YouTube, TikTok, Instagram and playabe on Windows PC, iPhone iPad, Android, etc.
 Free Download
 Free Download
Winxvideo AI is for PC, while Macxvideo AI (from our MacXDVD brand) is for macOS.
- 5 recording modes supported: record full screen, specific area, webcam, screen & webcam and capture audio.
- Support a wide range of output format, from MP4 MKV to FLV TS.
- Almost all the editing features needed for recording are included, be it draw, trim, Chroma key, split, add annotation, denoise, add special effects, etc.
- Unable to capture screen on Windows PC at 60FPS now.
How to free make screencasts on Windows 10 using Winxvideo AI?
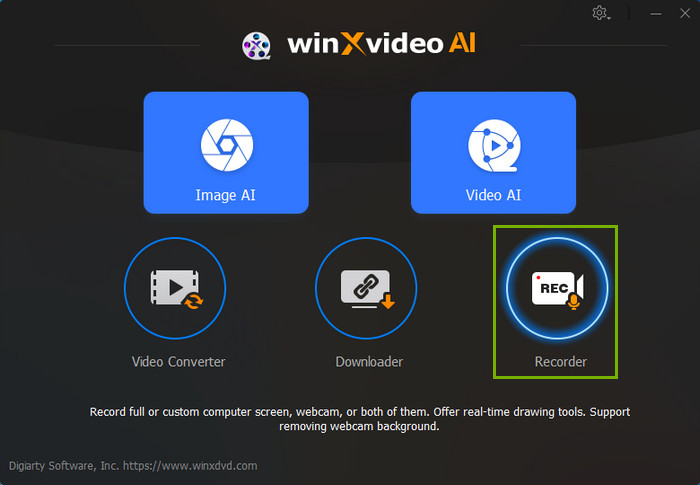
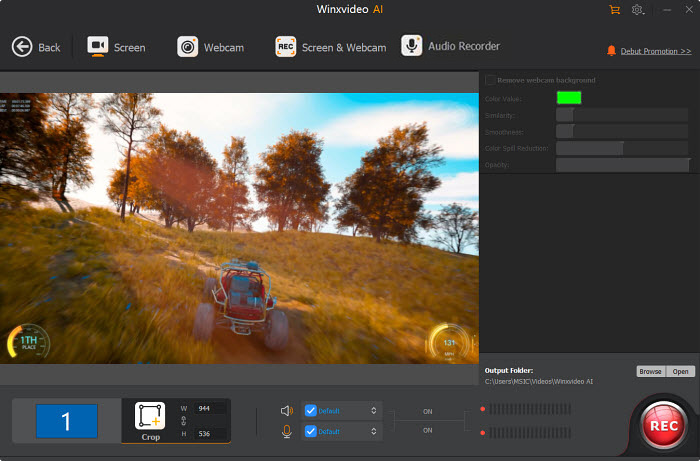
Step 1. Launch Winxvideo AI after installation and select Recorder on the main interface.
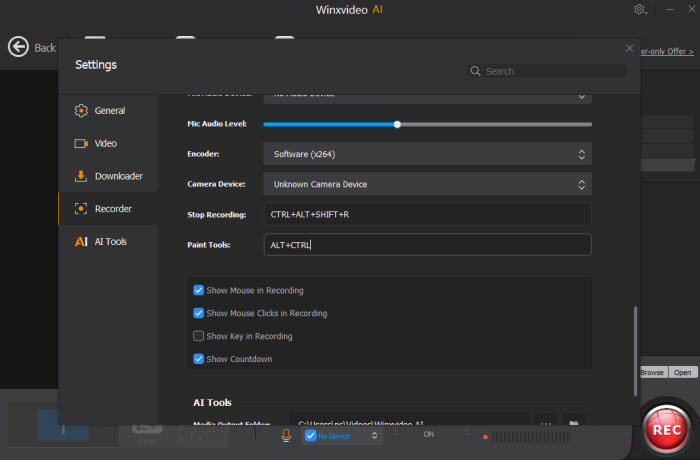
Note: tap the Setting icon on the top right corner of the UI and choose Recorder to adjust settings if needed. You're allowed to change recording quality, format, audio level/device, and know the shortcut for drawing (Ctrl+Alt).
Step 2. Select a recording mode on the top. If you want to record screen and face at the same time, pick up "Screen & Webcam" and make sure you have internal or external camera configured for your Windows PC.
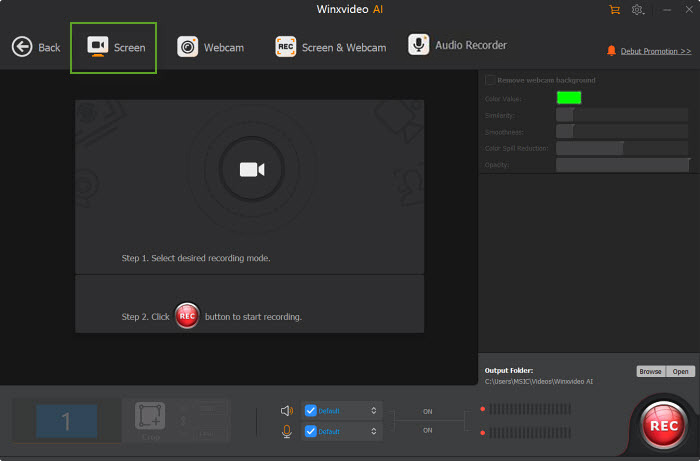
Step 3. Choose to record the entire screen or part of the screen at the lower-left corner.
Step 4. Enable audio device(s).
Step 5. Click on the REC button to start recording a meeting video, gameplay video, product demo, educational video or Discord video call, etc. When everything is OK, click on the Stop button to end. And the final recording file will be saved as MP4 (default) format. You can preview it and do further editing, compressing, AI video enhancing jobs thereon if needed.
3. Snipping Tool
Snipping Tool is a screenshot utility included in Microsoft Windows operating systems that you might not remember to use it for capturing screen activities on Windows PC. It allows you to capture screenshots and screencasts of all or part of your screen and then annotate, save, or share the captured videos or images.
You can choose to record a full screen on Windows laptop, a specific area, a window or a freeform with no time limit or watermark. The Snipping Tool provides basic editing features like highlighting, cropping, and adding annotations to the captured screenshots. It is commonly used for creating tutorials, documenting software issues, or simply capturing and sharing information displayed on the screen. For Windows 10 or Windows 11 users, you can directly activate it to capure screen videos on PC Windows without installing anything else. Convenient and sweet!
Also see: how to screen record Dell laptop running Windows
- Record screen video and make screenshots on Windows 10/11 PC.
- 4 types of recording modes to choose from: Rectangle, Window, Full Screen, Freeform.
- Built-in with Windows 10/11, needless to install anything.
- Unable to record screen and facecam at the same time.
- No draw, background removal features.
- Limited output format, only MP4 format now.
How to free record screen video on PC Windows 11 with Snipping Tool?
Previously, the user guide mainly focuses on Windows 10. This time, we show you the detailed guide on using Snipping Tool to capture Windows 11 screen video with audio. Check it out:
Step 1. Enable Snipping Tool. Click the Start button on Windows 11 > All Apps > tap the shortcut for Snipping Tool. Click the Camera icon on the toolbar and then hit New recording, or press Windows logo key + Shift + R. Press Windows logo key + Shift + S to record an image screen if needed.
Step 2. Select the area of the screen you wish to record, then select Start. The recording areas cover full screen, window, rectangle or freeform (draw a free-form shape around an object).
Step 3. After the recording starts, perform the screen activity you want to capture. Click the Pause button on the toolbar to take a break and then click the Record button to restart. When done, click the Stop button.
Step 4. Share your recording if needed. The recording will automatically begin playing in a Snipping Tool preview window. To share the file with a person or app, click on the Share icon. Supposing you want to save the recording as an MP4 video file, simply click the Save button.
4. Recordscreen.io
On top of the above-mentioned screen recorder for Windows 10 shortcut, users from superuser.com also recommend another online Windows screen capture service - recordscreen.io to help you capture a full screen, partial screen or screen & camera directly online with your browser, no application installation needed.
You can just select Chrome webpage, a window or an entire screen recording without time limit, nor watermark. Certainly, its convenience also comes at the price of customization and output formats. It doesn't sport with any editing features, parameter adjustment or draw/Chroma key features. And the output format is limited to webm only. If you need MP4 format, you can go back to Winxvideo AI to convert webm to mp4 format for free.
- Online screen record on Windows PC within browser, nothing else needed.
- Record screen and record screen & camera at the same time.
- No time limit or watermark.
- No draw, background removal, video editing, recording parameter adjustment features.
- Only WebM output format supported.
How to Online Free record screen on Windows 11/10 with Audio?
Step 1. Visit https://recordscreen.io/ and tap the purple button "Record".
Step 2. Choose your screen recording mode: Screen + Cam or Screen Only. Make sure your laptop has a webcam: internal or external if you want to record screen and face at the same time.
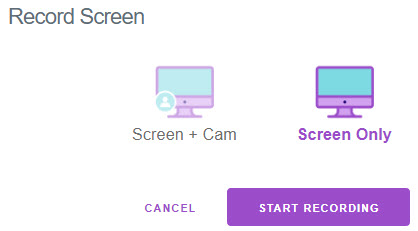
Step 3. Choose "Start Recording". Afterwards, choose recording area, Chrome webpage, window or entire screen. Tap Sharing after you make a decision. This online free screen recorder for PC will begin recording the selected screen region you choose. Now it begins online recording webinars, Skype calls, learning video, powerpoint, product demo, etc.
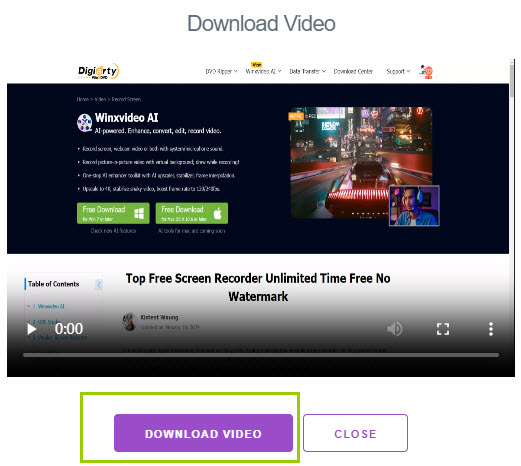
Step 4. Hit "End Sharing" to end your laptop screen recording. Click the Download button to download your recording file to your laptop storage folder. It will be auto saved as webm format.
5. Screencastify
Windows screen recorder extension is always an appealing option for those who plan to capture screen on laptop Windows without installing any software. Screencastify stands out as one of the top browser-based video recording tools available.
As a Google Chrome extension, it facilitates the swift capture of significant moments directly within your web browser environment. You can use it to record either your entire desktop or screen output as MP4 GIF MP3 format, and it provides the option to capture video directly from your webcam.
Even in free version, you're still authorized to record screen on Windows 10/11 PC without quantity limit or watermark. But the recording duration is limited to 5 minutes in free version. If you're high demanding in recording time and advanced editing features, consider upgrading to its Pro version or resort to other alternatives.
How to Online Capture Windows PC Screen using Screencastify Extension?
Step 1. Install Screencastify. Open the Google Chrome browser on your computer > Go to the Chrome Web Store > Search for "Screencastify" and click on the Screencastify extension > Click "Add to Chrome" to install the extension. After installation, open it in browser.
Step 2. Sign In or Create an Account.
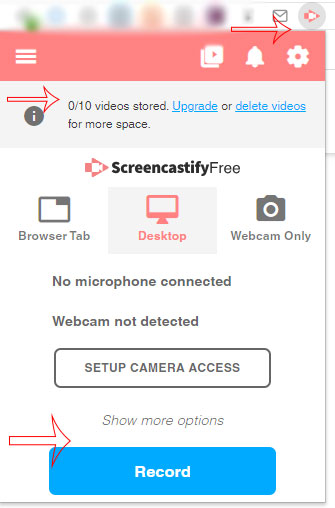
Step 3. Select Recording Options. Click the Screencastify icon in your browser toolbar. A menu will appear with various recording options:
- Tab: Record the current browser tab.
- Desktop: Record your entire screen.
- Cam: Record from your webcam.
- Audio: Record audio only.
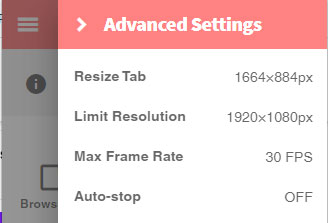
Step 4. Access screencastify settings by clicking on the gear icon. Adjust preferences such as video quality, microphone, and webcam settings based on your preferences.
Step 5. Initiate online recording using the browser extension. Choose the desired recording option (e.g., Tab, Desktop, Cam) to commence capturing streaming video, gameplay videos, business meeting, video calls, etc. A countdown may appear to prepare you for the recording.
Step 6. Conclude the screen video capturing process. Click the Screencastify icon in the toolbar and choose "Stop Recording" to bring the screencasting to an end.
Step 7. Save the recorded video locally or upload it to Google Drive (if your Google account is connected). Share the video with others by either sharing the link or downloading it.
6. ScreenPal
Formerly known as Screencast-O-Matic, ScreenPal is the new version of this free screen recorder software, available for Windows PC, as well as Mac, iOS, Android, Chromebook. It empowers you to capture any part of your Windows 10/11 screen (partial or full), record webcam, record screen and webcam and capture audio as many videos as you want, no experience needed.
Yet, its undesired sides also exist. The recording editing features (like trim, crop, merge), draw, annotation, and background removal features are only limited to its Pro version. You can't enable these functions unless you upgrade to its paid version.
- Multi-platform software, available for Windows 10/11 PC, Mac as well as iOS Android Chromebook.
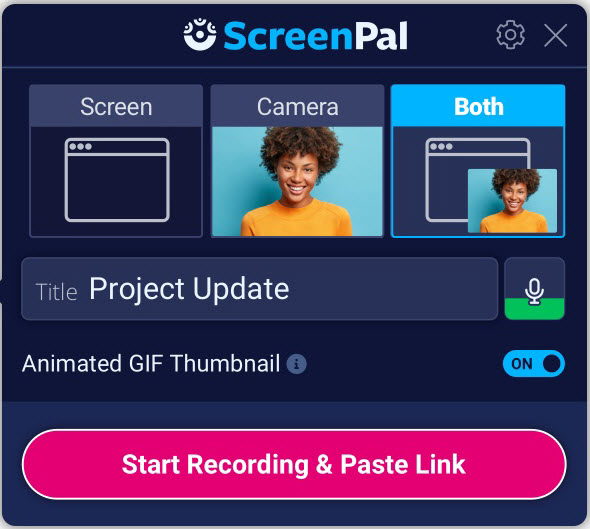
- 4 types of recording modes supported: record screen, record webcam, record both and record system/mic sound.
- Only paid version has editing features, draw, background removal function, etc.
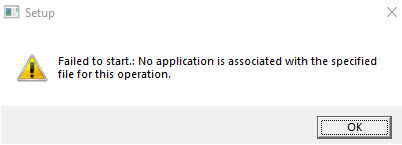
- The application setup would fail now and then.
How to Record Windows Laptop Screen using Screenpal?
Step 1. Open the screen recorder to capture your screen, webcam, or a combination of both. Select the specific area on your screen to record and decide whether to include audio narration.
Step 2. Enhance your recording using the built-in tools of the free screen recorder, which include features like highlighting, shapes, zoom, and more.
Step 3. Save the recording to your computer, securely upload it to your ad-free ScreenPal hosting account, or upload it to YouTube for convenient sharing of your screen recordings with others.
7. Loom
Loom is one of the most recognizable names in Chrome screen recorder extensions field, capable of letting you free record screen 4K video, capture webcam, record both or capture audio sound without watermark or time limit.
Loom enables you to swiftly record your screen and receive a shareable link instantly. It stands as the quickest and most straightforward method for screen capture, facilitating seamless communication with your team. Whether you're demonstrating a product, providing feedback, or expressing your thoughts, Loom simplifies the process, allowing you to stay connected through asynchronous video.
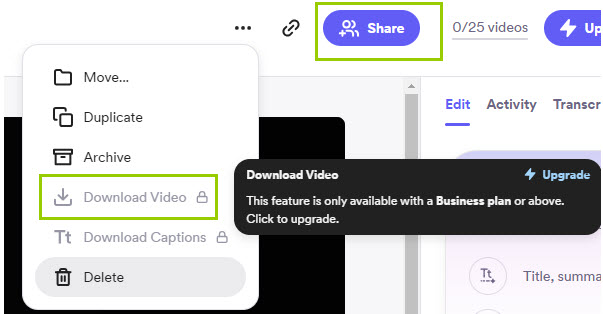
Meanwhile, it leaves much to be desired, too. It only allows you to free record screen on Windows 10/11 laptop with 25 videos and each one within 5 minutes. To capture more screen activities, you're required to upgrade to its paid version. That's how it keeps alive. If you're tight on budget, go back to try the 100% free screen capture software for PC above or read on the below options.
- Browser extension, convenient and lightweight.
- Record whatever activities on your screen, 4 recording modes supported.
- Recording video quantity is limited to 25 only in free version. And 5-minute length is the max for each recording.
How to Online Screen Record on Laptop using Recorder Extension?
Step 1. Download and install Loom to your Chrome browser extension (for instance). Afterwards, open it and log into it using your Google account, outlook mail, or workspace account.
Step 2. Enter your personal Loom account homepage and tap the "Record a video" button at the lower left corner of the interface.

Step 3. Select Recording mode: window, camera or audio. Here we choose window and you can decide the recording area, partially or full screen.
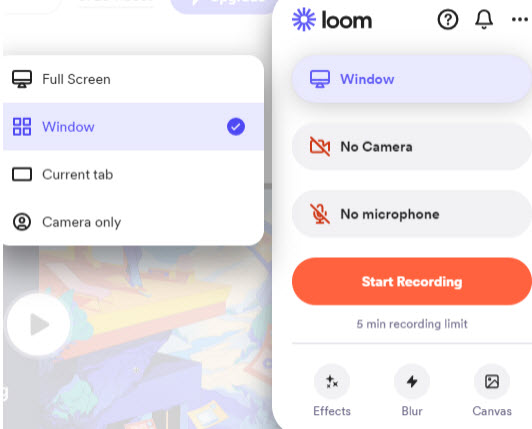
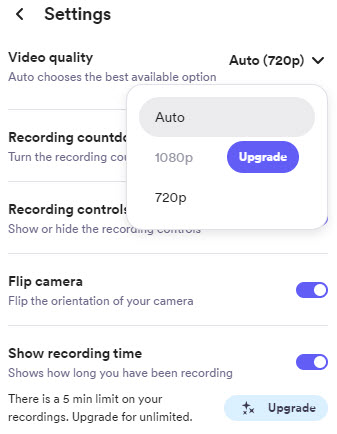
Optionally: there is a setting option to let your customize recording. As for free recording, the highest quality goes to 720p only. Glad to see that some effects and blur modes are available in free version.
Step 4. Hit Start Recording and select capturing a window, a webpage or a full screen. After selection, this Windows screen recorder extension will begin captuing everything on your screen.
Step 5. Click Ending Sharing and it will finish your recording task instantly.
Step 6. Click the Share button to share your recording instantly to your YouTube, Instagram, etc. platform. The download feature is unavailable unless you upgrade to its Pro version.
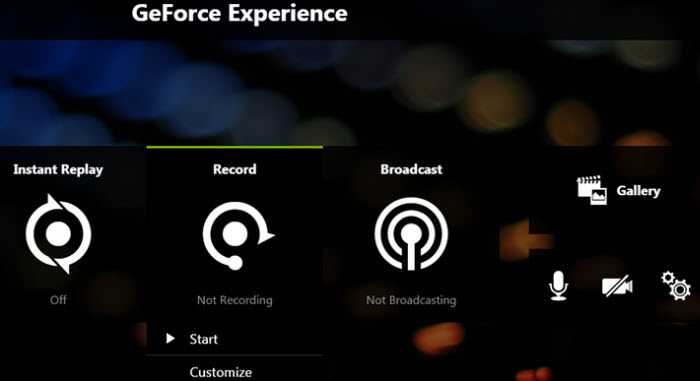
8. Nvidia Shadowplay
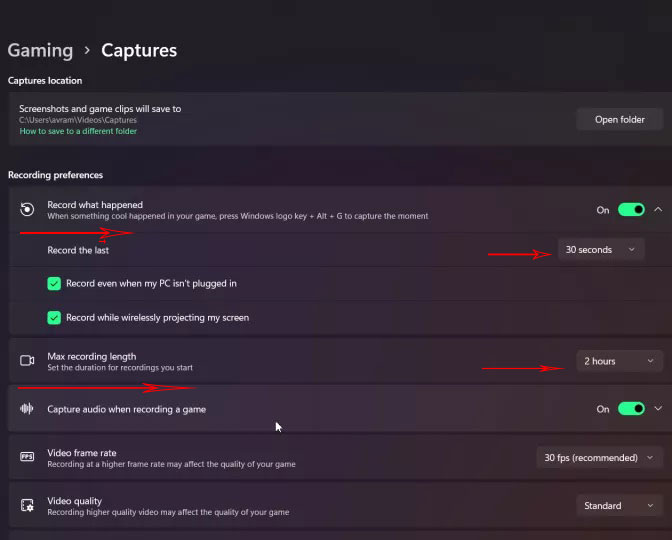
If you have a Nvidia GPU, you can download GeForce Experience for free to record gameplay video on Windows 10/11 PC at 4K 60 with customizable bitrate. And GeForce Experience contains a screen video recording feature called Nvidia Shadowplay, which can record gameplay video well even on demanding games and won't effect performance as much. The app has other features like screen record the last 30 seconds and game optimization.
Thus, gameplay enthusiasts can share all their best gaming moments and experience with friends of the same spirit in the gaming community. Delve into the user guide to use Nvidia GeForce Experience to capture gameplay video on PC Windows 10/11 if you wanna capture gameplay walkthrough video on PC.
- Well-designed screen recording feature for Nvidia GeForce series GPU graphics card, needless to install anything else.
- Capture gameplay video at 4K 60FPS no time limit/watermark, low demanding on your hardware configurations.
- Screen record the last 30 seconds.
- Unaccessible to other brands of GPU cards like Intel or AMD.
- No draw, Chroma key features, nor video editing functions.
How to screen record gameplay video on laptop Windows PC using Nvidia Shadowplay?
Before you proceed, make sure you have a Windows PC laptop with an Nvidia GeForce GTX 750 or higher GPU graphics card. Meanwhile, you have GeForce Experience installed on PC. If so, continue your recording:
Step 1. Open up the Nvidia GeForce Experience app via the Start Menu or by clicking Alt+Z. Then, the recording feature Nvidia Shadowplay can be accessible.
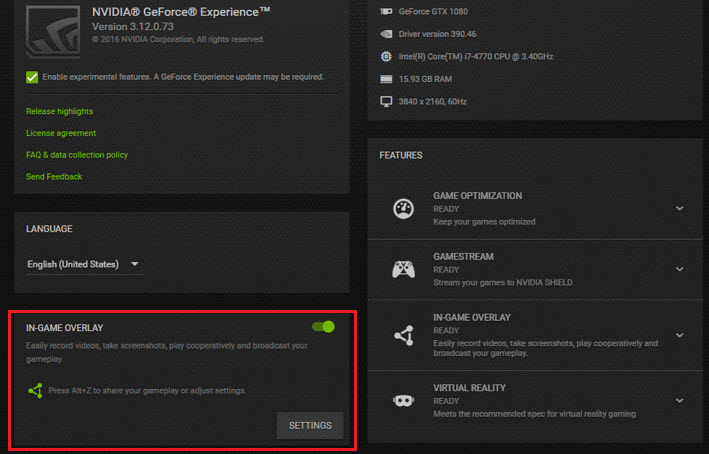
Step 2. Click on the Settings cog within Nvidia GeForce Experience at the upper right corner of the interface.
Step 3. Activate the In-Game Overlay toggle to ensure that you can view the menu while gaming. This facilitates easier initiation or cessation of the recording process.
Step 4. Choose the video game you want to play and start it up. Press the Alt and Z keys simultaneously on your keyboard to open the Nvidia GeForce overlay.
Step 5. When you're prepared to commence screen game recording, tap the Record button in the menu or use the shortcut Alt+9. Alternatively, you can enable Instant Replay, which will automatically capture all gameplay in the background.
9. OBS Studio
OBS Studio is always the top pick in many top screen recording software list reviews. Why we put it at the 9th place here? Not because its features, but its complication in user customization side.
There is no denying that OBS Studio is a strong performer in recording a full screen on Windows 10/11, recording webcam or both and capturing audio without time limit. And it provides you with a large dozens of advanced customization features like a collection of scenes, add text overlay to recording, set up transitions between scenes, control audio mixer, adjust recording settings, etc. But it would have a steeper learning curve for beginners compared to simpler screen recording tools. That's not much friendly to some users, especially newbies.
Consequently, for most users, if you just simply record screen activies on PC without high demands, you don't have to try this high-level Windows screen capture software. In case you do need its customization, work in tandem with OBS Studio.
- Free open source, available for Windows PC, macOS and Linux.
- Offer a high degree of customization settings.
- The software supports plugins and extensions, expanding its functionality.
- Not very user-friendly for beginners.
- Lacks some video-editing functionalities.
How to Screen Capture Gameplay on Windows 11/10 with OBS Studio
Step 1. Download and install OBS Studio from its official website.
Step 2. Open OBS Studio and set up a new "Scene" and "Source" for your gameplay recording in Windows 10/11.
Step 3. Configure recording settings like resolution, frame rate, and output format in the "Settings" menu.
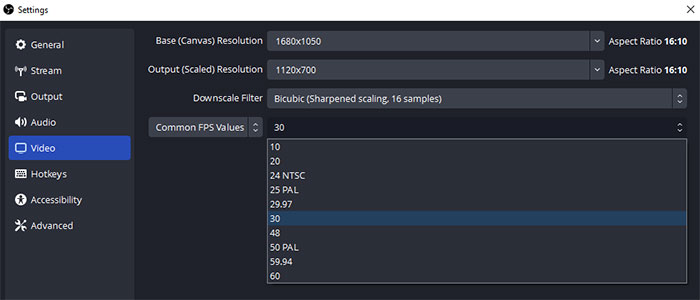
Note: there are an expansive selection of settings in OBS. Just pay attention to Settings > Output > Recording. Here you can specify the video encoder to use, the recording format, and recording quality. By default, OBS enabled hardware encoding, but that setting can get a little finicky. For the most reliable results, you're advised to select one of the software (x264) options instead.
Step 4. Start recording gameplay walkthrough video or capturing streaming live video by clicking the "Start Recording" button in the main OBS window.
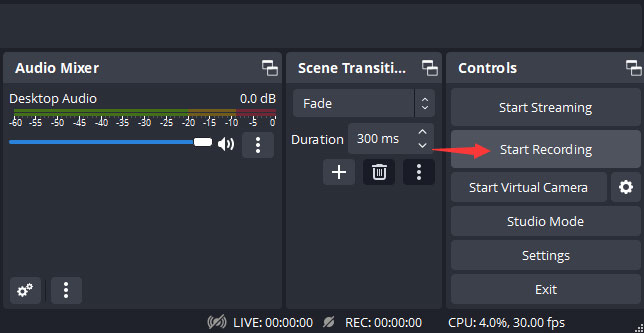
Step 5. Stop recording by clicking the "Stop Recording" button. Afterwards, go to the storage folder to check your recorded gameplay video on PC.
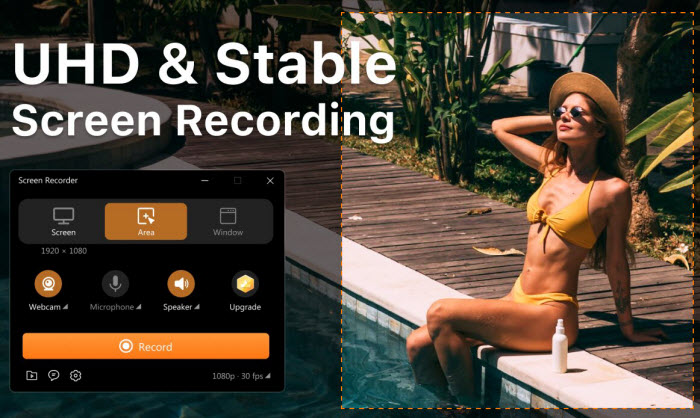
10. Screen Recorder for Windows 11
Go to Microsoft app store, search and download this Windows 11 screen recorder application. This screen recorder for Windows 11 has achieved a high acclaim thanks to its solid features in recording Windows 11 full screen, part screen, window, webcam, picture-in-picture video and audio sound. It also allows you to adjust your recording resolution and frame rates based on your recording activities.
Whether you're a content creator, a business professional, an educator or just need to record something for personal use, this Windows 11 screen recorder has everything you need. Certainly, there are limitations in its free version. You're asked to upgrade to its Pro version (subscription plan or lifetime plan) if you want unlimited recording duration, no watermark, and higher recording resolution/frame rates.
- Free record Windows 11 full screen, a specific area, webcam or both with audio.
- Selectable Frame Rates and resolution.
- Customizable shortcut keys.
- Limited recording duration in free version, only record for under a minute.
- Watermark in free version.
- Unable to record 1080p video or 4K 2160p video in free version.
How to screen capture video with sound on Windows 11?
Step 1. Download and install Screen Recorder for Windows 11.
Step 2. Launch it > tap Record > select screen recording size: screen, window or area. If you need capturing audio, check your audio settings to adjust volume, internal/external audio device, and audio mixer.
Step 3. Configure recording settings like resolution, frame rate, and output format in the "Settings" menu.
Step 4. Tap the Record button to begin recording your Windows 11 screen with audio. Hit the Stop button to end recording. The resulting file will be auto saved to your selected folder. Open and preview it. If you need to remove watermark or capture a video longer than 1 minute, upgrade to its paid version first.
As we conclude this immersive guide to screen recording on Windows, you now possess the tools to transform your digital interactions into captivating experiences. Whether you're a professional aiming to make an impact, a gamer leaving a lasting impression, or a helpful soul providing guidance, the ability to record your screen empowers you to share your story in a dynamic and engaging way.
So, go ahead, unleash your creativity, streamline your communication, and make every digital moment count. As your screen becomes a canvas, and your recordings a masterpiece, embrace the boundless possibilities that await. Happy recording!


