


How to Record Screen and Webcam at the Same Time with Audio
 Mike Rule
Updated on
Nowadays, the demand for creating engaging and dynamic content has never been higher. Whether you're a content creator, educator, or business professional, the ability to seamlessly capture both your screen and webcam simultaneously has become an invaluable tool.
From producing tutorial videos and online courses to conducting virtual presentations and remote collaborations, the fusion of screen and webcam recording opens up a myriad of possibilities for enhancing communication and content creation. Discover how this innovative approach can elevate your digital presence and effectively convey your message across various domains. This article will walk you through the detailed guides on recording screen and webcam concurrently, showing your screen and face at the same time with voice attached.
Top Free Ways to Record Picture-in-Picture Video with Sound
1. Winxvideo AI
Winxvideo AI is one tool that would make you go gaga over it when it comes to record screen and face at the same time with system/microphone sound. It enables you to record screen and webcam simultaneously at high quality, from 720p to 1080p, 4K 2160p. Meanwhile, you can use its Draw feature to draw while screen recording and apply its Chroma key feature to remove background from webcam.
Its attractiveness never stops here. It also lets you free record a full screen, a specific screen area, capture webcam, record system or microphone sound. More features like recording file compression, conversion, parameter adjustment, AI video enhancer, etc. are also worth a try.
 Free Download
 Free Download
Winxvideo AI is for PC, while Macxvideo AI (from our MacXDVD brand) is for macOS.
How to record screen and camera at the same time on Windows 10 using Winxvideo AI?
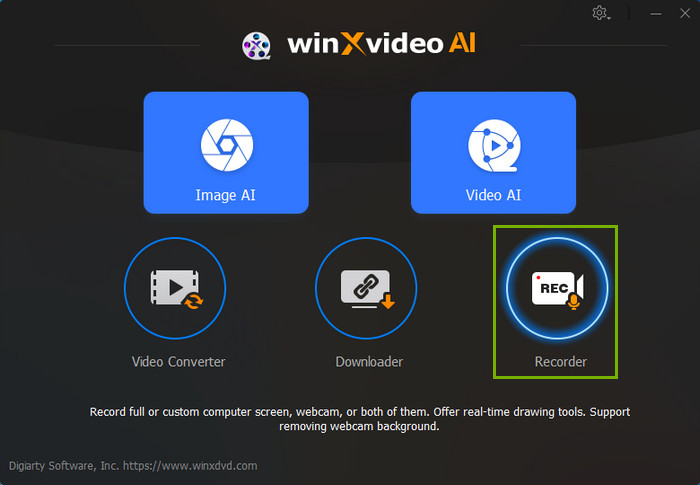
Step 1. Launch Winxvideo AI after installation and select Recorder on the main interface.
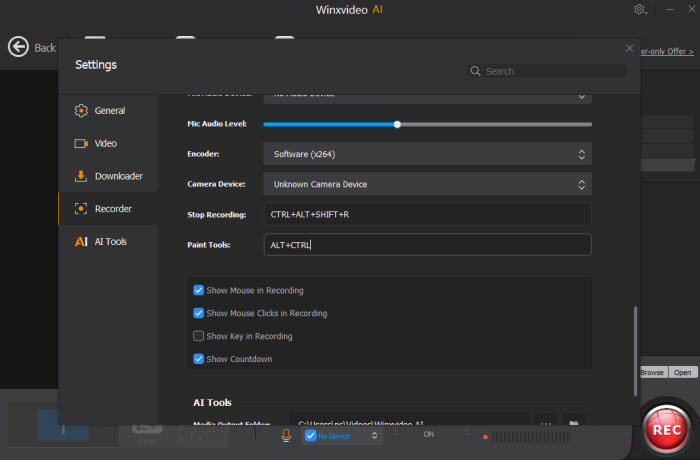
Note: tap the Setting icon on the top right corner of the UI and choose Recorder to adjust settings if needed. You're allowed to change recording quality, format, audio level/device, and know the shortcut for drawing (Ctrl+Alt).
Step 2. Select "Screen & Webcam" recording mode on the top. Certainly, you need to make sure you have an internal webcam recorder on your PC or external webcam recorder device.
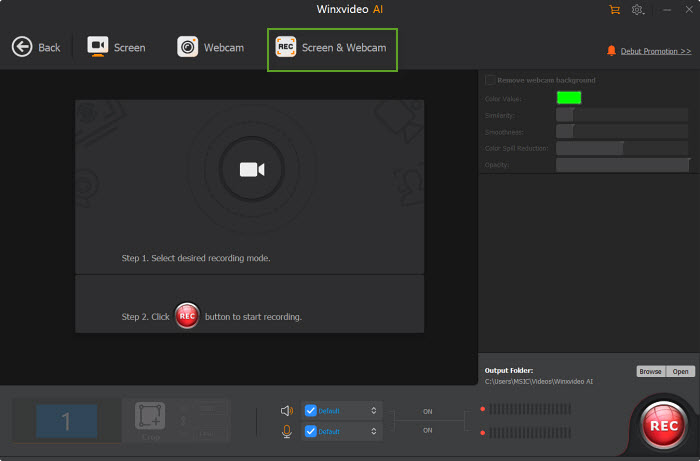
Step 3. Choose to record the entire screen or part of the screen at the lower-left corner.
Step 4. Enable audio device(s).
Step 5. Click on the REC button to start recording gameplay walkthrough video with real person explanation, product demo video, etc. When everything is OK, click on the Stop button to end.
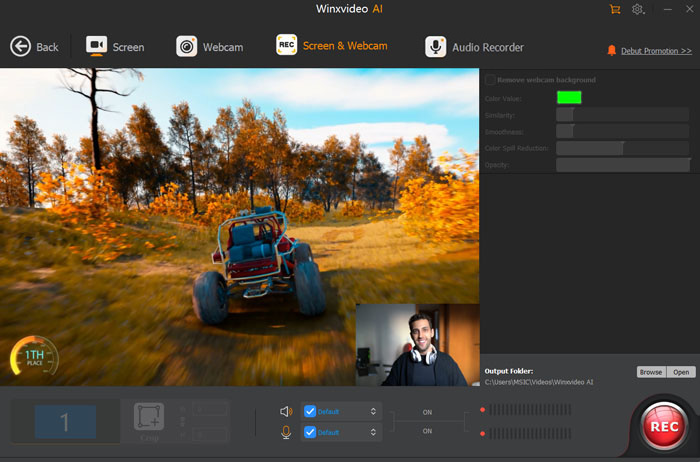
Note: manually tick the option "Remove webcam background" to turn background into virtual background to protect your privacy if your webcam background is green.

2. Camtasia
Camtasia is a comprehensive screen recording and video editing software, designed for both beginners and professionals to screen record with webcam and audio capture in high quality up to 4K resolution.
This top cam screen recorder also works as a video editing tool, including trim, draw while recording, add effects, animations and transitions. After screen and facecam recording, its sharing options are here for you to easily and quickly share your recording files to YouTube, Vimeo, and other platforms if needed. Give it a whirl if you need its screen & webcam recording, as well as editing and sharing features.
How to record your screen and show your face on computer using Camtasia?
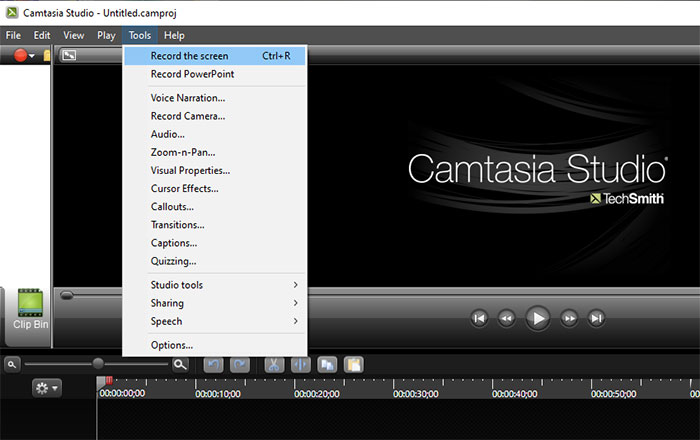
Step 1. download and install Camtasia from the official TechSmith website. Launch Camtasia on your computer then.
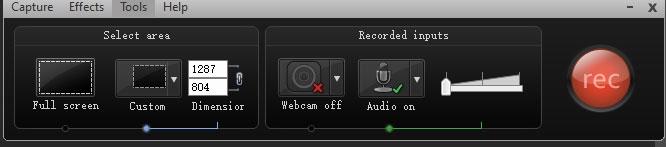
Step 2. Click on the "New Project" button to start a new project. In the toolbar, click on the "Record" button to open the recording options. Choose the area of your screen you want to record by selecting the appropriate option under "Region." Enable the "Record Camera" option to include your webcam in the recording.
Step 3. Adjust Webcam Settings. Click on the "Webcam" button to configure webcam settings. Choose your webcam from the list. Adjust the webcam position and size on the screen using the on-screen controls.
Step 4. Click the red "Record" button to start recording. Perform the actions on your screen while the webcam captures your face simultaneously.
Step 5. After you've finished recording, click the "Stop" button in the recording toolbar. Camtasia will automatically import the recording into your project. You can preview your recording file before exporting or sharing.
Optionally, you can take advantage of its editing features to cut, trim your recording or add special effects to polish your recording. Once you're satisfied with your edits, click on the "Share" button to export your video in the desired format.
3. Awesome Screenshot & Recorder
If the screen recorder with facecam program is not what you want, you can take screen recorder browser extension into consideration. Awesome Screenshot & Recorder appeals to those who need an all-in-one screen recorder with facecam and audio. It can help you free record the screen with facecam and audio, capture screenshots from scrolling webpages, edit recording files online, and share them instantly with links.
On top of picture-in-picture video recording, other recording modes like record screen, record webcam, capture audio are also included, with highest quality support up to 4K 2160p. Google Chrome, Mozilla Firefox, Microsoft Edge, and Safari, any of them is installed on your Windows 10/11 or Mac iOS Android, and you can now online record screen and your face at the same time now!
How to online free record screen and face at the same time using browser extension?
Step 1. Download and Install this free screen recording software to your browser. Sign in or create a new account.
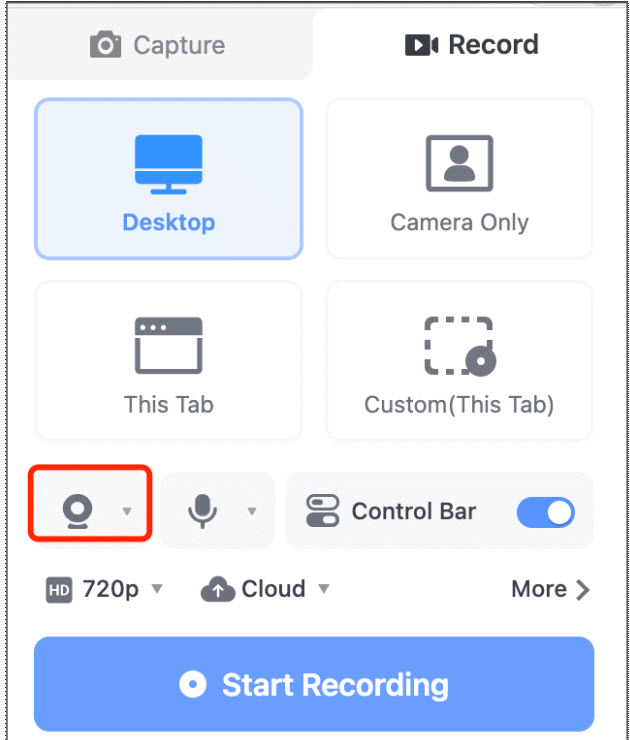
Step 2. Open Awesome Screenshot & Recorder in your web browser. Choose "Record" and pick from options like "Desktop," "This Tab," or "Custom (This Tab)" based on your requirements. For illustration purposes, let's consider "Desktop."
Activate the camera by clicking on the Camera icon, leading to a preview window displaying your face. If everything looks good, proceed by clicking the "Start Recording" button.
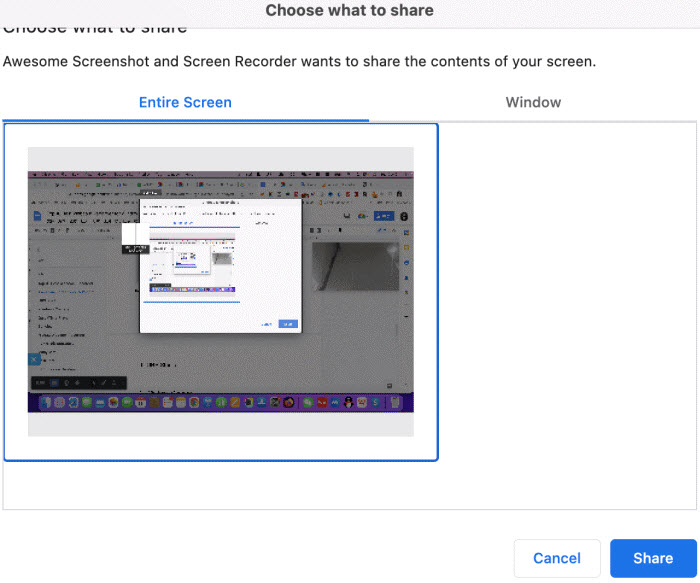
Step 3. Opt for either "Entire Screen" or a specific "Window," then select the screen preview you want to capture. Afterward, click on "Share" once you've made your choice.
Step 4. Click the Awesome Screenshot & Recorder icon, then click the "Stop" button to end recording. You can go to "My Items" to find your resulting recording file on the cloud. Preview and even generate a sharable URL link for later SNS sharing.
4. OBS Studio
The ranking place doesn't 100% mean the significance of OBS Studio. Objectively speaking, OBS Studio is a second-to-none screen recorder with webcam in this field. It not only provides you with several types of recording modes, like screen record, selected area recording, webcam recording, but also lets you record screen and add a webcam overlay. Thus, you can record gameplay video with your face showing up, record product demonstration video with your face to increase engagement, or create learning video with your face to make your educational video more absorbing.
Additionally, this screen recorder software comes loaded with more advanced customization setting, like parameter adjustment, video editing, etc. Yet, it comes at the price of complexity. Thus, it would be a little tricky for the beginners. OBS is better for advanced users to capture screen and webcam with sound.
How to record screen and add a webcam overlay using OBS Studio?
Step 1. Download and install OBS Studio on your Windows 10 or Windows 11. Launch it after then.
Step 2. In the main window, you'll see a "Scenes" box. Right-click in this box and select "Add." Inside the scene, you'll see a "Sources" box. Right-click in this box and select "Add." Choose "Display Capture" to capture your screen. Follow the instructions to select the specific display you want to record.
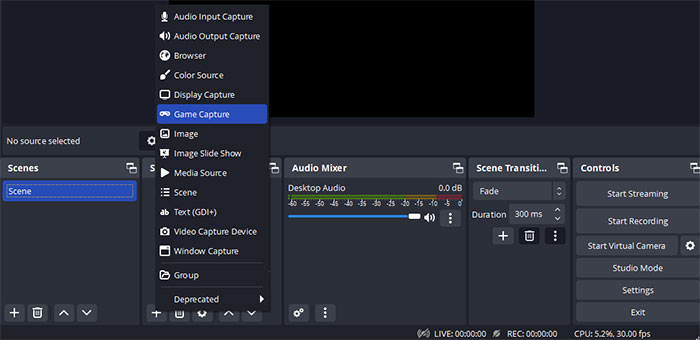
Step 3. Add Webcam Source. Right-click in the "Sources" box again and select "Add." Choose "Video Capture Device" to add your webcam. Select your webcam from the list and click "OK."
Step 4. In the main window, you can click and drag to rearrange or resize the sources to your preference.
Optionally, adjust settings if needed. Click on the "Settings" button in the bottom-right corner. In the settings menu, go to the "Output" tab and configure your recording settings, such as the file format and quality. Go to the "Video" tab to set the base (canvas) resolution and output (scaled) resolution.
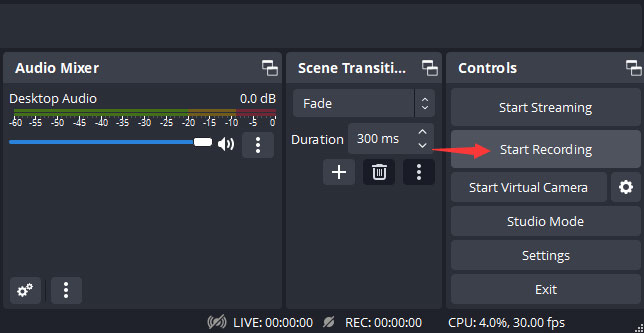
Step 5. Click the "Start Recording" button in the bottom-right corner to begin capturing your screen and webcam feed. When you're done, click the "Stop Recording" button. Your recording file will be auto saved into the destination folder you choose before.
5. AZ Screen Recorder
To directly capture screen and your face with audio on Android device, AZ Screen Recorder is your best mate, allowing you to capture your Android device's screen and add a webcam overlay, record audio, and add annotations. It's often used for creating tutorial videos, gameplay recordings, and live streaming recording on Android devices.
However, it's worth noting that AZ Screen Recorder doesn't have a dedicated version for Windows PCs. Besides, some users pointed out that they need a Pro feature where they can switch from live screen recording to my main camera without interruptions. Another pro feature where the user can somehow drag a window to mark a specific area they want to record without notification.
How to record screen and webcam at the same time on Android?
Step 1. Install AZ Screen Recorder on your Android phone or tablet. Launch it then.
Step 2. Swipe down from the top of your screen to access the notification shade. Find the AZ Screen Recorder notification and tap on it to open the recording settings.
Step 3. In the AZ Screen Recorder settings, look for an option named "Facecam" or "Webcam." Enable the Facecam option to include your front-facing camera in the recording.
Set the video resolution, orientation, and other recording settings according to your preferences.
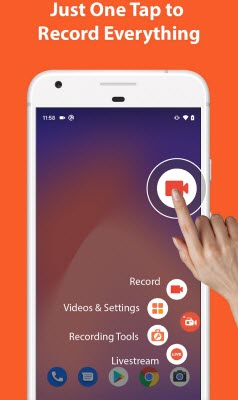
Step 4. Return to the AZ Screen Recorder app. Tap the red "Record" button to start recording your screen and webcam simultaneously. Once recording begins, perform the actions on your Android screen that you want to capture.
Step 5. When you're done, pull down the notification shade and tap the AZ Screen Recorder notification. Tap the "Stop" or "Pause" button to end the recording.
If desired, you can use the built-in editing tools within AZ Screen Recorder to trim or edit your recording. Share the recorded video through various platforms or save it to your device.
In conclusion, the fusion of screen and webcam recording not only streamlines the content creation process but also revolutionizes the way we connect and communicate in the digital landscape. As we navigate an increasingly virtual world, the ability to capture both screen activities and personal expressions simultaneously proves to be a powerful asset. Whether you're striving to deliver impactful presentations, create engaging tutorials, or foster collaborative environments, the harmonious integration of screen and webcam recording stands as a testament to the evolving nature of technology.
Embrace this transformative capability, and let it empower you to engage, educate, and captivate your audience in ways that were once unimaginable. The future of dynamic content creation lies at the intersection of your screen and webcam – a convergence that opens doors to innovation and compelling storytelling.


