


How to Record Gameplay Video for YouTube on PC Windows 10
 Mike Rule
Updated on
In the ever-evolving world of gaming, where virtual realms come alive and epic adventures await, there's no better way to capture the essence of a gaming experience than through gameplay videos. Whether you're a dedicated gamer seeking inspiration, a curious onlooker eager to delve into this mesmerizing universe, or simply a fan of spectacular moments, our latest article is bound to ignite your passion for gaming.
How to easily record gameplay video for YouTube sharing with kindred spirits? Follow our article to screen capture gameplay walkthrough videos in top simple ways and to embark on your own gaming odyssey.
Hot search: How to record Black Myth: Wukong Gameplay >>
Top Free Ways to Screen Record Gameplay Video for YouTube on Windows 10/11
1. NVIDIA ShadowPlay
NVIDIA ShadowPlay (aka. NVIDIA GeForce Experience) is a game recording and streaming solution specifically designed for users with NVIDIA graphics cards to capture their gameplay, take screenshots, and even stream their gaming sessions with minimal impact on system performance, thanks to its efficient use of the NVIDIA GPU's hardware encoder. You can record gameplay without significant frame rate drops, making it a popular choice for gamers.
ShadowPlay offers several features, including "Instant Replay," "Record," and "Broadcast" modes. "Instant Replay" allows you to continuously clip your gameplay in the background and save the last few minutes when you hit a hotkey. "Record" mode lets you manually start and stop recordings, and you can customize settings like resolution, frame rate, and bit rate. And "Broadcast" mode allows for easy live streaming to platforms like Twitch or YouTube. In a nutshell, if you're running on a NVIDIA powered Windows 10/11 PC, you can directly use its built-in ShadowPlay to capture gameplay video and then live streaming to YouTube without any 3rd party game recorder needed. Simple, convenient and totally Free!
Also see: How to screen record on Switch
How to Screen Record Gameplay Walkthrough Video for YouTube with NVIDIA ShadowPlay
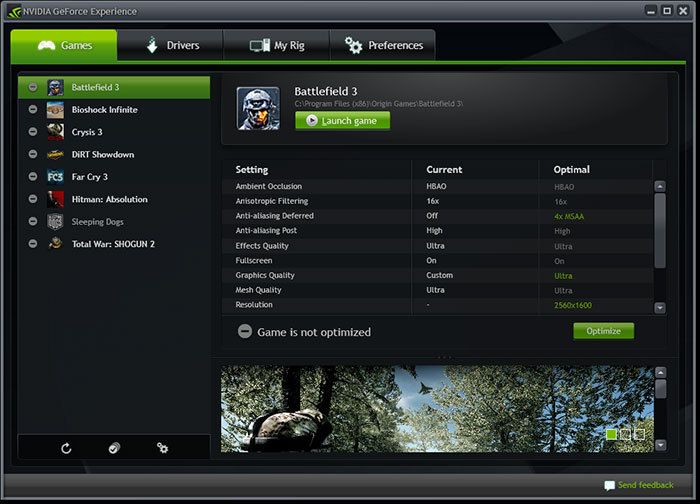
Step 1. Free download and Install GeForce Experience from the NVIDIA website (if you haven't installed it yet). Launch GeForce Experience then.
Step 2. Log In or create an account: You may be required to log in with your NVIDIA account or create one if you don't have one already.
Step 3. Enable In-Game overlay. To use the recording features, you need to enable the in-game overlay. Click on the settings (gear) icon at the upper right corner of the GeForce Experience window. Under the "General" tab, make sure "In-Game Overlay" is turned on.
Step 4. Adjust recording settings if needed. Click on the settings (gear) icon again > choose the "Privacy Control" tab.
Here, you can configure a wide selection of settings related to recording, including the save location, video quality, and microphone settings. Adjust these settings according to your preferences.
Step 5. Start recording gameplay walkthrough video on Windows 10/11.
Open the game you want to record. While in-game, press the default key combination to open the GeForce Experience overlay. By default, this is usually Alt + Z. In the overlay, click on the "Record" button to start recording your gameplay. You can also use Alt + F9 as the default hotkey to start and stop recording. After gameplay video capture, you can play it to check its quality and then upload to YouTube for sharing with your kindred spirits.
2. AMD ReLive
Similar to NVIDIA, AMD also created its own free game recording service for its users called AMD ReLive. If your Windows PC comes loaded with AMD Radeon graphics card, you can resort to AMD ReLive to record screen gameplay video on Windows 10/11 PC with a minimal impact on system performance, identically due to the hardware encoder on AMD GPUs.
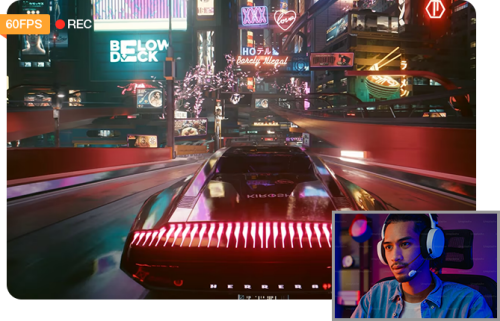
It offers similar features to NVIDIA ShadowPlay, including gameplay recording, live streaming, and screenshot capture. ReLive also allows you to record and stream in high-quality formats with customizable settings. Meanwhile, it overshadows NVIDIA GeForce Experience with its "Custom Overlay" feature, which enables you to add custom graphics or webcam overlays to your gameplay recording files. That's to say, you can record gameplay video with your face at the same via this picture-in-picture mode.
How to Record Gameplay with AMD ReLive on PC Windows 10/11
Step 1. Check system requirements. Ensure that you have an AMD Radeon graphics card that supports AMD ReLive. Most modern AMD GPUs should support it, but it's a good idea to check the official AMD website for specific requirements.
Step 2. Update AMD drivers. Make sure you have the latest AMD graphics drivers installed on your computer. You can download and install the latest drivers from the AMD website.
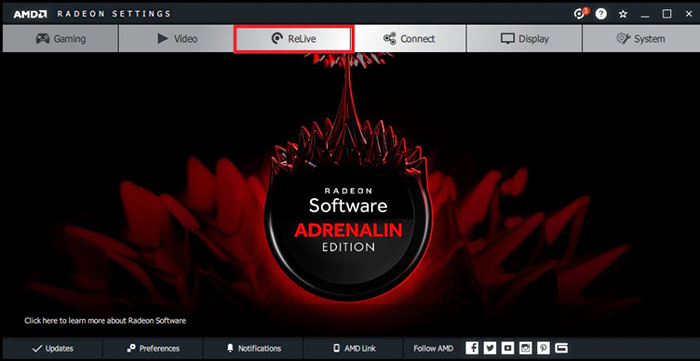
Step 3. Enable AMD ReLive. Right-click on your desktop and select "AMD Radeon Software" to open the AMD Radeon Software application. Afterwards, click on the "Settings" icon (represented by a gear wheel) in the bottom right corner.
Step 4. Configure AMD ReLive settings before recording.
Head to the "General" tab under the Settings menu > toggle the ReLive switch to turn it on > set hotkeys for starting and stopping recording, taking screenshots, and saving replays.
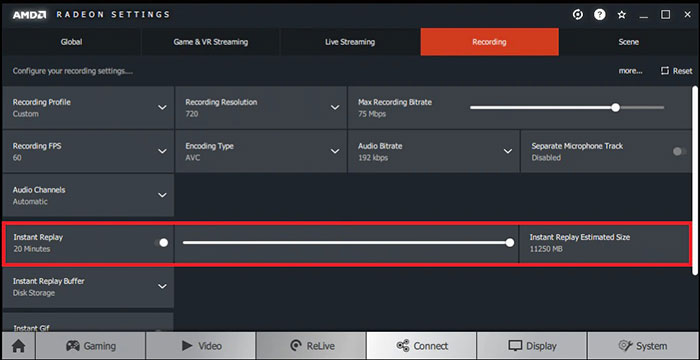
Moreover, choose whether you want the ReLive toolbar to be displayed during gameplay. Then adjust video quality settings, including resolution, frame rate, and bitrate if you want to record gameplay video at 1080p 60FPS or even 4K 2160p at 60FPS or 120FPS.
Step 5. Start gameplay recording. Launch the game you want to record. While in the game, use the hotkey you configured earlier (default is Ctrl + Shift + R) to start recording. Play the game as usual, and ReLive will capture everything on-screen.
Step 6. To stop recording, use the hotkey you configured earlier (default is Ctrl + Shift + R again). Your recorded gameplay will be saved to the location you specified earlier.
After recording is finished, you can access your recorded gameplay from the folder you specified in the settings. By default, it's in the "Videos" folder. You can use video editing software to trim or edit your recordings as needed.
3. Winxvideo AI
Beyond the above mentioned gameplay video recorders from GPU brands, there are professional gameplay video recording software worth a mention here. Winxvideo AI is one of the top screen gameplay recorders, helping you free capture gameplay walkthrough videos with audio narration, create gameplay video with your face via picture-in-picture mode and even trim your gameplay video to get your desired length.
It lets you record gameplay video at 1080p/4K resolution 30/60FPS, as well as record business presentations, educational tutorials, Skype video calls, meetings & webinars, etc. and export recording files as MP4, MKV, MOV, FLV, TS, etc. format. If you don't want to show your room or personal stuff while recording yourself, take advantage of its Chroma key to remove background from recording at 1 click.
 Free Download
 Free Download
Winxvideo AI is for PC, while Macxvideo AI (from our MacXDVD brand) is for macOS.
How to Screen Record Gameplay Video for YouTube on Windows 10/11 using Winxvideo AI?
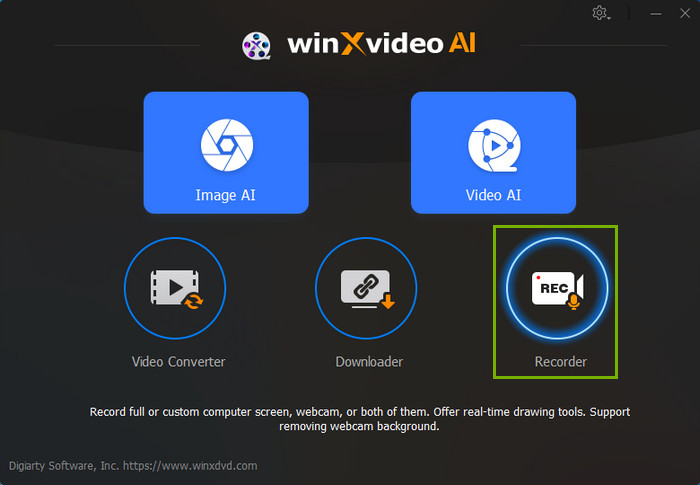
Step 1. Fire up Winxvideo AI after installation and select Recorder on the main interface.
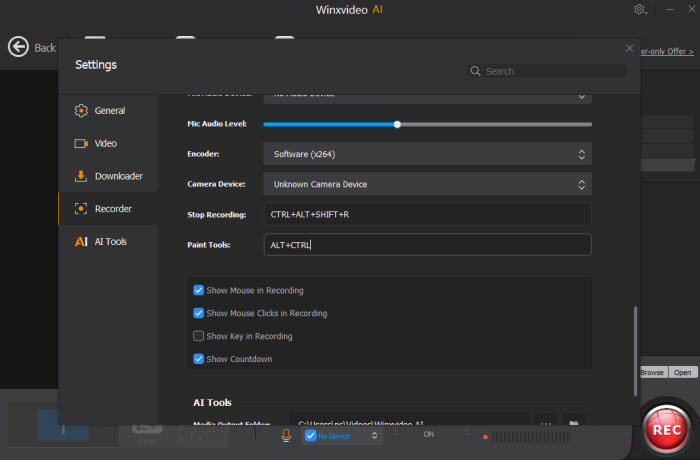
Note: tap the Setting icon on the top right corner of the UI and choose Recorder to adjust settings if needed. You're allowed to change recording quality, format, audio level/device, and know the shortcut for drawing (Ctrl+Alt+Shift+T).
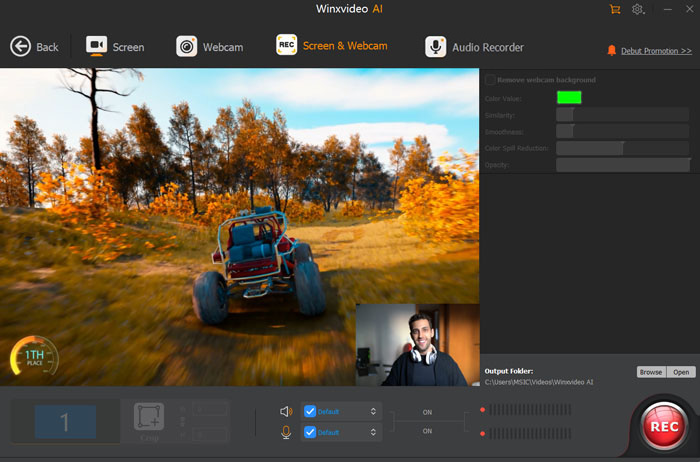
Step 2. Select a recording mode on the top. Generally, the first option "Screen" is what you need. If you want to record gameplay video with facecam at the same time, choose "Screen & Webcam" please.
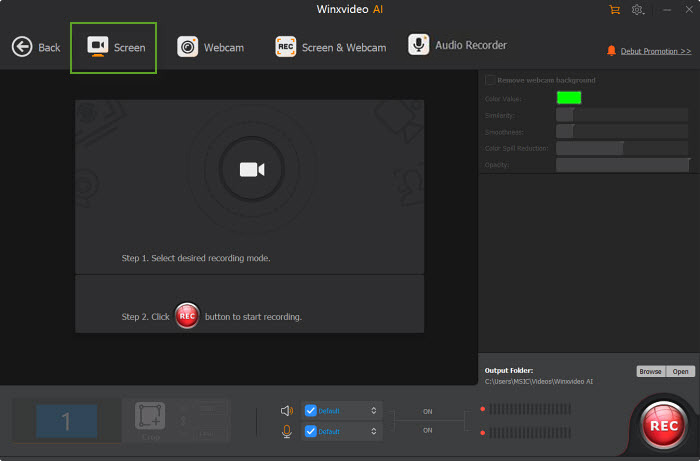
Step 3. Choose to record the entire screen or part of the screen at the lower-left corner.
Step 4. Enable audio device(s).
Step 5. Click on the REC button to start screen gameplay walkthrough recording. When everything is OK, click on the Stop button to end.
4. Fraps
Fraps, which stands for "Frames Per Second," is a classic and lightweight screen capture and benchmarking tool. Its primary focus is on displaying the frame rate of games, making it a popular choice for gamers interested in monitoring their game's performance. Meanwhile, Fraps can also capture screenshots and record gameplay in video formats. Recording audio from the microphone and system sound simultaneously is another nice touch.
Certainly, different from the NVIDIA GeForce Experience and AMD ReLive, this free gameplay video recorder pales in performance. Fraps can't guarantee you a minimal impact on system performance while screen recording gameplay. It may significantly affect your game's performance, depending on your PC's hardware capabilities and the settings you choose. Furthermore, the omission of video editing features makes it sit on the 4th place here.
How to Use Fraps to Free Screen Record Gameplay Video on PC?
Step 1. Go to the Fraps website (https://www.fraps.com/) and download the latest version of Fraps. Run this top free gameplay video recording software on your computer after installation.
Step 2. Configure Fraps Settings. In the Fraps interface, click on the "Movies" tab to access the video recording settings > tap Recording Settings. In the "Movies" tab, you'll find various recording settings:

- Video Capture Hotkey: Set a key that will start and stop your video recordings while you're in-game.
- Video Capture Settings: Choose the desired settings for your video recording, including the destination folder, video capture hotkey, and video capture settings such as frame rate and quality.
- Sound Capture Settings: Select your audio recording preferences, including the sound source (usually "Stereo Mix" or your microphone) and the recording format (usually "PCM").
Step 3. Set Your Game's Resolution. Ensure that the game's resolution matches the resolution you set in Fraps before you go. This will help prevent issues with recording.
Step 4. Commence gameplay walkthrough screen recording. Launch the game you want to record. While in-game, press the hotkey you configured earlier to start recording. By default, it's usually the "F9" key. Fraps will display an FPS counter in the corner of your screen to indicate that recording is active.
Step 5. When you're finished recording your gameplay, press the same hotkey again (e.g., "F9") to stop the recording. Fraps produces relatively large video files, especially if you choose high-quality settings. Make sure you have enough storage space on your computer to accommodate these files.
Finally, the recorded video will be saved to the destination folder you specified earlier in the Fraps settings. After recording, you can eventually upload and share your gameplay video to YouTube, Twitch, or other social media.
5. XSplit
XSplit is a versatile screen recording software with various capture methods, including screen capture, game capture, and window capture. Game vloggers prefer using this free gameplay recorder to record gameplay videos with audio narration up to 4K 2160p high quality.
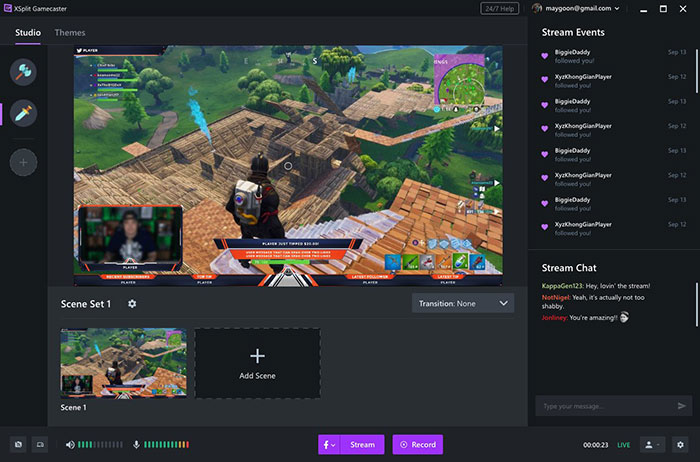
Additionally, XSplit does support recording gameplay and a facecam (webcam) simultaneously. XSplit Gamecaster and XSplit Broadcaster, both versions of XSplit, offer features that allow you to add a webcam overlay to your gameplay recordings or streams. Thus, you can offer your audience or fans with a more engaging gameplay walkthrough video with your personal narration.
Be noted that XSplit offers a free version with limited features and watermarked recordings. More advanced features are available as long as you choose paid subscriptions.
How to Capture Gameplay and Webcam for YouTube with XSplit?
Step 1. Install and Set Up XSplit. Download and install XSplit Gamecaster or XSplit Broadcaster, depending on your needs and preferences.
Launch XSplit and configure your settings, including your recording preferences and webcam settings.
Step 2. Add a Webcam Source. In XSplit, there should be an option to add sources to your scene. Look for a "Webcam" or "Camera" source.
Add your webcam as a source and position it on your screen where you want it to appear in the recording or stream.
Step 3. Configure Webcam Settings. You can adjust the size, position, and opacity of your webcam overlay. You can also configure additional settings like chroma key (green screen) if you want to remove the background behind your facecam.
Step 4. Start Gameplay video Recording. Launch the game you want to record. In XSplit, use the recording controls or hotkeys to start recording both your gameplay and the webcam feed.
Step 5. Stop and Save the Recording. When you're finished recording, use the appropriate controls or hotkeys to stop the recording. XSplit will save the recorded video with both the gameplay and the facecam overlay to your chosen directory.
In conclusion, recording gameplay videos on your PC is a fantastic way to capture and share your gaming experiences with others. Whether you're a streamer, content creator, or simply want to relive your epic gaming moments, the afore-mentioned top gameplay video recorders can address almost all your needs.
NVIDIA ShadowPlay and AMD ReLive are optimized for users with NVIDIA and AMD graphics cards, respectively. Winxvideo AI and XSplit are the best for those who want to record gameplay and webcam in 1080p/4K at the same time. Certainly, Winxvideo AI is also the primary option if you need further editing (trim, crop, merge, split, speed up…) after gameplay recording. Fraps is a lightweight and classic choice that primarily focuses on displaying frame rates but also allows you to record gameplay and take screenshots.
Each has its own pros and cons. When choosing the right recording software, consider your PC's specifications, desired recording quality, and additional features such as webcam integration, Chroma key and live streaming capabilities. With the right gameplay screen recorder and settings, you can capture and share your gaming adventures to YouTube at your desired visual effects. Happy recording!


