


How to Change OBS Recording Format from MKV to MP4?
OBS Studio is well-crafted to help you live stream contents and record videos in high quality. The default recording format is MKV. For some users who want to import the OBS recording file into other video editor software for further editing, MP4 is usually the better format, with better compatibility and suitable file size to balance compute intensity.
That's why they are prone to change OBS recording format from MKV to MP4 and make OBS record video in MP4 at the very beginning. If you just happen to have this demand, follow the below guide to change OBS Studio settings and let OBS record video in MP4, not MKV. Check now:
A Super Easy Way to Convert/Remux OBS MKV Recording to MP4
Winxvideo AI - A superb video to MP4 converter that allows users to convert OBS MKV recording to MP4, as well as any formats and devices. It's preset with 420+ profiles, including HEVC, H.264, VP9, MP4, MOV, iPhone, iPad, Android, PS5 and more. Fast speed and high quality guaranteed. Better yet, it can be done simply within 3 steps: Load the MKV file > Choose MP4 as output format > Tap RUN button. All done!
Table of Contents
Part 1. Change OBS Default Recording Format from MKV to MP4
Follow the below instructions to change recording output format from MKV to MP4 container format in OBS Studio:
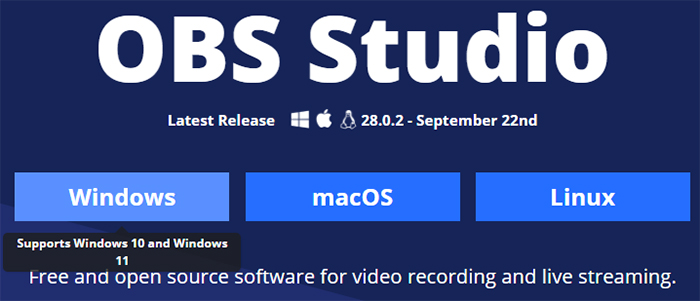
Step 1. Download and install OBS Studio program on your Windows PC if you don't have it. Please note that the latest version 28.0.2 is only available on Windows 10 or Windows 11.
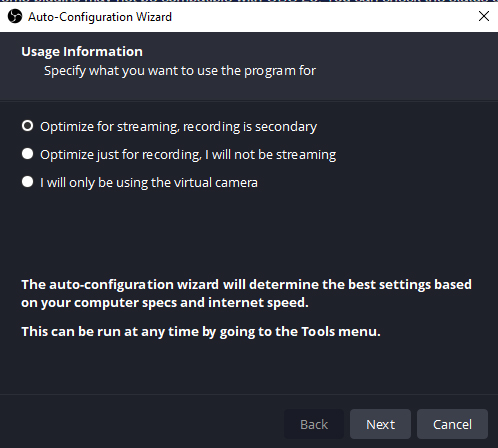
Specify what you use this program for: primarily for live streaming or video recording. Then, tap Next.
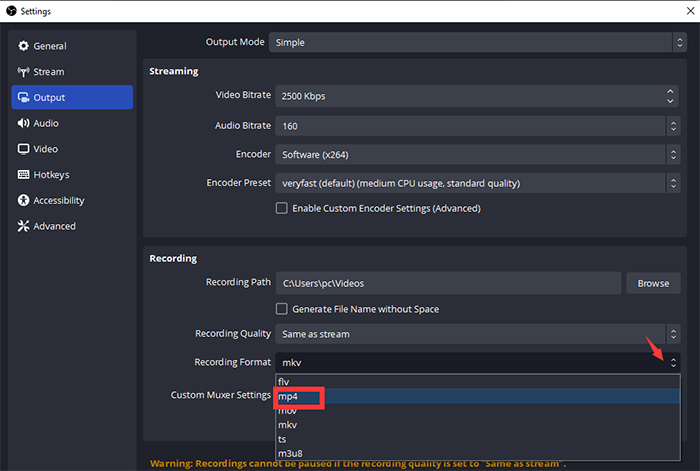
Step 2. Tap File at the top menu of OBS Studio > Settings > choose Output on the pop-up Settings Window > locate to Recording section.
Step 3. Find "Recording Format" > tap the right-land drop-down icon to show the hidden option > select "MP4".
Step 4. Change Recording Quality if needed. The default setting "Same as stream" won't let you pause your recording. If you don't wanna keep this, tap the icon to High Quality, Indistinguishable quality or lossless quality at your willing.
Step 5. Tap OK and now the OBS recording format change is done.
Note: many a user suggests on OBS forum that it's not recommended to make OBS record in MP4 format. Cuz if you cannot gracefully end the recording, the final OBS recording is unusable as a whole. This could happen if OBS or your computer crashes, or if your disk gets completely occupied. Instead, they recommend you to record to mkv format and apply OBS Studio to convert MKV to MP4 afterwards. This would protect you from suffering a crash during OBS video recording. Check how to convert MKV to MP4 in OBS Studio if you have no clue:
Part 2. Activate Automatically Remux to MP4 Setting in OBS
To convert MKV to MP4 in OBS Studio, you need to activate the built-in setting "Automatically remux to MP4" in OBS. Then, the resulting recording video will be auto remuxed into MP4 format without quality degradation. Here's the how-go guide:
Step 1. Launch OBS Studio > tap File > Settings > select "Advanced" on the pop-up Settings window.
Step 2. Move mouse to "Recording" zone where you manually tick "Automatically remux to MP4" option.
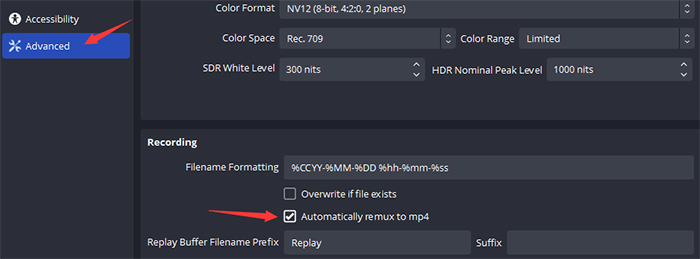
Step 3. Hit OK and the auto MKV to MP4 remuxing function is sucessfully enabled in OBS Studio. You don't need to further convert MKV to MP4 by manual.
Note: there is scarecely a man but has weak side. The same also applies to OBS Studio. Though it's damn easy to change default MKV to MP4 format or enable "auto remux to MP4" in OBS, a wide number of users complain on various forums that OBS remux MKV to MP4 is not working! If unfortunately you're confronted with such case and don't plan to waste time fixing this agnogenic problem, you can resort to another alternative to remux MKV to MP4 without transcoding. Check on:
Part 3. OBS Remux MKV to MP4 Not Working? Try An Alternative
To free yourself from the maddening remux not working trouble, use a reliable video remuxer tool to remux MKV to MP4 without quality damage. To reach this goal, give Winxvideo AI a shot!
With advanced "Auto Copy" mode, it can 1:1 lossless remux MKV to MP4 format without input & output codec change. Thus, your resulting file quality is 1:1 ratio, but also remuxing speed goes at 10X faster than video transcoding.
As a professional video converter program, it empowers you to convert any video to MP4, MOV, MKV, AVI, FLV, WebM, HEVC/H264, ProRes, etc. with 420+ preset profiles, as well as free edit videos, adjust video parameters like resolution, frame rate, bit rate, codec, etc. to customize your video footage at one go.
[Tutorial] How to free 1:1 remux MKV to MP4 without transcoding
Step 1. Import your OBS recording MKV video(s) to this video remuxer application. Bulk remuxing is supported, too.
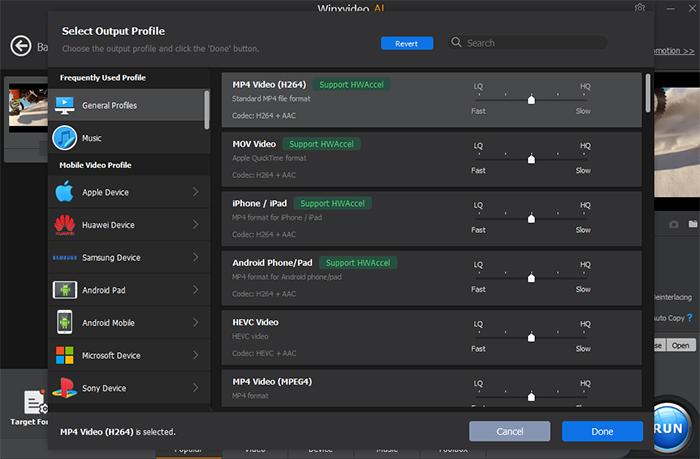
Step 2. Choose MP4 as output format. There're many MP4 output profile. Simply choose any one you like from Output Profile window. For example, go to General Profiles category and select MP4 Video. And then tap OK.
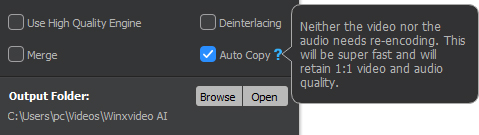
Step 3. Locate to Auto Copy and tick the box. Then the Auto Copy mode is activated.
Step 4. Tap RUN button to begin 1:1 remuxing MKV x264 to MP4 x264 without input/output codecs change. The whole remuxing process is running at lighting speed (10X faster), no more waiting even on 4K MKV remuxing.

