How to Crop A Video in Adobe Premiere Pro 2022/2021/2020
Cropping is a good way to remove black bars at the top or bottom of the video or to resize the video frame to highlight an object in the video. It's also a very basic feature provided by Adobe Premiere Pro. Premiere Pro is a very intuitive video editing program, however, it may be difficult to get started on how to crop a video in Premiere for beginners and some users run into cropping not working issues. Follow these steps to crop videos in Premiere Pro easily.
Table of Content
Part 1. How to Crop A Video in Adobe Premiere Pro?
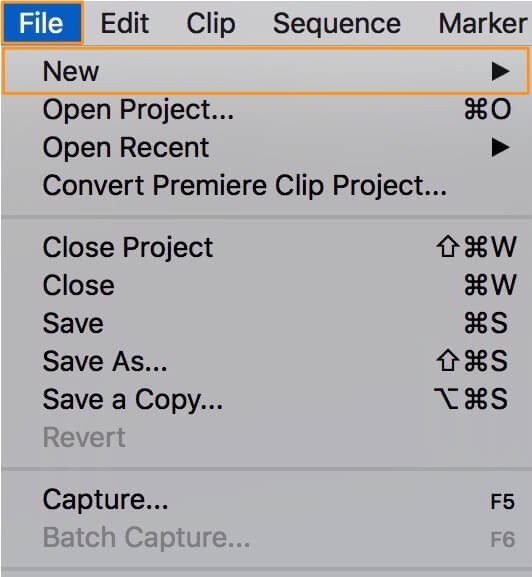
1. Create a New Project and Import A Video
Open Adobe Premiere Pro on your computer. Click File > New to create a new project. Import the video you'd like to crop in Premiere Pro. Click File and select Import from the dropping-down list. Then select the video from your computer and click Open.
2. Drag the Video to the Timeline
Add the video to the timeline through simple drag and drop. The video you import is listed in the Project panel. Select the video from the timeline by clicking the clip and then use the step below to add crop effect.
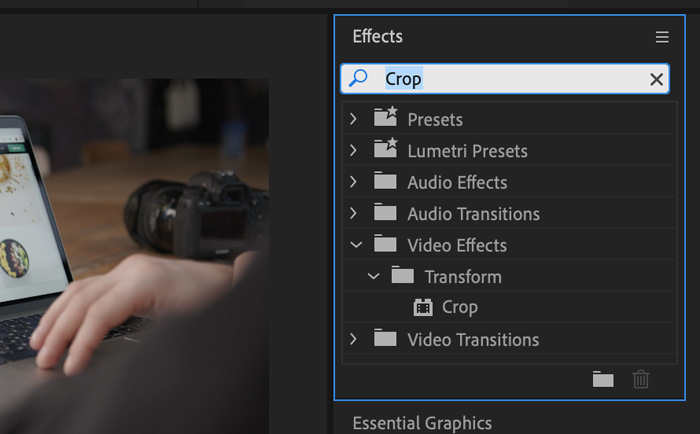
3. Add the Crop Effect to Your Video
Click the Effect tab in the Project panel in Premiere Pro to get cropping options. Select Video Effects > Transform > Crop. Or double-click the Crop button.
If you want to crop a video to the square in Premiere Pro, head to Sequence > Sequence Settings > Frame Size, and enter square measurements, such as 1920x1920, and 1080x1080, click Yes to apply the settings.
Related tutorial: How to Change Video Size(Width and Height) in Premiere Pro.
Tips: Apply Crop Settings in Premiere Pro
You have several different ways to crop videos for TikTok, WhatsApp, Instagram, etc. in Premiere Pro, crop videos by percentage, sliders, and cropping box. We recommend you use the cropping box to crop your video - it's the easiest way to crop each side of the video(left, right, top, and bottom). Simply drag the handles of the corner to crop out unwanted video frames.
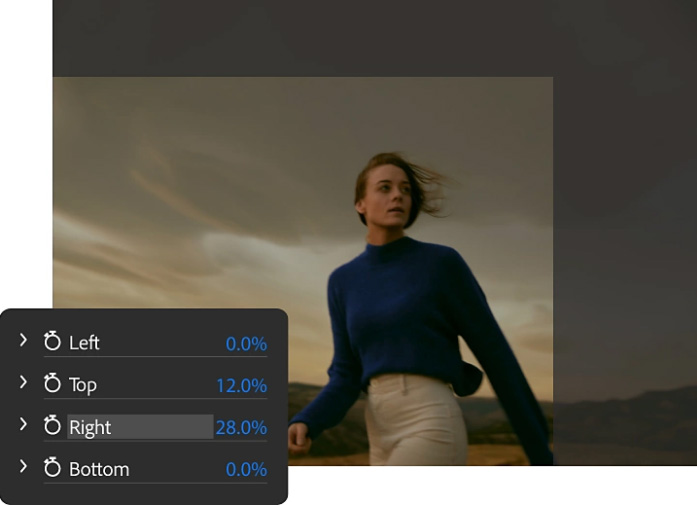
Cropping a video by percentages requires the percentage value. Set the percentage value to determine how much you want to crop from each side of the video. It's more flexible and also more complicated. Click on the dropdown arrow to get the slider and use the slider to set the area you want to crop. It's also possible to zoom in and reposition the video in Premiere Pro. The option is available under Video Effects > Motion > Position or Scale. Drag the Position or Scale values to set the zooming.
Read more: How to Compress Videos to Smaller Size in Premiere Pro
Part 2. Cropping Not Working in Premiere Pro? How to Fix It?
Some beginners complained about the crop not working issue in Premiere Pro. The crop option doesn't show up in the preview. Or the video isn't cropped as expected in the preview panel after applying the crop effects. Premiere Pro is a professional program but it requires some patience and time to understand the interface. If you are running into crop not working problem in Premiere Pro, try the following possible solutions.
1. Check if you've enabled the "Toggle Global FX Mute". The icon is under the Program viewer and above the Timeline. Click the "Toggle Global FX Mute" button and see if the crop option is available in the preview.
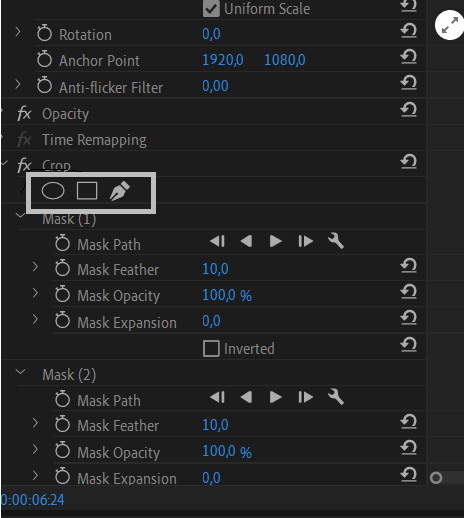
2. Double-click the clip in the timeline to open the video parameters in the Effects Controls Panel. In the Effects Controls Panel, select Opacity > Oval or Rectangle mask shape. Now, the mask should show up on the Program monitor. This way is reported to work for those for have multiple masks created.
Part 3. How to Crop Videos Flexibly with Premiere Pro Alternative
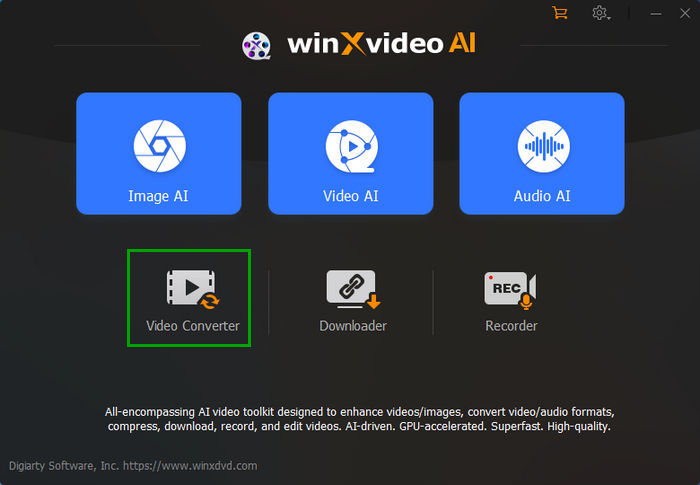
If Premiere Pro is too dificult to get started, try a much simpler video cropper tool. For the video cropping job, we use Winxvideo AI. It crops video to any desired frame size with ease using a cropping letterbox. The program also lets you change video size(resolution, aspect ratio, video audio parameters, video file size, and more. Use the following steps to crop videos with the Premiere Pro alternative.
Step 1. Free download the tool, install and open it on your computer. Click + Video button and select the clip you'd like to crop. Choose an output format from the popping up Output Profile window. MP4 H.264 is a widely used format for playing, sharing, and uploading.
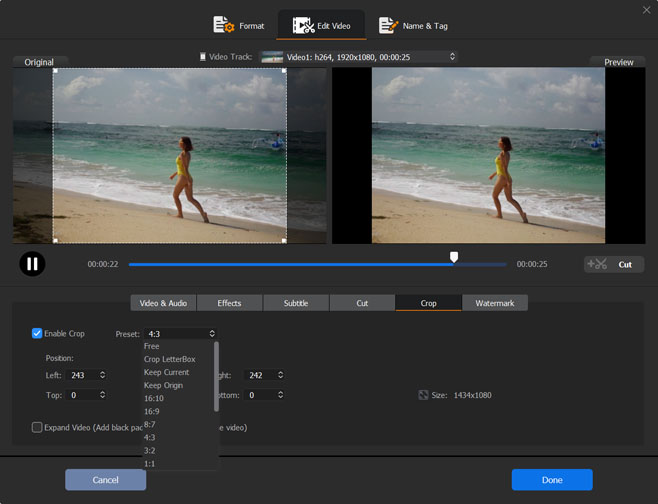
Step 2. Click the Edit button to open the video editing panel. Then, click Crop & Expand tab and check Enable Crop to enable the cropping feature. You can set the aspect ratio to 16:9, 4:3, or 1:1 and then drag the border of the letter box to crop the video easily. You can also enter desired values near the boxes of Left, Width, Top, and Height to cut out unwanted frames or highlight the object in the video. Click Done to save the cropping and close the cropping window.
Step 3. Click the RUN button to process the cropping and export the cropped video to your computer.
Part 4. Video Tutorial - Crop Videos in Adobe Premiere Pro
You can find many useful Premiere Pro channels and tutorials on YouTube. We pick the clearest and quickest tutorial about how to crop a video in Premire Pro from YouTube. To save your time, open the following video tutorial to learn how to crop out unwanted video frames in Adobe Premiere Pro.