


Premiere Pro Tutorial - How to Export Premiere Pro to MP4 Format
Have you ever edited video files in Premiere Pro but are intimidated by the tons of export options. Wondering how to export Premiere Pro to MP4 effortlessly? If you are frightened by the complexity of the video editing software, hold on and follow the step-by-step guide to save any Premiere Pro project as MP4.
Note: Premiere Pro doesn't support import MKV source, you need to convert MKV to MP4 first
Premiere Pro May End up with Choppy Playing or Unsupported Codec Error. Fix It Now!
Premiere Pro may fail to import some videos like MKV or HEVC due to the codec or format incompatibility, or end up with chopyp or stuttering playback of 4K UHD video, and even export out-of-sync file. It's time to download a video converter and convert video to Premiere Pro compatible file format now.
Table of Contents
Part 1. How to Export a Video as an MP4 in Premiere Pro
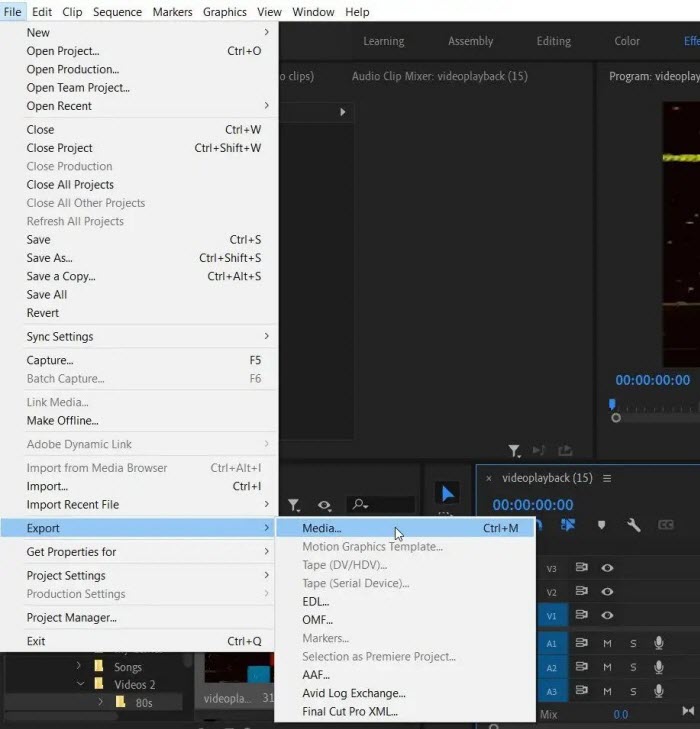
- Go to File in the top menu bar > select Export > choose Media.
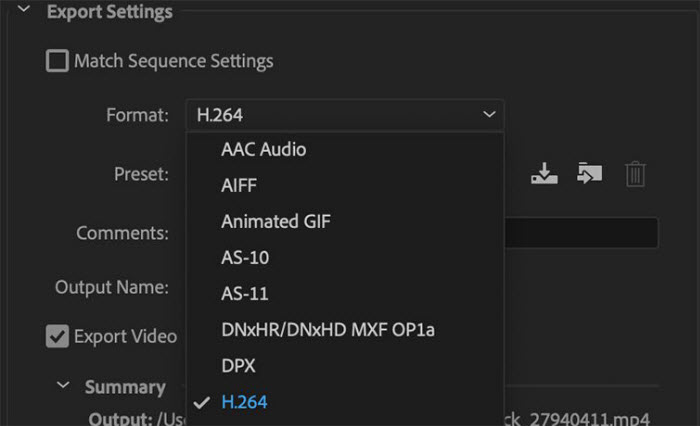
- Expand the format list and choose H.264 from the drop-down list if you want to export as MP4 in Premiere Pro.
- Click Export.
Part 2. How to Export Premiere Pro to MP4 for Various Platforms
First of all, open the Adobe Premeire Pro, and finish the editing. After that, you can export your project and save it as MP4 format. Here are the detailed steps.
Step 1. Open the Export Settings Window. To do the task, you can click on the File in the top menu bar, select the Export option, and choose Media from the list. Or you can press Ctrl+M (Windows) or Command+M (macOS) to open the Export Settings Panel.
Step 2. Once the Export Settings Window pops up, under the Format dropdown box, you can select H.264 from the drop-down list. This will automatically export Premiere Pro project as an MP4 file.
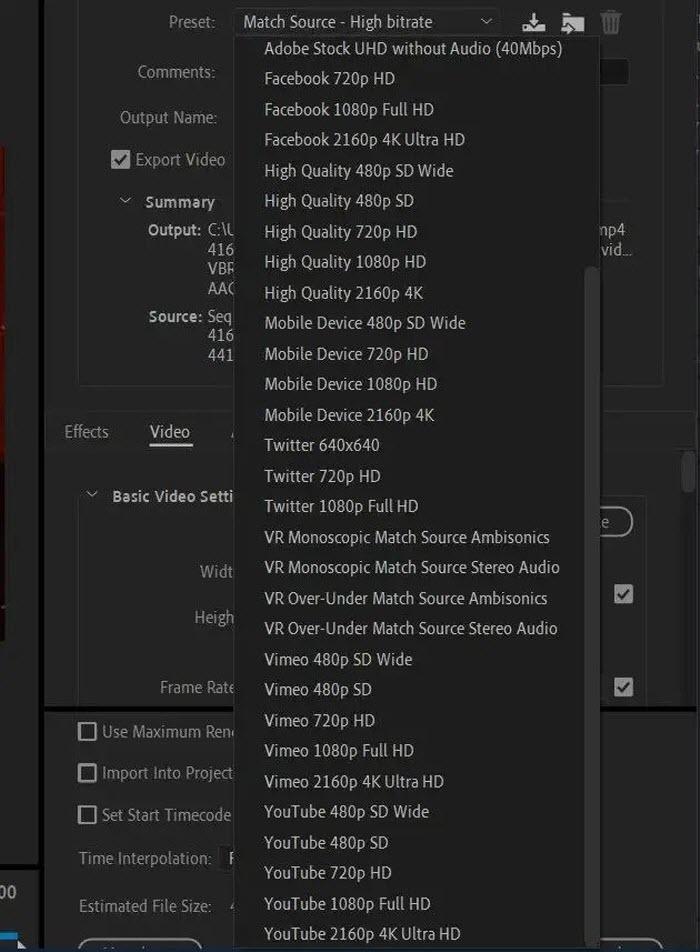
Step 3. Choose the best preset for your MP4 video.
Generally, H.264 format will export your video with good quality. Chances are you may want to upload the video to YouTube or upscale the MP4 with better quality for your 4K TV or so. Here are better recommendations to export your video file from the Preset list.
Premiere Pro offers many presets available, from Facebook 720p HD, High Quality 2160p 4K, mobile device 720p HD, Vimeo 480p SD, to YouTube presets ranging from 480p SD to 1080p Full HD and 4K Ultra HD. If you want to share your video to various platforms, you can export your project in various formats corresponding to the platforms.
Generally, higher bitrate gives result to better quality. But bear in mind that high quality preset also leads to enlarged file size and slow rendering time.
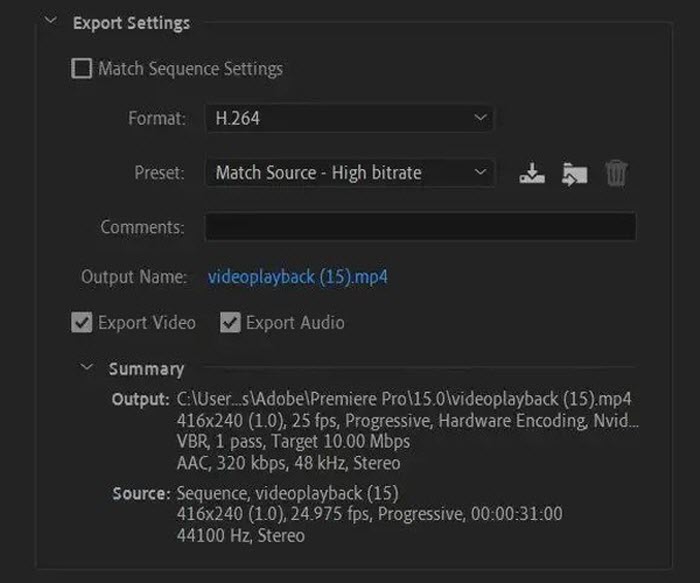
Step 4. Select your preferred settings for your project in Premiere Pro. Here it’s recommended to uncheck the Match Sequence Settings, and check the boxes of Export Video and Export Audio. And keep Match Source – High Bitrate selected from your Preset option.
Step 5. Click Export at the bottom of the window. Then premiere Pro will begin exporting your project as MP4. You can also click on Queue button to render your project through Adobe Media Encoder.
Step 6. After your project has been exported as MP4 in Premiere Pro, you can find it wherever you save the file. Check it by clicking on the Output Name.
Export Settings Panel Examined
For a new comer, the Export Settings Window in Premiere Pro has many options, which can seem daunting and overwhelming. Let’s explore everything on the panel and break it down.
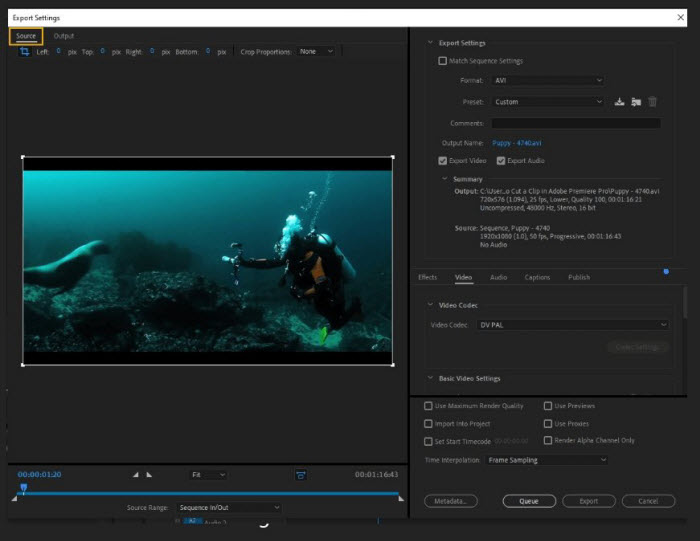
1. Left Panel
- Source option. You will be shown with the source video before the export settings are applied. Here you are available to crop the image, with different aspect ratio you desire.
- Output option. The output shows you want your final content will look like.
- Timeline. The two triangles at the lower left panel set the in point and out point of the timeline. You can also drag the triangles underneath the timeline to set the duration and export the full video or a portion of the video.
- You can also toggle on or off the aspect ratio correction, zoom in, out or select Fit in the output preview and have the video fit perfectly in the frame.
2. Right Panel
Here you can choose preset or format of the video. Or create custom preset as you like. If you want to upload your Premiere Pro video to YouTube for example, you can go to the YouTube preset as per your needs.
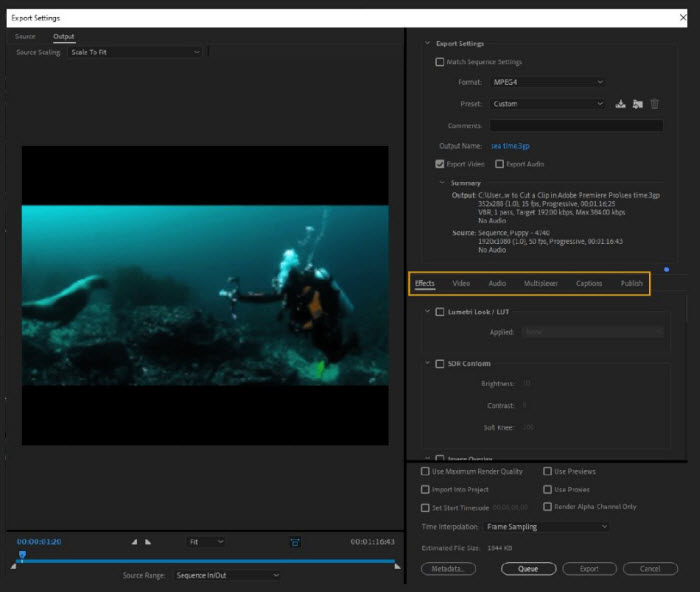
From the middle right panel, there are 6 tabs, including
- Effects containing Lumetri Look/LUT, SDR Conform, Image Overlay, Name Overlay, Timecode Overlay, Time Tuner, Video Limiter, Loudness Normalization.
- Video where you can adjust frame size, change frame rate, tweak the order of the video fields, set a custom video aspect ratio, set a TV standard, profile, level, enable or disable Maximum depth, choose CBR or VBR encoding, set the overall bitrate, choose the keyframe distance.
- Audio where you can choose the codec to encode the audio stream, set the sample rate, channels, parametric stereo, audio quality, and more.
- Multiplexer – here you can choose MP4, 3GPP or None.
- Captions where you can export captions as a separate file, burn them into the video, choose the caption’s file format, pick the frame rate or edit the metadata for the captions
- Publish – Adobe Premiere Pro also allows you to directly export your file to Adobe Creative Cloud, Behance, Facebook, FTP, Vimeo and YouTube.
At the lower part of the export settings, you can also check the box of Use Maximum Render Quality, Import into Project, Set Start TimeCode, and more. That’s all for how to export Premiere Pro to MP4.
Part 3. An Alternative Way to Convert Premiere Pro Video to MP4 Format
For some reasons, videos exported from Premiere Pro is not recognized by some operating systems or platforms you intend to play they on, you have to convert the Premiere Pro clip to a readable format like MP4. A feasible way to do the task is by relying on a video converter like Winxvideo AI.
Packing with 320+ video codecs and 50+ audio codecs, it enables you to convert any 8K/4K/HD/SD video to MP4, MOV, MKV, WMV, HEVC, and more. In addition, the program is equipped with basic post-product tasks, like compressing, resizing, trimming, cropping, merging, adding subtitles, and more but also tasks can be done without too much of learning curve like Premiere Pro does. Here are the detailed steps to export video to MP4 with Adobe Premiere Pro alternative.
- After your launch the program onto your PC or Mac, you can click +Video button and import the Adobe premiere Pro video you want to convert.
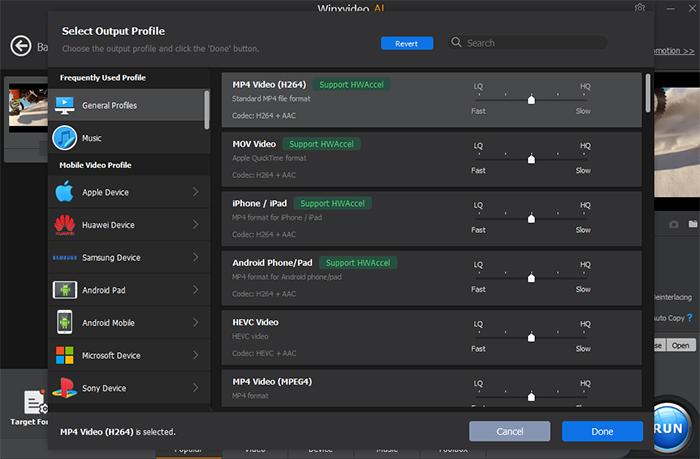
- Choose MP4 (H.264 or HEVC) as the output format. For the best compatibility, you can choose H.264 from the pop-up window. Optionally, you can also choose the web profile list, choose quality encoding or fast encoding, change video resolution, codec, frame rate, and more as per your needs. And even shorten the video duration, remove black bars from the video, etc
- Choose a folder you want to save the exported file by clicking Browse button. And press RUN from the bottom-right corner. It will begin exporting Premiere Pro video to MP4 format.
Part 4. FAQs about Premiere Pro MP4 Exportion
1. Can I export Premiere Pro to MP4 without losing quality?
Technically, it’s impossible to export a video as an MP4 format in Premiere Pro with no quality loss. Generally, muxing get the job done well. It just takes the current file, applies the cuts, re-stitches it back together, and leaves you with the same file. However, Premiere Pro is totally different from the muxing app. It exports a completely different file out and re-encode to a new file. However, visually, you can choose the H.264 and export as 1920x1080 in Premiere Pro, this will export MP4 with quality loss imperceptibly.
2. What is the best format to export a video from Premiere Pro?
In general, MP4 is the best format to export a video from Premiere Pro. It has so far the optimal compatibility with media players, mobiles, TVs, PCs, tablets and gaming systems. So whether you want to play the video on your computer, or share it to YouTube, you can export Premiere Pro project to MP4 first.

