How to Make Instructional Videos/Training Videos
 Mike Rule
Updated on
If you present your audiences or students with two versions of instructions: a text instruction and an instructional video, which one would they prefer? According to the research data, roughly 69% people preferwatching a short instructional tutorial video to an article.
That's to say, creating an instructional video is seemingly a must have if you want to attract more viewers and bring them better yet immersive experience. Providing you're meant to make an instructional videobut have no such experience before, stay here and this post will show you the top free ways to create a training/teaching video for students or YouTube sharing.
Part 1. How to Make Instructional Videos with Screen Recording
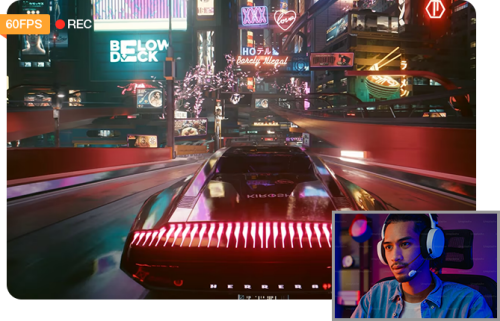
The first option to create a how-to video, make an educational video or instructional video is using screen recorder. This will help you capture your operating steps on the screen and meanwhile capture yourself presenting the teaching steps. This would whoppingly improve engagingness.
Regardless of what kind of video you want to create, you need a script first. Different from the past, now we're in the era of AI. Thus, we ought to utilize AI generative tool ChatGPT or Gemini to the utmost. Make full use of ChatGPT or Gemini to write a video script for us. More novel ideas and higher efficiency! To generate a captivating script, 5 elements for prompt are worth a note.
- Tell them what type of video you want to create.
- Topic of the script. Be specific.
- The video duration you need, 3 minutes, 5 minutes or 10 minutes.
- Tone of voice: concise and comprehensive, detailed, humorous, witty or rational.
- Additional details, notes, etc.
Read More: How to Record a Lecture for Teachers and Students >>
After your prompt is ready, log into ChatGPT or Gemini with your account and enter your prepared prompt to them and wait for its response. When the video script is ready, you can have a overview on it and properly modify the AI-generated video script, adding or deleting certain plots to optimize it. Afterwards, you can eventually follow your video script to make your instructional video.
To make an instructional video or an explainer video, Winxvideo AI is strongly recommended, offering you 3 recording modes: screen record, webcam, and both. And the system audio and microphone sound can be both captured, as well. The high quality can be achieved up to 4K 2160, alongside with AI video enhancer feature if you demand more.
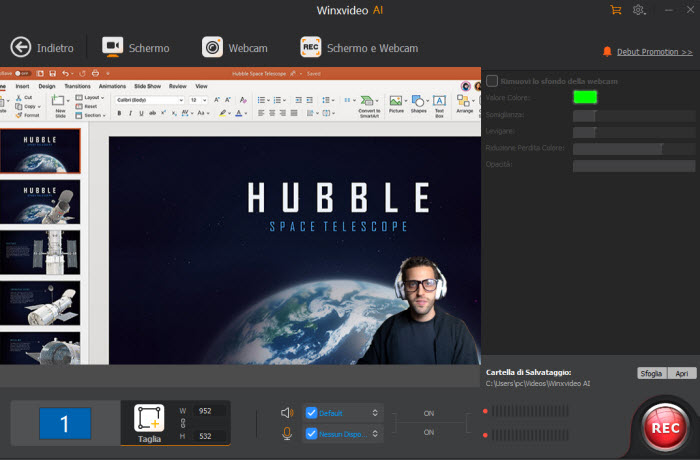
This instructional video recorder makes picture-in-picture teaching video simple and painless. Choose "Screen & Webcam" mode and it lets you make a teaching instructional video with showing your face to make video more engaging. Enable its Draw feature to highlight while recording and its Chroma Key feature to remove background from webcam to protect your privacy.
 Free Download
 Free Download
Winxvideo AI is for PC, while Macxvideo AI (from our MacXDVD brand) is for macOS.
1. How to Make Training Videos/Lecture Videos with Facecam
Before you go, check if your computer has an external camcorder or an external webcam. If you need recording voice-over, connect a microphone to your Windows PC or Mac first. When everything is ready, let's delve into the training, lecture videos or product demo videos creation journey:
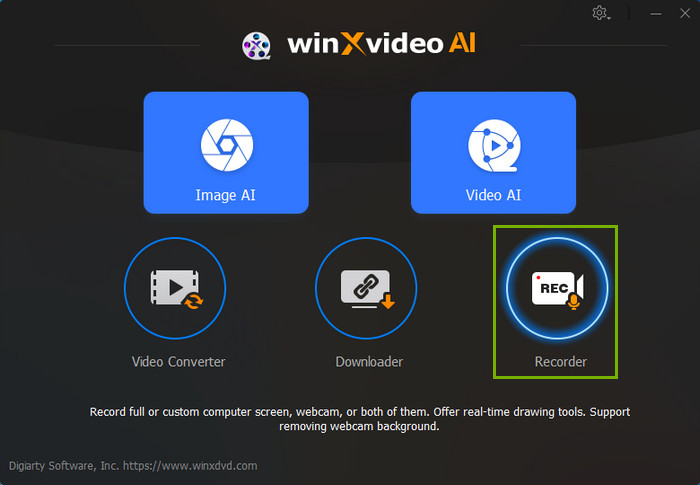
Step 1. Launch Winxvideo AI after installation and select Recorder on the main interface.
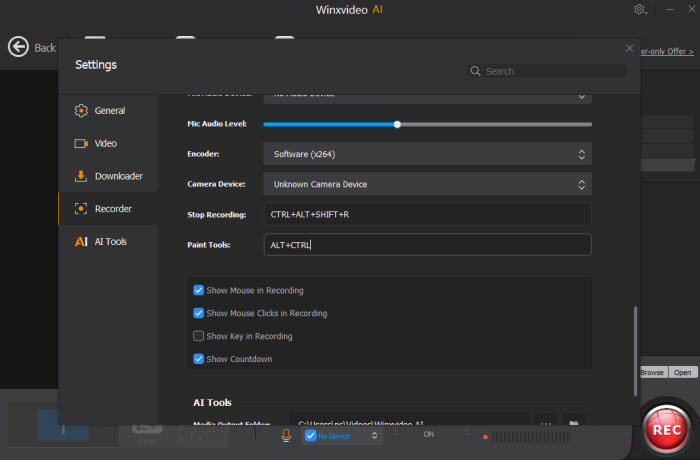
Note: tap the Setting icon on the top right corner of the UI and choose Recorder to adjust settings if needed. You're allowed to change recording quality, format, audio level/device, and know the shortcut for drawing (Ctrl+Alt+Shift+T).
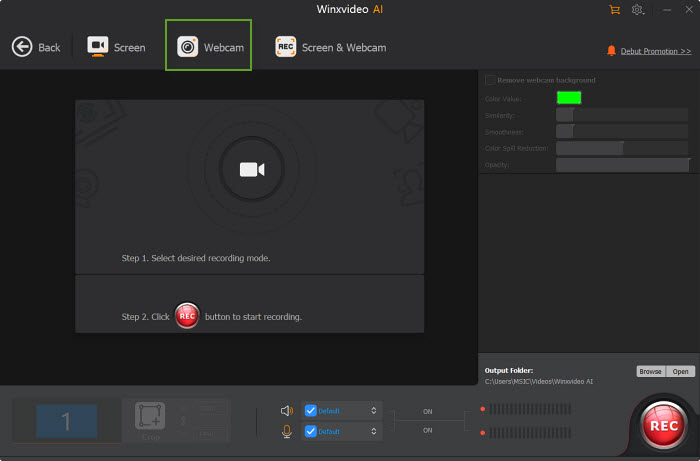
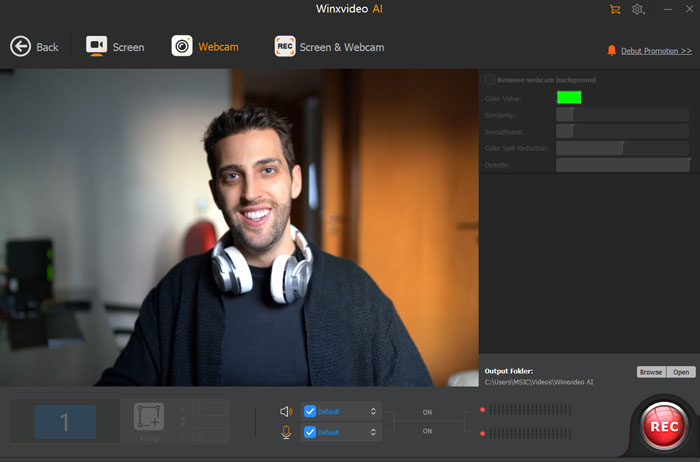
Step 2. Opt for Webcam recording mode on the top.
Step 3. Choose to record the entire screen or part of the screen at the lower-left corner. The recording size is all at your disposal; free ajust the marquee using your mouse.
Step 4. Enable audio device(s). Record microphone or both system and microphone sound based on your needs. Open your AI-generated video script and follow your video script to conduct the tutorial step by step. Also learn how to make instructional videos with green screen
Step 5. Click on the REC button to start recording an instructional video or explainer video with your face. When everything is OK, click on the Stop button to end.
2. How to Create Instructional How-to Videos with Screen Recorder and Webcam
Now resort to "Screen & Webcam" mode if you need to capture your teaching screen and face at the same time.
Step 1. After launching Winxvideo AI, select "Screen & Webcam" recording mode on the top. Certainly, you need to make sure you have an internal webcam recorder on your PC or external webcam recorder device.
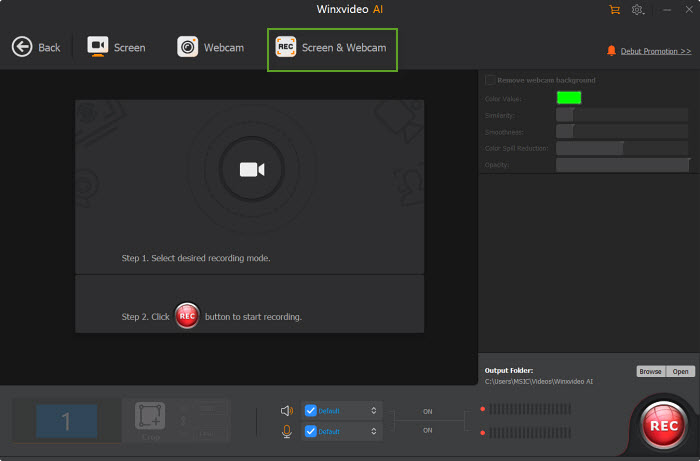
Step 2. Similar to the above part, choose your recording area and enable your audio device(s).
Step 3. Click on the REC button to start recording training video for school project or YouTube with real person explanation, teaching steps demonstration, etc. And follow the above ChatGPT generated script to record your voice over for your tutorial video. When everything is OK, click Stop to end capturing instructional videos on PC.
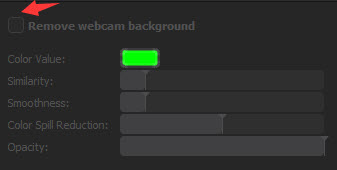
Note: manually tick the option "Remove webcam background" to turn background into virtual background to protect your privacy if your webcam background is green.
Part 2. How to Create a Training Video with Camera Footages
The content in Part 1 mainly focuses on freshly creating an instructional guide video using your computer screen or camera. If some product demo videos or explainer videos need outdoor video materials or video resources in different seasons, you need your previously recorded camera footage materials to combine a complete video now. In such case, your training video or instructional video footages are needed to trim, crop, split, edit and combine into a new one.
Now, it's a feature-rich video editor fitting your bill. Adobe Premiere, Camtasia, VideoProc Vlogger, Movavi editor and more similar stuff can be your best options. Here we use Premiere for instance, showing you how to use it to make an instructional video with your camera footages.
Step 1. Plan your video with all your media gathered, including video clips, image, audio track, background music file, narration, transition, etc. Create a clear folder structure for your project to keep everything easily accessible.
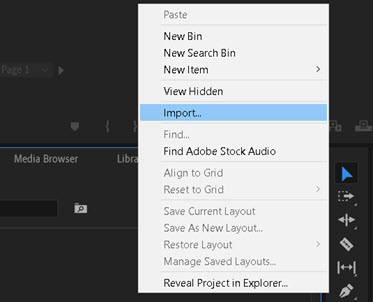
Step 2. Import your video files. Drag and drop your video clips, images, and audio files into Premiere Pro.
Step 3. Arrange your clips on the timeline in the order you want them to appear in the video. Use the cutting tools to trim clips if certain instructional video is too long, add transitions between cuts, and adjust clip order for clarity.

Step 4. Enhance your tutorial how-to video. Add titles, graphics, and background music to make your training or instructional video more engaging.
Step 5. Optionally, if your product demo video requires narration, record your voiceover and add it to a separate track in the timeline.
Step 6. Choose the appropriate export settings for your target platform (Email for sharing to students, YouTube for online sharing, etc.) and render your final training video.
Note: remember, creating compelling teaching videos takes practice. Don't be discouraged if your first attempts aren't perfect, and keep exploring the many features of Premiere Pro. Or you can also make an appealing instructional video using newbie-friendly video editor like Camtasia if you're a green hand and not high demanding on video effects.
Part 3. How to Make Tutorial Videos with PowerPoint
Many a user asks on Google or forums about how to make an instructional video using PowerPoint. Actually, PowerPoint doesn't sport with screen video recording feature. But luckily, it offers features to create presentations that you can convert into instructional videos. So, if you want to present your audience with a PowerPoint slideshow video without showing your face, you can directly utilize its PPT to video conversion feature after the slideshow creation. Check the detailed how-to steps:
Step 1. Craft your PowerPoint slides. Three key elements you need to pay attention to:
- PPT structure. Plan the flow of information with clear and concise content on each slide.
- Visually appealing. Use high-quality images, diagrams, and icons to enhance understanding.
- Control words number. Focus on key points and use bullet points instead of lengthy paragraphs. We don't like tedious expression.
Step 2. Export your PowerPoint slideshow as an instructional video.
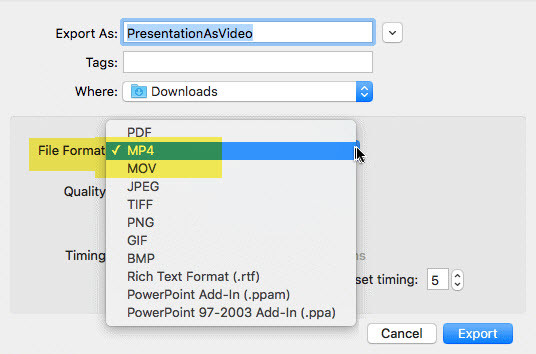
Head to "File" > "Export" > "Create a Video." Select your desired video quality (e.g., 720p, 1080p full HD) > choose whether to include recorded timings and narrations > hit "Create Video" to export your instructional presentation as a video file.
Step 3. Optionally, you can then use professional video editors like Premiere to further edit and polish your resulting PowerPoint instructional video, like add royal-free background music, add special effects to make tutorial videos more engaging, enrich training video with proper transitions, etc.
Until now, you can eventually use the final PowerPoint presentation instructional video for school project or YouTube sharing. Certainly, if you have used any other better solutions to create instructional videos, you're warmly welcomed to share with us and we'll keep this article updated with new methods.


