How to Crop A Video in iMovie Easily in 4 Steps
Cropping is a very basic function of iMovie. You can crop video in iMovie on Mac, iPhone, or iPad easily. Cropping is a good way to delete or trim out unwanted frame edges of the video (top, top, bottom, left, or right). iMovie can crop videos with the ideal aspect ratio for Instagram, YouTube, Whatsapp, and other platforms. In this post, we will walk you through how to crop video in iMovie on a Mac computer, iPhone, or iPad within 4 steps.
Table of Content
Part 1. How to Crop a Video in iMovie on iPhone or iPad
Cropping video is useful on iPhone and iPad to delete unwanted edges or emphasis the video objects for sharing to Instagram, Facebook, Whatsapp, etc. Here's how to crop a video in iMovie on iPhone or iPad.
1. On your iPhone or iPad, open iMovie, open the Projects at the top, tap the plus icon.
2. Select Movie from the window that appears. Select a video you want to crop from the library. At the bottom of the screen, tap Create Movie to pick the movie option.
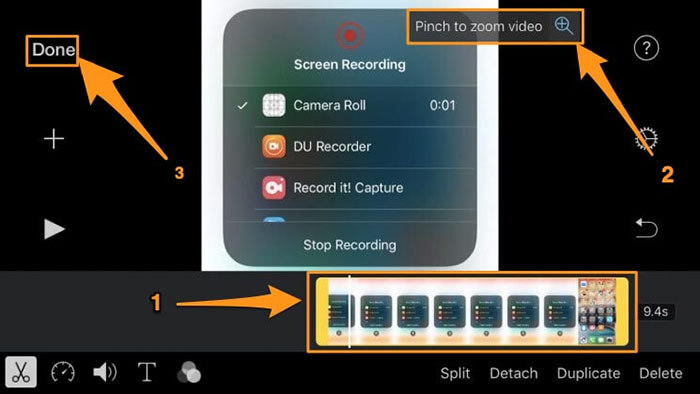
3. Tap the video you are going to crop in the timeline. Tap the Pinch to zoom video button to start cropping the video with your two fingers.
4. Tap the Done button to complete the cropping and save the video.
=> [iMovie Tutorial] How to Compress Video in iMovie
Part 2. How to Crop a Video in iMovie on Your Mac
It's also easy to crop the video with iMovie on a Mac computer. If you want to crop a video with iMovie on your Mac computers, use the following steps to do so.
1. Open iMovie on your Mac computer. Click the Create New button to create a new project.
2. Select Movie from the dropdown menu and click the Import Media button. Select a video to import. The video should be imported quickly.
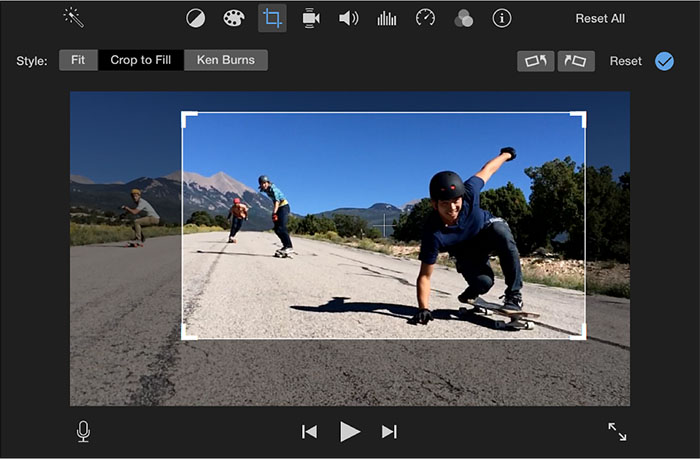
3. Click on the Cropping button and select Crop in the top left corner of the player.
4. Select the area you want to crop by dragging the handlebars. Once the cropping is done, click the blue checkmark button at the top right corner to save it.
Part 3. How to Stop iMovie from Cropping Automatically
iMovie can crop your movie projects automatically when your add a video in 4:3 to a 16:9 movie projects. The Ken Burns effects also look like cropping. If you don't want iMovie to crop your videos automatically, you can turn off automatic cropping in iMovie. Here’s how to do it.
1. Open iMovie on your Mac computer. Select the video and click the Cropping feature to open the cropping options, Fit, Crop to Fill, and Ken Burns.
2. Select Fit. So the movie project won’t turned to be in another aspect ratio.
You can also stop iMovie from automatically cropping via its preferences.
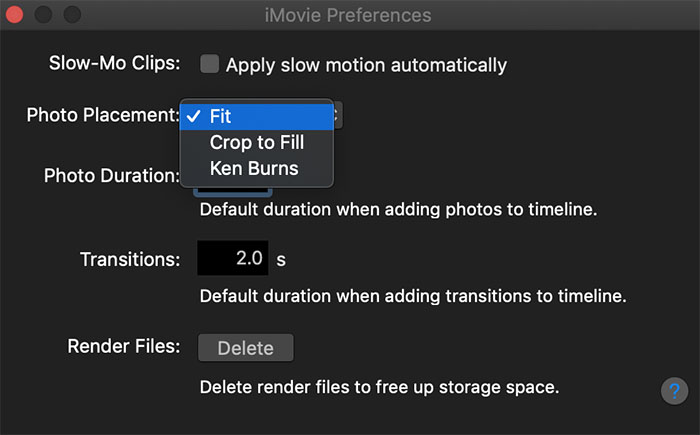
1. Open iMovie on your computer. Click iMovie in the menu bar and select Preferences.
2. Click the Photo Placement and select Fit.
3. Video won't be cropped automatically in iMovie when the preference gets valid.
Part 4. How to Crop Videos on Windows/macOS with iMovie Alternative
If you are totally new to iMovie, you have to speed some time getting started. You can try a much simpler video cropper tool like Winxvideo AI. The video toolbox works on both Windows and macOS. It crops video to any desired frame size with a simple cropping letterbox. It allows you to change video size(resolution, aspect ratio, other parameters, video file size, to name a few). Follow the steps below to crop videos on Windows/macOS with the iMovie alternative.
Step 1. Free download the video cropper, install, and run it on your computer. import the video you are going to crop by clicking the + Video button at the top menu bar. An Output Profile window appears when the video is loaded. Select a video format for the output video. MP4 H.264 is recommended if you have no idea what format to choose.
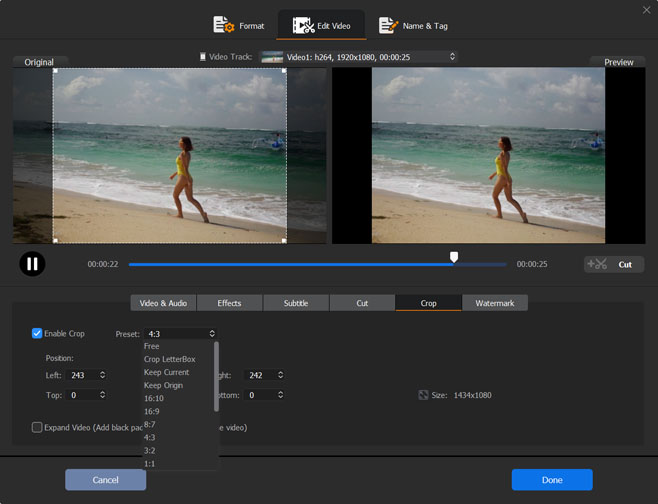
Step 2. Click the Edit button to open the video editing toolbox. Click the Crop & Expand tab and check the Enable Crop to enable the cropping option. Set the aspect ratio(16:9, 4:3, or 1:1) and then drag the border of the letter box to crop the video with the ideal aspect ratio. Alternatively, enter desired values near the boxes of Left, Width, Top, and Height. Click the Done button to save the editing and close the cropping screen.
Step 3. After you've all set, click the RUN button at the bottom right corner and it will start cropping the video. When the cropping process finishes, the cropped video is exported to your computer.
Part 5. Video Tutorial - How to Crop Videos in iMovie
This video tutorial shows how you can adjust the cropping to make the whole image fit in the video with black bars to either side. It shows cropping options offerred by iMovie in detail, including Fit, Crop to Fit. If you want to learn more about how to crop a video in iMovie and remove black bars, watch this video.