How to Screen Record Snapchat without Them Knowing
 Mike Rule
Updated on
Unlike most messaging apps, Snaptchat only gives you only a short window, roughly, up to 10 seconds to view the snap. In the case of disappearing messages and fleeting content, capturing a hilarious snap or a friend's epic fail on Snapchat can feel like a fleeting moment. But what if you could hold onto those digital gems forever? You need screen capture on Snapchat.
Recording Snapchat content directly through your phone's screen recording function isn't possible. This is because Snapchat has built-in security that prevents screen captures and even alerts users when someone attempts to record their snaps. Well, is it possible to screen record on Snapchat? Yes. There is always a way to make Snapchat screen capture possible. Check the below top free ways and find the best one you prefer to screen record Snapchat chats, messages or stories without them knowing.
Part 1. How to Screen Record Snapchat Chats on Windows 10/11 PC?
Does Snapchat notify when you screen record? Generally, Snapchat will notify users about screenshots or screen recordings in most cases. Even recording a text-based chat, Snapchat will notify the other person if you screenshot a disappearing photo or video chat. Consequently, in most cases, please be upfront with your friend and ask if it's okay to record the chat. This is the most respectful approach.
In case, you do really not want to notify others when recording Snapchat chats, you can mirror your phone's screen to a computer and use recording software there. This offers more control over your whole Snapchat screen recording task. And to reach this goal, resort to Winxvideo AI - a full-fledged AI screen recorder toolkit to help you screen record Snapchat chats, messages, or stories on Windows 10/11 PC without getting notified. You can freely adjust Snapchat screen recording area, full screen or partial screen with audio captured, as well.
Meanwhile, its internal Draw feature empowers you to highlight the keypoints from your Snapchat recording. You can export your Snapchat screen recording file up to 4K 2160p high quality in MP4, MOV, AVI, FLV or TS format at your willing.
 Free Download
 Free Download
Winxvideo AI is for PC, while Macxvideo AI (from our MacXDVD brand) is for macOS.
How to Record a Snapchat Video Call without Them Knowing using Winxvideo AI?
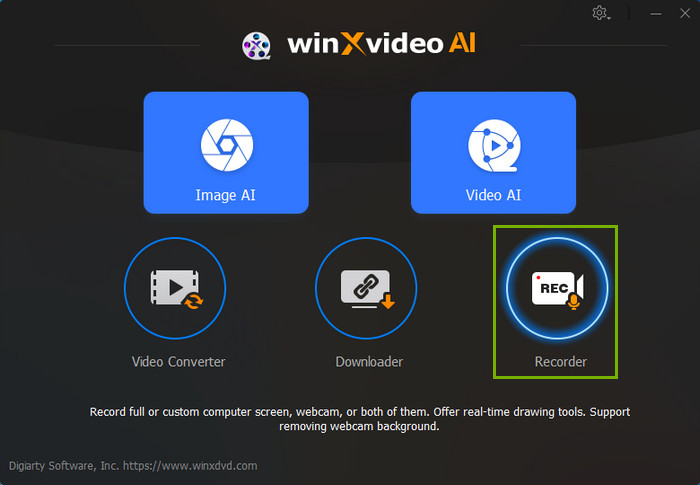
Step 1. Launch Winxvideo AI after installation and select Recorder on the main interface.
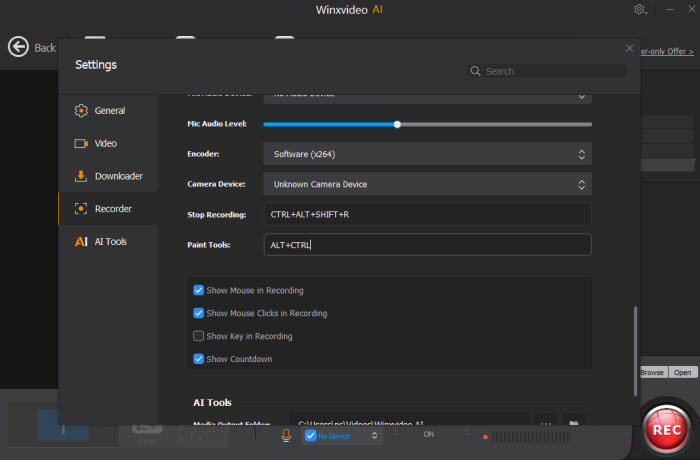
Note: tap the Setting icon on the top right corner of the UI and choose Recorder to adjust settings if needed. You're allowed to change recording quality, format, audio level/device, and know the shortcut for drawing (Ctrl+Alt+Shift+T).
Step 2. Select "Screen" mode on the top.
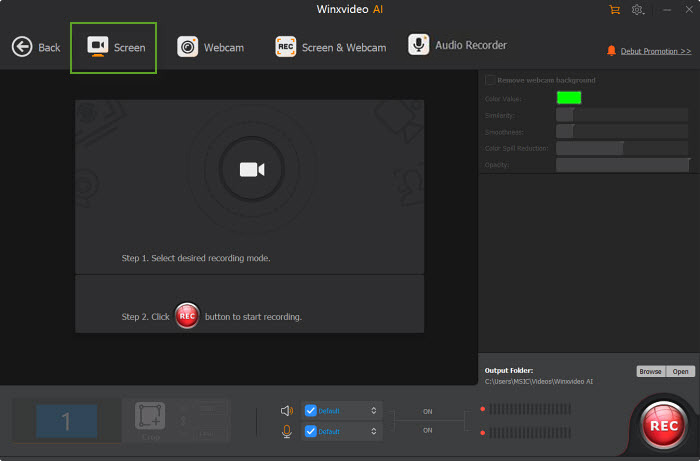
Step 3. Choose to record the entire screen or part of the screen at the lower-left corner.
Step 4. Enable audio device(s). Here you might need to record both system and microphone sound if you speak in your Snapchat video, too.
Step 5. Mirror your phone screen to your Windows PC computer. Afterwards, click on the REC button to start screen recording Snapchat video, chat, message or stories on Windows PC. When everything is OK, click Stop to end.
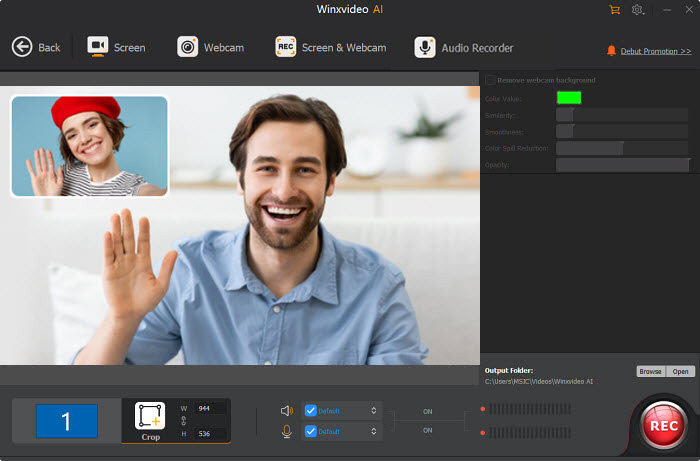
Note: if you have used Windows screen recorder to record Skype calls, FaceTime calls or online meetings but ain't satisfied with the result quality, you can go back to Winxvideo AI home screen and tap "Video AI" to enable its AI video quality enhancement feature. This will whoppingly improve your recorded video quality up to 4K 2160p with crisp image grounded on AI video enhancement tech.
Part 2. How to Free Screen Record Snapchat on iPhone iPad
To free capture a Snapchat call on iPhone or iPad, you need a screen recorder application. Thankfully, you don't have to look around since your iPhone and iPad have internal screen recording feature. This guide will show you how to record Snapchat videos with audio using built-in screen recording features on iOS iPhone or iPad free and painlessly.
Step 1. Prep Your Control Center. Enable screen recording in your Control Center. Navigate to Settings > Control Center > Customize Controls. Find "Screen Recording" and hit the green "+" button to add it.
Step 2. Open Snapchat app on iPhone iPad. Open Snapchat on your iPhone or iPad and start your Snapchat message, story or chat.
Step 3. Activate the Recorder. Swipe down from the top right corner of your screen (iPhone X and later) or swipe up from the bottom (iPhone 8 and earlier/iPads) to open Control Center. Locate the screen recording icon (it looks like a circle with a dot inside) and hold it down.
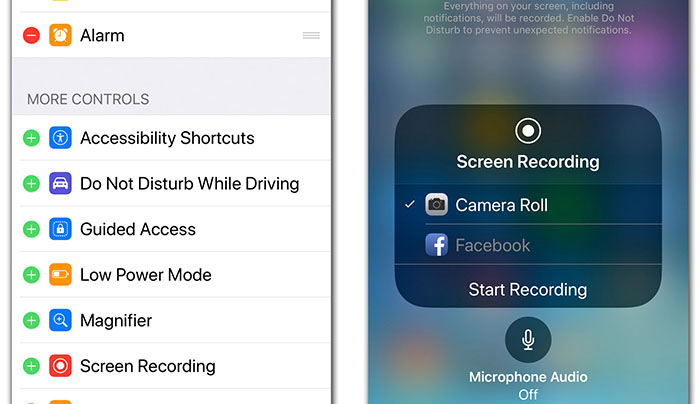
Step 4. Turn on Microphone Audio. Long-press the Screen Recording icon if you need to screen record Snapchat video with audio. That ought to bring up the screen below, where you can tap the Microphone icon at the bottom.
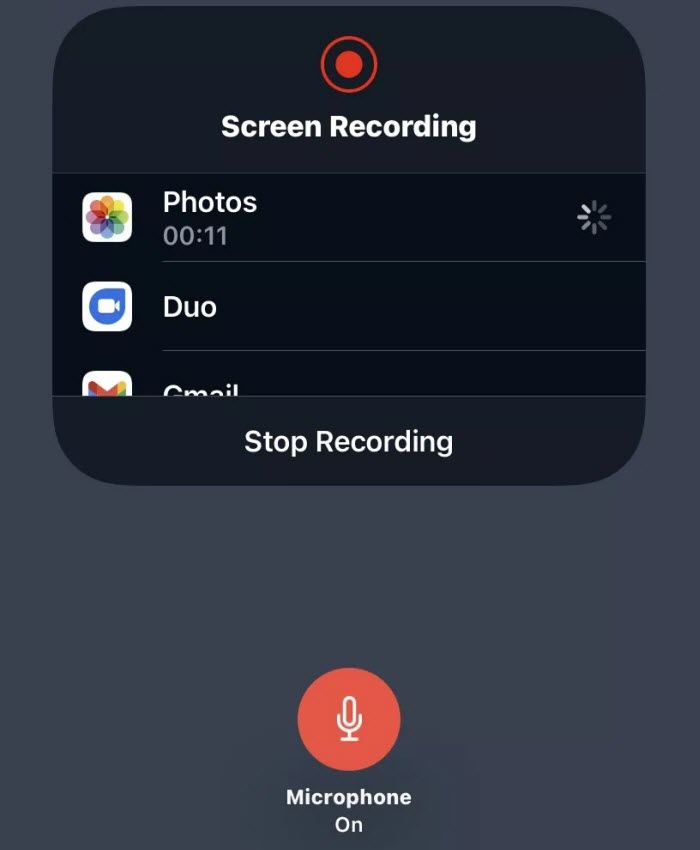
Step 5. Tap Record. Once you've selected your recording preferences, tap "Start Recording." A countdown will appear, then your Snapchat message or story will be captured with audio.
Step 6. Stop Recording. When you're finished, open Control Center again and tap the red recording icon to stop Snapchat video capturing. Your recorded Snapchat video will be saved in your Photos app, typically within a new folder titled "Screen Recordings."
Part 3. How to Free Screen Record Snapchat Messages on Android
Similar to iOS iPhone iPad devices, most modern Android devices have a built-in screen recorder, as well. Thus, to screen record a Snapchat video on Android, you don't have to install 3rd party screen recorder application, either. Follow the below steps to capture Snapchat messages or stories on Android if you didn't have such experience before.
Step 1. Swipe down from the top of your screen to open the notification panel.
Step 2. Swipe down again to fully expand the Quick Settings menu. If you don't see a "Screen Record" button, you might need to edit your Quick Settings menu and add it.
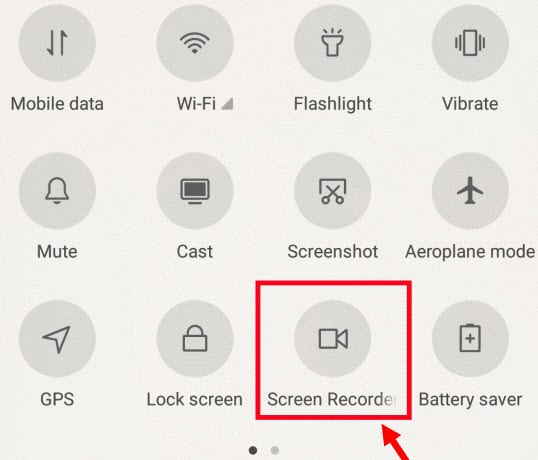
Step 3. Once you locate the "Screen Record" button, tap it to start recording.
Step 4. Open the Snapchat app and navigate to the message you want to record.
Step 5. Once you're done recording, pull down the notification panel again and tap the screen recorder notification to stop recording.
Note: there are many free screen recording apps available on the Google Play Store. You can search on Google Play Store and check the app's privacy policy before installing. Be cautious about what permissions the app requests and if the app provides in-app purchases for full functionality.
Part 4. How to Screen Capture Snapchat Video on Mac
Mac users, same good luck, you don't have to download or install any Mac screen recorder, either. Apple ecosystem big family takes almost everything you need into consideration. The Mac internal screen recorder is of no exception. That is your well-versed QuickTime player.
Not only does QuickTime player work as a free video player, but also a decent screen recording software. Merely 6 steps, you can hassle-free capture Snapchat screen on Mac in high quality. Check the details.
Step 1. Launch Snapchat app on your Mac first. Be noted that there is no official Snapchat app for Mac indeed. Please try the Snapchat app released by third-party websites or use the Snapchat web version instead.
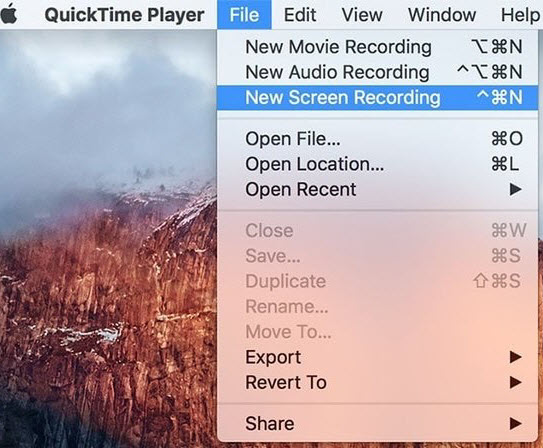
Step 2. Open QuickTime Player. Head over to your Applications folder and launch QuickTime Player. Navigate to the top menu bar and select "File" followed by "New Screen Recording."
Or hit CMD + Shift + 5 on your Mac keyboard. This brings up controls at the bottom of your screen.
Step 3. Record Snapchat full screen or part screen. In the highlighted section, the button on the left records everything happened on your Snapchat video, and the one on the right records a selected portion. If you just want a part of screen to be captured, select the latter one and you'll get a dotted, draggable window to resize the capture area. Once you've made a choice, click Options and choose a place to save your recording.
Step 4. Choose Microphone. Click the down arrow next to the record button. Here, you'll choose "Built-in Microphone" to capture both sides of the chat.
Step 5. Press Record. Click the red record button to begin free screen recording Snapchat messages or stories on your Mac.
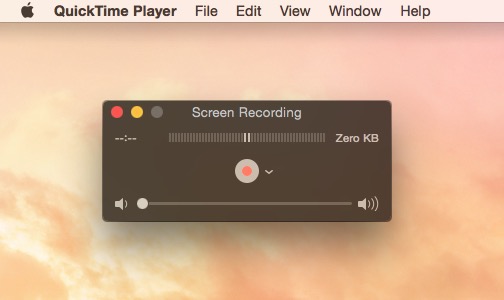
Step 6. Stop Recording and save the final file. Once you're done, click the record button again to stop recording. Generally, the output recording file will auto show up in the destination folder and you can directly open to play it for playback and testing its video quality and sound.
With a few simple steps, you can capture those laugh-out-loud moments or important conversations on Snapchat. Remember, the built-in screen recorder or trusted third-party apps offer effective solutions. Meanwhile, always prioritize transparency and get permission before recording someone's chat. With these methods and a little planning, you can preserve those special Snapchat moments and keep them forever.


