


How to Record Webex Meetings or Webinars on Computer/Cloud
 Mike Rule
Updated on
In today's fast-paced business landscape, effective communication and collaboration are paramount. Webex meetings have become a cornerstone for many organizations, enabling geographically dispersed teams to connect seamlessly. But what happens after the meeting ends? Crucial details, action items, and decisions can easily fade over time. That's where Webex meeting recording comes in.
By capturing these sessions, you can empower your team with a valuable resource to revisit key points, share recordings with stakeholders, and ensure everyone is on the same page. However, with the ever-growing volume of meetings, organizations need robust and user-friendly recording solutions to unlock the full potential of this powerful Webex feature. This post happens to share with you top effective solutions to screen record Webex meeting videos on Windows computer or cloud.
Part 1. How to Record a Webex Meeting Video on Windows/Mac Computer
To record online meetings on Windows or Mac computer, Webex website or webex meeting app can be accessible. Almost any platform is covered, from Windows Mac to iOS Android. Beyond, you can also sign up to use its webpage version for online meeting.
For hosts, if your organization enables it, you can record meetings directly to your computer. These recordings capture everything that happens in the meeting, including the audio and video of participants, as well as any content shared on screen.
As for recording Webex training session, it allows anyone with the presenter role to record Webex training session video. Only if your administrator allows WRF recordings (Windows only) specifically for training, can participants be assigned the recording role. And make the participant you want to record the session the presenter. This will give them a "Recorder" button in their controls. If you've already started a local recording and then make someone else presenter, they can start their own recording without interrupting yours.
Steps to Screen Capture Webex Meeting Videos on Computer
Step 1. Open webex meeting webpage or launch webex program on your Windows 10/11 or Mac. Afterwards, click the Record icon and select the option for your computer.
In some cases, you can't find the computer option, which might be disabled. Contact your webex website administrator please to fix this issue. Meanwhile, to record a webex meeting with sound, choose "Computer Audio" as the source. If you joined the meeting with a different audio method, you'll be notified, but you can still record without audio.
Step 2. Click Record again.
Optionally, choose Pause and Resume to maintain a single recording. Providing your online meeting, event or training session lasts couples of hours, it's advised to create multiple recordings, beneficial for later management and viewing.

Step 3. Click Stop to end your current webex meetings recording. Generally, your webex recording will be saved as MP4 format and saved to the Documents folder in My Computer by default (on Windows) or Home folder by default (on Mac).
This is the detailed process of recording online webex meeting to computer. Read on the below part to learn how to screen record Webex conference calls, meetings, events or training videos to cloud.
Part 2. How to Record a Webex Meeting Video in the Cloud
Unlike capturing webex meetings in the Windows/Mac computer, there are more limitations to screen record a webex online meeting, conference call or webinar in the cloud. Firstly, if you're using webex free plan, you're unqualified to record webex meeting videos in the cloud. Upgrade to Webex Starter, Plus, Business plans or Enterprise plans to obtain the entrance qualification.
Moreover, you're unable to screen record meetings as a cohost unless the Webex version goes to version 42.12 and later. Keep in mind that the current Webex Events (classic) is no longer available for schedule webinars. You can still access any existing recordings of webinars scheduled with Events (classic).
Steps to Free Screen Capture Webex Meetings in the Cloud
Step 1. Click the Record icon and select the cloud option.
If you don't find the Record button, go to More... options to activate it. If you subscribe to Webex from your Service Provider, please direct questions about this feature to your Provider's customer support team.
Step 2. Click Record again.
Optionally: select your recording layouts if you want them to be different from your default preferences. Mix and match popular layouts like grid view, stage view, focus view, and focused content view to present users a more engaging meeting video.
Step 3. Click Stop to end your current webex meeting video recording. The recording will be saved to the cloud as MP4 format. The meeting host can access the recording and share them with the cohost or anyone else that needs it. The host also receives an email with all the details to share and play the recording. Generally, it will take up to 24 hours to receive the recording based on the recording file size and your network connection speed.
Part 3. How to Record a Webex Meeting without Permission/Notification
The Webex built-in screen recording feature is convenient and easy to use. Yet, it needs permisson and sends notification on Windows/Mac computer, and requires paid plan in the cloud. In case you're using a free plan and don't want suffering from permission or notification, try the professional meeting video recorder software - Winxvideo AI to free screen record a meeting video, a webinar or conference call or without compulsory permission, nor time limit. Both meeting audio or your microphone sound can be captured into video, as well.
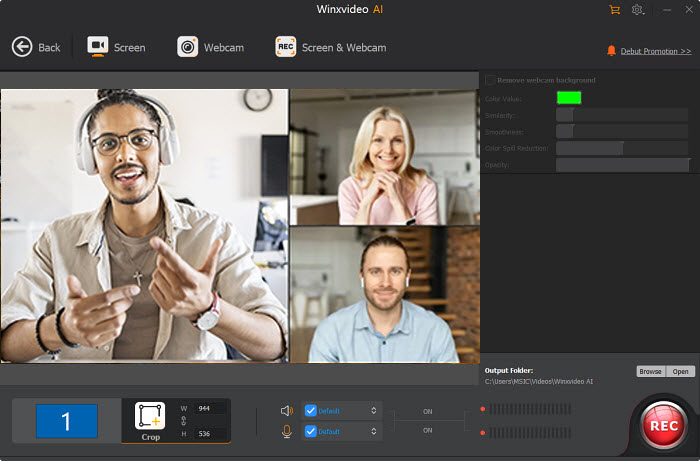
Certainly, this meeting screen recorder also makes picture-in-picture recording painless if you plan to capture screen and yourself presenting a powerpoint at the same time. Its "Screen & Webcam" mode is what you prefer. If you want to protect your privacy like your room, you can use its built-in Chroma Key feature to change your meeting recording background to virtual background.
 Free Download
 Free Download
Winxvideo AI is for PC, while Macxvideo AI (from our MacXDVD brand) is for macOS.
How to Capture Webex Video Meetings with Winxvideo AI?
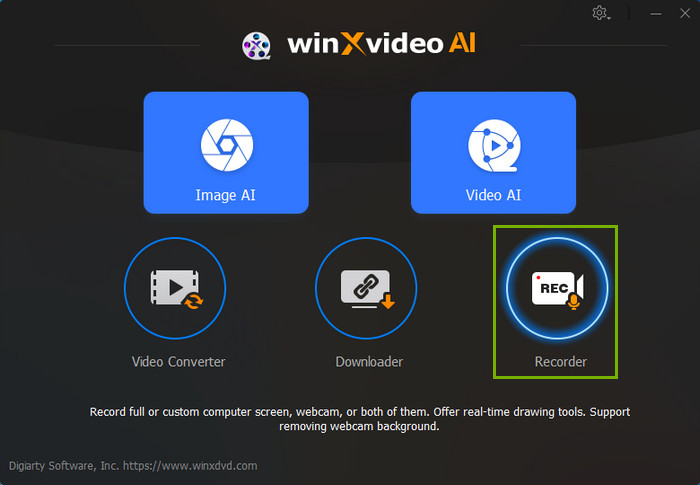
Step 1. Launch Winxvideo AI after installation and select Recorder on the main interface.
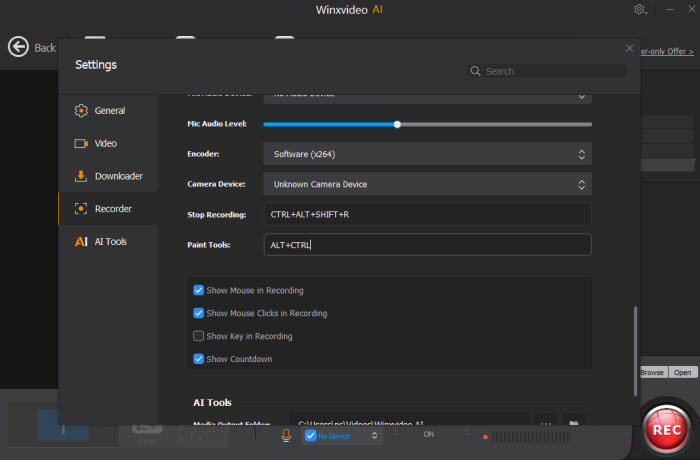
Note: tap the Setting icon on the top right corner of the UI and choose Recorder to adjust settings if needed. You're allowed to change recording quality, format, audio level/device, and know the shortcut for drawing (Ctrl+Alt+Shift+T).
Step 2. Tap Screen at the top menu. If you want to record webex meetings with yourself presenting a slideshow, choose "Screen & Webcam" instead.
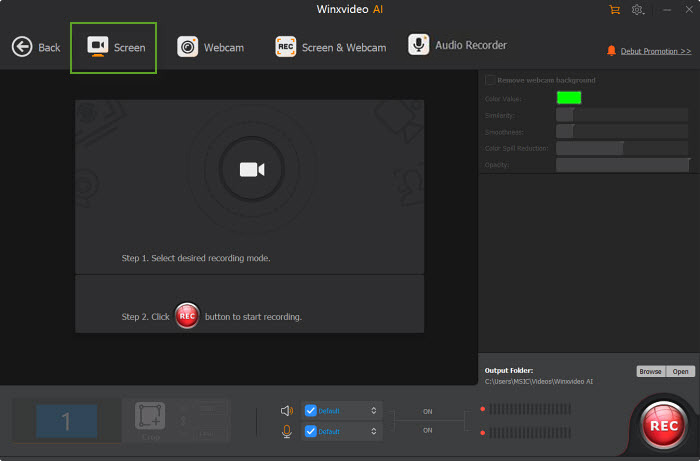
Step 3. The below "Crop" option is designed for you to freely choose recording area, full screen or partial screen.
Step 4. Enable audio device(s). Here you might need to record both system and microphone sound if you speak in your meeting, webinar or conference call.
Step 5. Click on the REC button to start screen recording meeting conversations. When everything is OK, click on the Stop button to end.
Generally, the default recording file format goes to MP4 on Windows PC and MOV on Mac. If you want other modern formats, you can go to settings option to change the output format to MKV, FLV AVI or TS based on your specific need.
In conclusion, implementing a user-friendly Webex meeting recording solution empowers your team to maximize productivity and knowledge retention. By capturing key decisions, brainstorming sessions, and presentations, you ensure everyone has access to valuable information, even after the meeting ends. Select a recording solution from the above to transform Webex meetings from fleeting interactions into enduring resources that drive collaboration and propel business success.


