Top 100 iTunes Errors and FAQs
The most complete guide on iTunes - with 100 Q&A, categorized in common iTunes errors, iTunes update, download, restore, sync errors, iTunes errors with music sync/edit problems, Apple ID and media manage issues.
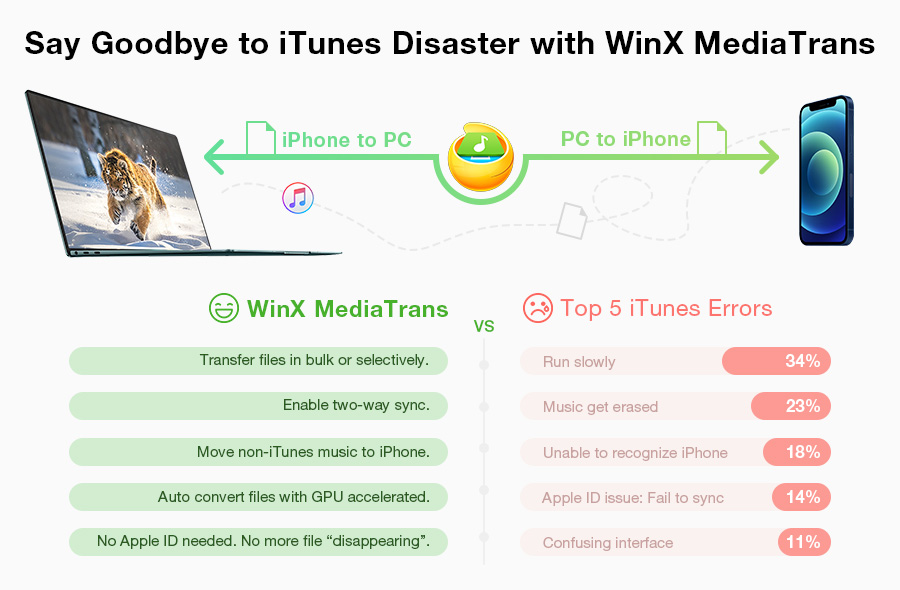
No More iTunes Errors! Manage, Sync and Transfer Files with WinX MediaTrans
WinX MediaTrans can manage and transfer your music, photos, videos, books, etc securely. It quickly connects your PC with iDevice, support two-way transfer without any data loss.
Part 1. Common iTunes Errors on Windows 10 or Other OS
While dealing with Apple iTunes, we often get stuck in various errors, such as, can't download iTunes, iTunes won't install on Windows 10, iTunes has stopped working, iTunes freezes, crashes or iTunes not responding, iTunes sync is slow or fails halfway, iTunes won't play, iTunes component missing, iTunes matching error, iTunes has an invalid signature, iTunes store is unable to process purchases, iTunes request server error, etc whatever OS we use. Below solutions will resolve iTunes problems related to download, installation, restore, sync and more. You can click the link below that will direct you to the specific part.
#1. Can't install iTunes on Windows 10. How can I fix this problem?
- Install iTunes in administrator mode.
- Disable Firewall.
- Disable or uninstall anti-virus software.
- Install Microsoft Visual C++ 2005 Service Pack 1 Redistributable Package MFC Security Update.
- Download the setup file directly off Apple's servers tailored for your version of Windows 10 instead of from apple.com. make sure to download the file fit for your version.
- iTunes 12.8.0 for Windows (32-bit): iTunesSetup.exe
- iTunes 12.8.0 for Windows (64-bit): iTunes6464Setup.exe
- iTunes 12.8.0 for Windows (64-bit – for older video cards): itunes64setup.exe - Remove Apple Software Update tool using Microsoft Installer Cleanup tool which should be installed in administrator mode.
- Download iTunes from Ninite - a package management system offering that lets users automatically install popular applications for Windows.
#2. Everytime I open iTunes, it says "iTunes has stopped working" and then crashes out.
This issue could happen when you try to open iTunes or access to iTunes Store. To solve it, first of all make sure you're using the latest version of iTunes. If not, download the newest copy. Then, try each fix below until you figure out it.
- Repair Apple DLL file: Find QTMovieWin.dll under C:\Program Files (x86)\Common Files\Apple\Apple Application Support, and then copy and paste it into location C:\Program Files (x86)\iTunes. There's a big chance to resolve your problem using this method.
- Repair Bonjour: Navigate to Control Panel > Add or Remove Programs > Bonjour > Change/Remove > Repair (Windows XP), or Programs and Features (later OS) > Bonjour > Change > Repair.
- Change preferences of iTunes: launch iTunes > Click on Edit > Preferences > Advanced > Reset Cache. Next, log out of iTunes Store and then back in again.
- Uninstall and reinstall iTunes: Ensure all those things including iTunes, Apple Software Update, Apple Mobile Device Support, iCloud (if there is), Bonjour (if there is), Apple Application Support 32-bit and Apple Application Support 64-bit are removed. Then, reboot computer and reinstall.
- Delete iAdCore.dll: this file can be found in C:\Program Files\iTunes (32-bit) or C:\Program Files (x86)\iTunes (64). Then repair iTunes following the similar steps for repairing Bonjour.
- Unplug iDevice: If error gets fixed after disconnection, you may need to update your iOS.
- Remove iTunes plug-ins: Go to C:\Documents and Settings\[your username]\Application Data\Apple Computer\iTunes\iTunes Plug-ins (Windows XP) or C:\Users\[your username]\App Data\Roaming\Apple Computer\iTunes\iTunes Plug-ins (Windows Vista and later). If you have files in this folder, move them to your desktop.
Check the complete solution to iTunes keeps crashing error
#3. iTunes won't open on my computer, is there a fix?
- Reboot computer and restart iTunes to have a try.
- Uninstall everything related to iTunes and reinstall iTunes.
- Press both Shift and Ctrl keys while opening iTunes to run it in safe mode.
- Configure firewall to allow iTunes to run on your computer.
- Click on Start menu, type firewall.cpl into the search field.
- When it appears in the search results list, click on it to open Windows Firewall window.
- Click on "Allow an app or feature through Windows Firewall" (for Windows 7 users) or "Allow an app or feature through Windows Firewall" (for Windows 8/10 users), and then hit "Change settings".
- Select iTunes for both private and public networks and Bonjour for Private networks only. If iTunes and Bonjour aren't listed, click "Allow another app" (for Windows 8 and 10 users) and "Allow another program" (for Windows 7 users).If you cannot see iTunes listed, click Browse and go to C:\Program Files\iTunes\. For Bonjour, click Browse and go to mDNSResponder (C:\Program Files\Bonjour\). Select one of the programs and click "Add" in the Add an App/Add a Program (Windows 10 and 8/ Windows 7 respectively).
- Click OK and close the firewall window.
- Disconnect your computer from the internet.
- Create a new user account for your Windows PC.
#4. iTunes keeps freezing every start on Windows 10.
Try following fixes one at a time:
- Reboot your computer, right-click on iTunes icon and choose "Run as administrator".
- Close iTunes, press Ctrl + Alt + Delete key and then choose Task Manager. Under the "Processes" tab, select the file APSDaemon.exe and click "End Process" button. Then close Task Manager and open iTunes to see if error is solved.
If it works, do what we tell you below to avoid doing the same process every time you restart computer: go to Run > enter msconfig > click Startup tab > uncheck "Apple Push" > hit on OK > reboot computer. - If there's no APSDaemon.exe file, remove SC files, and then restart computer and iTunes to have a try.
- Repair or reinstall QuickTime. To repair it, go to Control Panel > Programs and Features > click QuickTime > tap on Repair.
- Move one of iTunes preference folders to the desktop and see if the issue is gone. If it isn't, move it back and try another folder. Below are the locations for those folders:
C:\Users\username\AppData\Local\Apple Computer\iTunes
C:\Users\username\AppData\Roaming\Apple Computer\iTunes
For more details, click here.
#5. iTunes crashes every time I try to burn a playlist to CD.
This is an iTunes issue which can be fixed with ease.
- Firstly, exit iTunes.
- Go to /users/*/library/preferences/byhost/, and then delete all files containing iTunes.
- Re-open iTunes, and then it should burn playlists to CD.
#6. Why iTunes starts automatically at startup on Windows 10?
This issue probably has something to do with Plex Media Server. To solve this,
- Open iTunes, and then navigate to Preferences
- Click on Advanced tab, and then check "Share iTunes Library XML with other applications".
iTunes won't install on my PC. Error pops up saying my system isn't modified.
Fix 1: Remove iTunes and its related software components and then reinstall them again following guide http://support.apple.com/kb/HT1923. If this error persists, navigate to iTunes folder, right click on iTunes.exe setup file, and then select "Run as administrator".
Fix 2:
- Install iTunes as usual.
- Don't click "Finish" when you get the error message "iTunes errors occurred during installation before iTunes could be configured". Just leave it.
- Now navigate to your AppData directory C:\Users\[your username]\AppData\Local\Temp, and search for a file called iTunes64Setup.log or iTunes32Setup1850.log. Then open the log file and locate these key things as in example, "Executing: "C:\windows\system32\msiexec.exe" /i "C:\Users\[your username]\AppData\Local\Temp\IXP593.TMP\iTunes64.msi" INSTALL_SUPPORT_PACKAGES=1".
- Next, go to folder named IXP593.TMP where all the installation packages are saved. Now copy all of those files and paste them into a new folder.
- Once done, click "Finish" on the failed iTunes installer. Then, run iTunes64.msi or iTunes.msi, and now you should install iTunes successfully.
"There is a problem with Windows installer package" when installing iTunes on Windows 10.
When you are told that there's a problem with Windows installer package and a program required for this install to complete could not be run, you can simply unregister and re-register the Windows Installer to fix it.
- Click the Search or Cortana icon in the Windows 10 taskbar, type run, and then you'll see the Run command appear at the top of the list. Then just click on it.
- Next, type "msiexec /unregister" into the text field [DO NOT type quotation marks], and then click OK. It's normal if nothing appears after this operation.
- Back to Run, enter "msiexec /regserver" [DO NOT type quotation marks], and then click OK. Likewise, nothing will occur. But Microsoft Windows Installer service has been re-registered.
If the error hasn't been solved yet after this operation, remove all Apple programs and reinstall iTunes.
Error (-42037): "This copy of iTunes is corrupted or is not installed correctly" when trying to open iTunes on Mac.
Uninstall it and then reinstall to see if it can be fixed. Make sure that everything related to Apple is uninstalled, including iTunes, QuickTime, Bonjour, Apple Mobile Device Service, Apple Updater, etc. Check how to uninstall iTunes on Mac.
When uninstallation is completed, reboot your Mac. Then, go to Apple.com to download and install a proper iTunes copy.
I can't download iTunes for Windows 7 64-bit. It says it is incompatible.
Since you're using a 64 bit version of Windows, you should download the 64 bit version application to ensure full compatibility and stability. So first of all, check if you download the appropriate iTunes version.
● If not, uninstall your current iTunes version and then choose the right version to download.
● If you have the right version but still face this error, install Windows Installer Cleanup Utility to remove iTunes installation information. Below are the detailed steps.
- Open Windows Installer Cleanup Utility.
- Locate iTunes and click on the Remove button. Then, any corrupt or incomplete iTunes files, Bonjour and QuickTime will be removed off your computer. Note that your iTunes Store purchases or songs imported from CDs won't be affected during this process.
- After that, navigate to Apple.com, download the newest iTunes 64 bit version, and try to install it again.
Why iTunes won't let me download podcasts ever since the latest update?
If nothing happens when you click "Get" button on a podcast, here's a workaround - subscribe to podcast.
- Go to iTunes Store, and click on Podcast tab.
- Search for the podcast you want to download.
- Click on the podcast icon, and then subscribe to the podcast.
- Move to Library, and then you'll see two sub-tabs, My Episodes and Feed respectively.
- Click on the Feed tab where everything is hidden.
- You should see a list of episodes for subscribed podcast. On the far right you will see a cloud icon on each episode line.
- Click on the cloud icon to download episode to your computer.
If you already subscribe it, simply unsubscribe and re-subscribe. Make sure to delete the entire podcast from your feed after unsubscribing.
iTunes freezes after plugging in iPhone, how to fix it?
● For Mac users: go to Finder > Go > Library > Application Support > Sync Services, and then trash Sync Services.
● For Windows users: navigate to C:\User\your user name\AppData\Roaming\Apple Computer\SyncServices, and then click on Local folder, press Ctrl + X to cut it and then Ctrl + V to paste it to the desktop. Next, reboot computer and iTunes. Then, it should work well.
If you can't find SyncServices on Windows under the location mentioned above, you should
- Uninstall all software published by Apple.
- Go to C:\...\AppData\Roaming, and then rename the Apple Computer to donotuse_Apple Computer.
- Go to C:\Program Files XX and then rename any folders starting with Apple as in step 2.
- Download iTunes, right click on the exe setup file and select Run as administrator.
- Don't run iTunes as part of installation. (for example, uncheck the box where it says something like 'Open iTunes after installation').
- Open iTunes as administrator for the first time.
How can I stop iTunes from crashing on Mac?
It's possible to fix it by re-opening iTunes, rebooting Mac, or re-logining iTunes. But if crash still happens, try methods below.
- Re-download latest iTunes installer from Apple.com and then install it. But before that, make sure you've completely uninstalled iTunes and its components.
- Disconnect to the internet.
- Downgrade iTunes to previous version if the previous works flawlessly.
- Launch iTunes in safe mode (hold down Command and Option keys when starting iTunes).
After restoring from a backup all my songs are gone from my iPhone. How can I get them back?
The backup doesn't include your music and other media content like movies. The backup is designed to restore settings. So, your music should be stored on your computer. To get them on your iPhone, you will need to do as follows:
- Connect iPhone to computer via USB cable, and then open iTunes.
- Select your iPhone, and choose Music at the left-hand menu.
- Check Sync Music, and then select "Entire music library" or "Selected playlists, artists, albums, and genres" [Be aware that syncing an entire music library will erase the content in the "Music" app on your iPhone and replace it with the content of the iTunes library your synced it to.]
- If you choose the latter option, check the playlists you wish to sync to your iPhone.
- Hit Sync at the bottom to sync music to your iPhone right now.
Not enough free space is available on the iPhone when I try to restore iPhone from iTunes backup.
When you're told that there's no enough space or your backup is too big to restore, first of all check how much space is available: Settings > General > Storage & iCloud Usage > check used storage and available storage. If iPhone doesn't have enough space, try to free up space on iPhone until you release enough space.
Other solutions:
- Upgrade iTunes and iOS to the latest version.
- Restart computer and iOS.
- Change the setup of your security software.
How can I selectively restore content from an old backup in iTunes?
It's impossible to selectively restore content from iTunes backup to iOS device. Restore all or nothing. If you really need to do this, you can pay for some third-party programs.
"The iPhone cannot be synced. An unknown error occurred (-54)" when trying to sync iTunes to iPhone.
This error will pester you if a file on your computer or iPhone is locked. Simply clicking OK at the bottom of this error message will help you out and make sync continue in most cases. But if the iPhone still can't be synced, reboot your computer and iDevice. Moreover, make sure you're using the latest version of iTunes, the latest software updates for your iPhone, running iTunes in administrative mode, and have authorized your computer in iTunes.
If error persists, try methods below until you fix it.
Solution 1: Third-party security software can result in unsuccessful sync. So change your security software's setup to see if it is responsible for this error.
Solution 2: Since the media files in your iTunes library might be stored in several destinations, consolidate them into the iTunes Media folder and then try syncing again.
Solution 3: If you met this issue after updating to Windows 10, fix it through steps below.
- Open Windows Explorer, and then head to the Music folder from side menu.
- Then you should see iTunes folder. Just right click on it, choose Properties, and then uncheck the Read Only option under Attributes. Save your settings by clicking on OK at the bottom.
- Tick "Apply changes to this folder, subfolders and files" on the pop-up window, and then press OK.
- Afterwards, you should sync iPhone with iTunes successfully. If not, ensure that you have full control over the iTunes folder: right click iTunes folder > Properties > Security > Edit > full control and apply it.
Solution 4: Find out the content that causes this issue: Sync only a small amount of content at a time. Add more content until you see the error again. If the dubious content comes from iTunes Store, delete and re-download it or download it directly to your iOS; if it's from other sources, delete and re-import it from the original source.
iTunes stuck on "preparing to update" when I try to transfer music to iPhone. How can I fix this issue?
Fix 1: This error often pops up when there's a corrupted file. To make the sync run well, simply locate the culprit and exclude it from the to-be-synced list. During the sync process the middle top bar of iTunes shows what songs are being synced. You can tell what song is causing the hang by watching that bar.
Fix 2:
- Click the eject button in iTunes, and then confirm that when a popup asks you if you're sure. As long as there's no syncing icon on your iPhone at the top, this operation won't harm your device in any way.
- Disconnect your iPhone from computer, and then plug it into computer again and wait.
- After syncing or whatever iTunes wants to do, it will add the songs you were trying to transfer to iPhone automatically.
Part 2. iTunes Errors after iOS Update and Restore
If you’ve ever update and restore your iOS 15 or other versions, you may run into the iTunes error 54, 3194, etc. Reasons for these iTunes errors can be various. For example, it can be due to the Apple server, USB connection, software update, etc. Click the links below that will direct you to your desired part.
#1. iTunes Errors due to Apple server
iTunes error codes:
- iTunes error 17, iTunes Error 1638, iTunes Error 3014, iTunes Error 3000, iTunes Error 3002, iTunes Error 3004, iTunes Error 3013, iTunes Error 3014, iTunes Error 3015, iTunes Error 3194, iTunes Error 3200.
- "There was a problem downloading the software"
- "The device isn’t eligible for the requested build".
The above errors can be caused by your Apple's software update server. If you've ever run into the iTunes errors, you can follow the steps below and fix them correctly.
- Make sure your Mac or Windows is up-to-date.
- Update your iTunes to the latest version.
- Update or restore your device again.
- Make sure that your computer can communicate with the Apple software-update servers.
- Configure or temporarily uninstall security software.
- Make sure you have a stable internet connection. Bypass your internet router. Disconnect from your wired or wireless router and use an Ethernet cable to connect computer to your modem directly, restart your computer and modem, if you are using a router that isn’t made by Apple. Then update your iOS device again.
- Update iDevice with a different internet connection.
- Check your hosts file to make sure your computer can contact the update server.
- Check your third-party security software.
#2. iTunes Errors due to security software
iTunes error codes:
- Error 9
- Error 2, 4, 6, 1611
The above typical iTunes errors as a result of security softwareg. Check your third-party security software. Sometimes, the security software can lead to the above errors, and some other errors such as you cannnot sign in Apple ID, get an error "Verification failed: An unknown error occured", etc. To fix the error, you can check the steps below.
- Make sure the date, time, and time zone are set correctly on your computer.
- Log in to an admistrative user account instead of a guest account.
- Update your iTunes, Mac or PC to the latest version.
- Set up Windows Hello.
- Have one security software installed. Do not install more than one type security software.
#3. iTunes errors due to USB connection
iTunes error codes:
- iTunes Error 13, iTunes Error 1600, iTunes Error 1601, iTunes Error 1602, iTunes Error 1603, iTunes Error 1604, iTunes Error 1611, iTunes Error 1643-1650
- iTunes Error 2000, iTunes Error 2001, iTunes Error 2002,iTunes Error 2005, iTunes Error 2006, iTunes Error 2009,
- An error that includes "invalid response"
- error 0xe8000015, 0xe8000084, 0xe80090302, 0xe80090326, 0xe8000003, 0xe800001c, 0xe800002d, 0xe8000068, 0xe80000a
If you see one of the iTunes error code, this might be an issue with the USB cable connection to your device. If you have the problem with iTunes, you can check the conncetion between your device and computer. Be sure your iPhone is on the homescreen. And then try the steps below.
- Disconnect and reconnect your iPhone.
- Check if the cable connection has come unplugged or loose.
- Use the USB cable that came with your device, or try another Apple USB cable.
- Try another USB port on your computer.
- Try a USB port on another computer.
#4. iTunes errors due to Hardware
iTunes error codes:
- iTunes Error 1, iTunes Error 3,iTunes Error 11, iTunes Error 12, iTunes Error 13, iTunes Error 1
- iTunes Error 20, iTunes Error 21, iTunes Error 23, iTunes Error 26, iTunes Error 27, iTunes Error 28, iTunes Error 29, iTunes Error 34, iTunes Error 35, iTunes Error 36, iTunes Error 37, iTunes Error 40, iTunes Error 5
- iTunes Error 1002, iTunes Error 1004, iTunes Error 1011, iTunes Error 1012, iTunes Error 1014, iTunes Error 1667, iTunes Error 1669
- Error 53
If you see the following iTunes error code, it might be a hardware issue. You can follow the steps below and fix them correctly.
- Quit your iTunes and reopen it.
- Check your third-party security software.
- Make sure your USB cable, computer and network are reliable.
- Restore your device again.
- Make sure your software is updated.
#5. iTunes errors due to Software update
iTunes error codes:
- iTunes error 10
If you see the iTunes error 10, it might be your software is outdated. Try the steps below to update the software on your computer.
- On macOS 10.11 or later, please disconnect and reconnect your iDevice to your computer. Unlock your device if possible. When you see the message a software update is required to connect to your iOS device, please click install to download and install it so that you can restore and update your iDevice on your Mac.
- On Windows computer, you cna update to the latest version of iTunes.
#6. Other iTunes errors due to iOS backup and restore
- An update failed or Apple Pay not available alert for iOS update or restart
- iTunes could not back up the iPhone
- iTunes could not connect to this iPhone
- iTunes network connection timed out
- iTunes won’t recognize iPhone
- cannot connect to iTunes store
- iPad disabled cannot connect to iTunes
- iPhone not showing up in iTunes
- iTunes 0x (error)
- iTunes error 14
- iTunes error 9, 4005, 4013, 4014
Generally, you can try the steps first. Make sure your Mac is up to date. and have your latest version of iTunes installed on your PC computer.
Part 3. iTunes Error while Sync
Another kind of iTunes errors can be classified into the sync errors. Here are the most common problems when syncing with iTunes. You can click the links below and move to the desired part to solve the problem.
- #1. Why does iTunes sync take so long?
- #2. iTunes sync stuck at half way
- #3. Error 54, 5000, 69, 13010,13014, 50, 39, 0xe8000065
- #4. iTunes won’t sync with iPhone
- #5. iTunes crashes when syncing
- #6. iTunes cannot read the contents of the iPhone
- #7. iTunes CDB files damaged
- #8. iTunes Match wont sync
#1. Why does iTunes sync take so long? How to solve slow sync?
Sync process requires multiple steps. As usual, things get slow at step 6 or step 7 saying "Waiting for changes to be applied". This may be because iTunes is comparing the content to be synced with a database on your iOS device. The larger the database, the longer it takes.
To solve this problem, you'd better restore your device. iTunes sync speed will be accelerated effectively through wiping an iOS device and re-syncing all my content.
#2. iTunes sync stuck at half way, how to fix it?
Uninstall all iTunes related software, and then reinstall iTunes (make sure you're using the latest version of iTunes). If issue persists, it is probably the result of a corrupted song purchased from iTunes or a hardware problem with your iOS device.
Fix 1: Look through your purchased songs with a cloud icon, and then delete them before syncing.
Fix 2: Choose "Manually manage music and videos" and drag your music across to your device.
Fix 3: Check your iOS device with diagnostics mode following turingtest2's instructions under a thread.
#3. Error 54, 5000, 69, 13010,13014, 50, 39, 0xe8000065
If you cannot sync music from iTunes or Finder on your Mac to your iPhone or other iDevice, you can follow the steps below.
- Update your software.
- Consolidate the media files in your music library and make sure to store your media files in one location
- Check if there is some problem with the third-party security software. Then change your security software's setup and try to sync file again.
The most encountered one is error -54 on Windows (10) saying "The iPhone cannot be synced. An unknown error occurred (-54)". Fix this iPhone iTunes sync problem in this way:
Open Windows Explorer -> Open up Music folder -> Right click the iTunes folder to tap Properties -> Uncheck the Read-only in General window.
Kindly to notice that it's perfectly safe to authorize the computer in iTunes, and run iTunes as administrator. To turn off "Show Apple Music" on iPhone/iTunes and even turn off Music at iCloud may get the iTunes music syncing issues through.
Part 4. iTunes error during Update/Install/download
There are still some other iTunes problems due to update, install and download. Check the specific problems you may meet.
- #1. iTunes installer has insufficient privileges
- #2. Apple Mobile Device Service missing
- #3. iPhone won't update on iTunes
- #4. iTunes installer error
- #5. iTunes error 2, 7, 10, 23, 126, 400, 1001, 1667, 1671, 3201, 3253, 3259, 3600, 4000, 8003, 9006, 45075, 3244
#1. iTunes installer has insufficient privileges
This is typcially on Windows PC. Try the following steps to fix the error.
- Download the latest iTunes installer.
- Rt. click the installer, select 'Properties'.
- Click on 'Unblock', then click Apply, then OK.
- Click on the Windows icon and type 'uac' (no quotes).
- Click on 'Change User Account Control Settings'.
- Move the slider down to 'Never Notify' (NOTE: This will require a reboot).
- Rt. click the installer and select 'Run as administrator' from the context menu.
- Let the installer complete (it should now).
- Open 'Change User Account Control Settings'.
- Return the slider to the position you found it on (likely 2nd from the top).
#2. Apple Mobile Device Service missing
Follow these steps to reinstall the Apple Mobile Device USB driver.
- Disconnect your device from the computer.
- Reconnect your device. If iTunes opens, close it.
- Press the Windows and R key on your keyboard to open the Run command.
- In the Run window, enter: %ProgramFiles%\Common Files\Apple\Mobile Device Support\Drivers
- Click OK.
- Right-click on the usbaapl64.inf or usbaapl.inf file and select Install.
#3. iPhone won't update on iTunes
If you cannot update your iPhone on iTunes, it might be because your have not enough storage space on your iPhone, or the download takes a long time, unable to reach the update server, or incomplete update. You can follow the steps below.
- Make sure you have enought space. Go to settings > General > Storage to remove contents or apps on your device.
- Improve the speed of teh download, avoid downloading other contents or apps and use a Wi-Fi if possible.
- Update your device using another network. If the error still happens, remove the update and update with multiple networks.
- Keep your iPhone connected to a power source. Turn on the iPhone to let the update or restore complete.
#4. iTunes Install Error
If you cannot install iTunes for Windows, you can learn what to do to fix the error.
- Make sure you are logged in to your computer as an administrator.
- Install the latest Windows updates.
- Download the latest version of iTunes for your PC.
- Repair iTunes.
- Remove components left from a previous installation.
- Disable conflicting software such as the third-party security software.
- Restart your windows computer.
Part 5. Common iTunes Errors related to Apple ID
Fixing Apple ID account errors is a crucial first step for using both iTunes and iDevices, especially for purchasing and file streaming. Go get the answers of how to delete an Apple account or buying history, unlock Apple ID, reset password, merge iTunes Store account, etc.
#1. My Apple ID is disabled! What do I do to unlock it?
1) Apple ID is disabled for security reasons
If you Apple account is locked for security reasons (with "security" alerts), you can reactive it through iforgot.apple.com, or using two-step verification which requires a recovery key and trusted device, or using two-factor authentication with your registered phone number.
2) Apple ID is locked for other reasons
If your Apple ID is disabled for other reasons and there is no help guide online, just contact Apple support team for help.
#2. How do I delete an old Apple ID account permanently?
How to delete an Apple account from iPhone?
1) Go find the "Settings" icon on your iPhone and click to get in.
2) Scroll down to click "iTunes & App Store".
3) Tap the Apple ID with your email address and choose "Sign Out".
The steps above can only help you to change account. To delete an account permanently, you need to delete all associated email addresses from appleid.apple.com and contact Apple support of your region.
How can I remove Apple ID from iTunes?
1) Open iTunes on your PC/Mac.
2) Click "Account" -> "Authorizations" -> "Deauthorize this computer" -> enter your password -> click "Deauthorize".
3) Move to "App Store" -> "iTunes in the Cloud" -> "Manage devices" -> Tap "Remove" button of any devices on the list -> "Done".
#3. Forget Apple account password. How do I reset Apple ID password for iTunes, App Store and iCloud?
If you forget your Apple ID password:
1) Turn on two-factor authentication on your iPhone (10.3 or later) first by going to the "Settings" -> your name -> "Password & Security" -> turn on.
2) Then back to "Password & Security" -> "Change Password".
If you are signed in already:
1) Go to Apple ID iforgot page (https://iforgot.apple.com/password/verify/appleid) and enter your Apple ID (email).
2) Then type the code in the image and write down your phone number to continue.
3) There are two options for you to choose to reset Apple ID password: "Reset from another device" or "Use trusted phone number". The first one enables you to reset your password on iPhone while the second requires account recovery.
#4. Is it possible to merge two iTunes Store accounts so we can share apps and other purchases?
A: Firstly, merging two iTunes Store accounts is not possible and Apple doesn't provide an official effective way. But there are workarounds to share apps and purchases:
1) Use home sharing, which allows you to share iTunes purchases under the same home network. How to set home sharing >>
2) Use a single one password for two Apple ID accounts, which saves you a little trouble about remembering different IDs and passwords when using shared apps.
#5. How to stop Apple ID verification required when installing free apps on iPhone?
1. Go to "Settings", find "iTunes & App Store", click in and tap your Apple ID item.
2. Choose "View Apple ID" from the pop up window.
3. Change your payment type to "None" under "Payment Information". If you can't see "None" option, close family sharing and try again.
#6. How do I stop family sharing?
1. To remove all family members and stop family sharing, you must be the organizer.
2. Then go to "Settings" on your iPhone -> click your name -> tap "Family Sharing" -> choose to remove any name to stop family sharing.
How do I unlock my iTunes account when my old e-mail is unavailable?
1. Try your best to recollect the password of your old email, such as by answering the security questions, to unlock the account.
2. Try contacting Apple support online or just call them, provide a list of your purchases to ask for help resetting the email address for your iTunes account.
3. Don't ever register your Apple account with work emails and get your Apple account an extra free email to avoid such circumstances.
Is there any way to buy content from another country's iTunes?
A: To buy content from other countries' iTunes, you need to first change your iTunes Store/App Store region on iDevice or computer. Follow the next steps to change iTunes Store region on iPhone:
1) Click "Settings" on iPhone, followed by choosing your name and selecting "iTunes & App Store".
2) Tap the "Apple ID" option and click "View Apple ID". You might be asked to sign in with your Apple ID and password.
3) Select the place you are at under "Country/Region" -> "Agree" -> choose your payment method -> fill out payment info and billing address -> "Next" and done.
How do I add money to my iTunes account?
Go to your account settings by tapping on your email on the bottom on the main screen of the App Store or iTunes Store, and then:
● Add money to iTunes account from credit card by using the built-in camera or entering the code on the back of the card. Or you can just scroll down and click on redeem to redeem an iTunes gift card. When you go to check out or purchase an item, it will automatically get debited from your credit card, so there is no need to "add money."
● Add money to iTunes account with debit card by iTunes & App Store -> Apple ID -> View Apple ID -> Add Money -> Select a payment type -> debit card -> Next
iTunes Pass can also help add money to iTunes account in Apple stores. Create an iTunes Pass if you don't have one yet.
How to delete purchased App store history?
First you should know there is no way to permanently delete your iTunes Store, App Store or iBooks Store purchase history. But you can choose to hide the purchases and make it invisible.
1. Hide purchase history on iPhone: go to "App Store" -> Updates -> Purchased -> All -> scroll to the app you want to hide -> swipe left -> click "Hide". Hiding apps is only possible if you use Family sharing.
2. Hide purchase history on iTunes (12) on PC: Open iTunes and sign in -> move to "App Store" and find "Purchased" -> choose "Apps" and click "All" -> hover the mouse to the app you want to delete and click the "X" button in the top left hand corner -> confirm the pop-up box of "Are you sure you want to hide this purchase?" -> done. You are also allowed to hide Books and Audiobooks.
Part 6. iTunes errors with music, video, podcasts, etc
#1. iTunes Errors on Music Syncing, Playing, Adding/Deleting etc.
iTunes boasts its powerful ability to manage music files but happens to produce many errors. The most common problems when syncing, playing, adding/deleting and editing (Apple Music) songs, playlists, ringtones in iTunes library have been listed and answered here.
Why won't iTunes sync songs/playlists to iPod?
1. Because iTunes syncing will be unavailable when you get up-to-date contents with iCloud or other services, so you should turn off iCloud Music Library if you're using an iPod Touch. Open Settings > Music > iCloud Music Library and switch it off.
2. Select the iPod in iTunes and move to Music tab from the Settings list which is located at the left side of the iTunes window.
3. Check Sync Music. Enable "Entire music library" and click Apply to sync all music in iTunes library to iPod.
Some songs in iTunes are greyed out, unable to play and sync. Why?
Fix 1: If you have logged in iTunes, go to Account > Sign Out and sign in again.
Fix 2: Go to playlist. Right-click greyed out songs and select "Check Selection".
Fix 3: If the song you had purchased in iTunes is greyed out, try to re-download it.
Remove the song from iTunes library. Go to iTunes Store. Click Account and select Purchased from drop-down list. Find the song and download it back.
Fix 4: Try to re-authorize your computer in iTunes.
1. De-authorize
Click Account > Authorizations > De-authorize This Computer > Sign Out.
2. Re-authorize
Restart computer. Go to Account > Sign In > Authorizations > Authorize This Computer.
Why dose iTunes sync unchecked songs to my iPhone? How can I fix it?
Fix 1: Connect iPhone with iTunes. Select the iPhone in iTunes and move to "Music" tab. Uncheck "Sync Music". Check music on your iPhone. Expect the unchecked songs, other songs have been removed. Manually delete the unchecked songs from iPhone. Back to iTunes and check "Sync Music" again. The syncing will be correct without unchecked songs.
Fix 2: If you're using Apple Music, it will get access to all songs in iTunes library. Open Apple Music app on iPhone. Tap My Music on the bottom and select the menu below Recently Added. Now turn on Only Downloaded Music.
When I sync my iPhone, iTunes keeps syncing same songs everytime. Is there a way to solve this problem?
Fix 1: Open iTunes > Edit > Preferences > Devices > check Prevent iPods, iPhones, and iPads from syncing automatically.
Fix 2: Select all songs in iTunes library and right click. Hit "Get Info" and then check "Use work and movement" option under Details tab. Next, make the "work" field blank. Click OK.
After the changes are applied to iTunes library, select all songs and right click to get access to "Get Info". Uncheck "Use work and movement" and hit OK to apply changes. The same songs will not be re-synced again next time.
I have added some new songs to my iTunes library and tried to sync it to my iPhone but it dosen't work.
A: Go to Settings on your iPhone. Click Music and check whether "iCloud Music Library" is turned off. If yes, connect iPhone with iTunes. Click the iPhone in iTunes, select "Music" tab and uncheck "Sync Music" option. Hit "Apply". When a pop up gives asking you to remove all contents, select Yes. After that, re-check "Sync Music" and choose "Entire music library". Hit "Apply" and everything will be synced to your iPhone, including new music in iTunes library.
Why can't I add .mp3 music files from a folder on my PC to iTunes?
To fix it, we should check if the MP3 files are good at first. Play MP3 files on QuickTime or other 3rd party players. If not playing well, try to repair/decrypt MP3 files or convert MP3 to M4A which is fully compatible with iTunes. After this process succeeds, drag MP3 files into an empty playlist in iTunes. Now, you can find the MP3 files are added to the playlist in iTunes.
How can I transfer songs (MP3/AAC) from iTunes to computer?
Open iTunes > Edit > Preferences > Advanced > iTunes Media folder location > Change and select a new folder.
If you want to move existing files of original folder, open iTunes > File > Library > Organize Library > Consolidate file > OK.
Case 2. Move songs from iTunes to new computer.
1. Consolidate iTunes library. Open iTunes > Library > Organize Library > Consolidate files > OK.2. Find iTunes media folder location. Open iTunes > Edit > Preferences > Advanced > iTunes Media folder location.
3. Back up iTunes library to an external hard drive. Connect external hard drive with computer. Open iTunes folder and drag iTunes folder to this external hard drive.
4. Install iTunes latest version on new computer.
5. Delete iTunes folder in the new computer.
6. Drag the copied iTunes folder from external hard drive to Music folder on new computer.
Now, open iTunes and all music is transferred from older computer to the new one.
How do I transfer my music from Google Play Music to my iTunes?
1. Get songs from Google Play Music to computer.
Open Google Play Music page on browser. Search the song/album and click play icon next to song/album title. On the bottom of the page, media player pops up. Click vertical three dots and select Buy. When you're asked to select a download location, choose an empty folder.
2. Add Songs from Computer to iTunes.
3. Open iTunes > File > Add File to Library to move Google Play Music from the folder to iTunes.
How do I download music off YouTube to iTunes?
To get music off YouTube, you should get help from a YouTube to MP3 converter, which can be a web convert (youtube-mp3.org), a plug-in for browser (YouTube Mp3) or desktop software (WinX HD Video Converter Deluxe). Considering safety and stability, it is suggested to use desktop software. Follow the steps to convert YouTube to MP3 via WinX HD Video Converter Deluxe.
Open WinX HD Video Converter Deluxe > click YouTube URL button > copy YouTube music URL to address bar in pop-up window in WinX HD Video Converter Deluxe > click Analyze > select output version and check Auto convert > OK > select MP3 as output format > set destination folder > Run.
2. Add MP3 file to iTunes.
Open iTunes > File > Add File to Library to add the converted YouTube music file to iTunes.
How can I copy iTunes music to external hard drive?
● For Mac: Finder > username >Music
● For Windows Vista or later \User\username\Music\
● For Windows XP: \Documents and Settings\username\My Documents\My Music\
If the iTunes folder isn't in the default location, Go to iTunes > Edit > Preferences > Advanced and the location will be shown in the box under iTunes Media folder location. And, please check Copy files to iTunes Media Folder when adding to library to make any music will be saved in the folder.
2. Consolidate files.
Go to File > Library > Organize Library and check Consolidate files.
3. Copy iTunes folder to external hard drive.
Connect external hard drive with your computer. Copy and paste the iTunes folder to external HD.
How do I sync iTunes lossless tracks to iPhone/iPod with less memory intensive format?
Connect your device with iTunes. Select the device in iTunes and click Summary. Move to Options panel and check "Convert higher bit rate songs to 256 kbps AAC". You can change 256 kbps to 192 or 128 kbps. After that, iTunes will automatically convert lossless tracks when syncing to your iPhone or iPod.
I want to burn MP3 CDs from music on iTunes. How should I do?
2. Add songs to this playlist. Up to 150 songs can be accepted depending on the capacity of a MP3 CD.
3. Insert a blank CD into CD-drive.
4. Back to iTunes and select the playlist you just created. Click File > Burn Playlist to disc. Burn Settings window pops up. Select MP3 CD as disc format and click Burn.
Several minutes later, you can get a CD with iTunes songs. Also, you can cancel the burning at any time by clicking "X" next to the progress bar.
Why dose iTunes change the names of music files?
iTunes won't play my music. Why and how can I make songs playable?
Make sure that the speakers you're using are in a good condition.
● If there are built-in speakers, turn on volume control at in iTunes and computer's volume.
● If there are powered speakers, make sure the speakers are properly connected to your computer and the volume isn't turned down.
● iTunes only allows you to play songs on up to 5 authorized computer so that you can't play songs on the sixth computer unless you deauthorize one of the authorized computers.
● If you want to play purchased music in a shared library or playlist, you must get an authorized computer by the person who is sharing the song or log in with that person's ID and password.
Some songs found online instead of purchased iTunes Store may not be played because the music format is incompatible format. If so, convert the format with iTunes.
1. Open iTunes > Edit > Preferences > General > Import Settings
2. Select one format (AAC Encoder, AIFF Encoder, Apple Lossless Encoder, MP3 Encoder, WAV Encoder) and click OK.
3. Select one or more songs in iTunes. File > Convert > Create Format Version.
How can I stop iTunes auto-playing when plugging iPhone into my car?
Fix 2: Force quite music app.
Double click iPhone home button to launch multitasking screen. Find Music app and flick it up to shut down it.
Fix 3: Turn off Cellular Data for music streaming.
Open Settings on iPhone > Music > Cellular Data > Off.
Fix 4: Delete iTunes music from iPhone.
Open Settings on iPhone > General > Storage & iCloud Usage > Manage Storage > Music > Edit > All Songs and press Delete. The deleted songs can be downloaded again from iTunes later.
How can I delete music files in iTunes?
Open iTunes. Go to Music menu and select Songs on the left sidebar to show all songs in iTunes library. Right click one song and select Delete from Library. Click Delete song.
2. Delete playlists from iTunes.
If you want to remove one playlist from iTunes, right click the playlist and select Delete Playlist > Delete. It just deletes the playlist but music files are still kept in iTunes library.
I got some duplicate songs in iTunes. How can I find and remove them?
Open iTunes. Go to Music menu and select Songs on left sidebar. Click File > Library > Show Duplicate Items.
2. Delete duplicate songs from iTunes library.
By default, duplicate songs will be sorted by name. You can also sort them by Artist, Album or Genre. After sorting, right click the duplicate song and select Delete from Library. A pop-up will appear asking if you are sure you want to delete the song, click Delete Song.
I can't delete purchased music in iTunes. Why?
1. Open iTunes > Account > Sign In and log in your Apple ID which is used to purchase music.
2. Click Account > Purchased. Go to Music menu and you can sell all purchased songs are listed.
3. Find the song you want to hide and move your mouse on its cover. After the x icon appears in the upper-left corner, click it. And your song will be hidden.
Deleted songs on iPhone keep re-appearing after syncing with iTunes.
2. Delete songs you don't want from iTunes library. If songs are in a playlist, you'd better delete the whole playlist in iTunes.
3. Open iTunes > Edit > Preferences > Devices > check "Prevent iPods, iPhones, and iPads from syncing automatically".
4. Connect iPhone with iTunes. Click iPhone in iTunes and select Summary. Move to Options panel and check Sync only checked songs and videos.
5. Click Music > Sync Music > check Selected playlists, artists, albums and genres.
How can I transfer Apple Music songs from iPhone to Mac
2. Open Settings on iPhone > Music > turn on Show Apple Music and iCloud Music Library.
3. Click Keep Music once you're asked for keeping music or not to add Apple Music songs from iPhone to iCloud Music Library.
4. Open iTunes on Mac. Choose iTunes > Preferences > General and check Show Apple Music Features and iCloud Music Library > OK.
5. If you can't see Apple Music songs on your Mac, open iTunes > File > Library > Update iCloud Music Library.
Apple Music not working in iTunes. How can I fix it?
1. Restart your computer.
2. Sign out your Apple ID in iTunes
3. Uninstall iTunes and reinstall the latest version of iTunes. During installation, please disable antivirus software.
4. Sign in your Apple ID in the reinstalled iTunes.
If Apple Music is still not working, try to change DNS on your computer.
On Windows:
Find Network and Internet from Control Panel > Network and Sharing Center > Change Adapter Settings > right click Local Area Connection/Wireless Network Connection > Properties > select Internet Protocol Version 4/6 (TCP/IPv4 or TCP/IPv6) > Properties > change the Preferred DNS server as 199.85.127.10 under Use the following DNS server addresses > OK.
On Mac:
System Preferences > Network > select Wi-Fi or Ethernet > Advanced > DNS > click + button and enter the number 199.85.127.10 >OK.
How do I free make ringtone out of songs in iTunes?
iPhone only accepts .m4r music clip as ringtone. So it's necessary to rename the M4A into M4R directly on the computer. After the renaming, iTunes Tones Library would show it here. Then it's time to sync the self-made ringtone to iPhone.
Why my iPod Nano won't sync with songs downloaded from Apple Music?
iTunes-made (30 seconds long) ringtone won't show up in Tones Library. What's the problem?
How can I transfer ringtones from iTunes to my iPhone easily?
Connect your iPhone to computer via USB cable to have it recognized by iTunes;
Click to go to "Tones" section, check the box for "Sync Tones" and then choose "All tones" t or "Selected tones" according to your needs. Finally tap "Sync" button in the bottom line to transfer iTunes ringtones to iPhone at once. After sycning, the target ringtone files will appear on your phone automatically.
I'm getting a new phone. And I wonder how to get ringtones from my old iPhone (6) to new iPhone (8)?
How do I export iTunes library to an external hard drive or USB flash drive?
Default location for iTunes Media folder (viewable and changeable at iTunes Advanced Preferences):
Mac OS X: Finder\ username\Music\
Windows XP: \Documents and Settings\username\My Documents\My Music\
Windows Vista: \Users\username\My Music\
Windows 7/8/10: \Users\username\Music\
How do I move the whole iTunes library to a new computer?
1) Do iTunes library moving wireleessly via Windows/Mac Migration Assiatant between the same system or not: https://support.apple.com/en-am/HT204087
2) Finish iTunes library transferring with the aid of external hard driver/USB: https://support.apple.com/en-am/HT204318
Can't add or edit Smart Playlist in iTunes (12). How to solve the menus not workinge error?
How can I edit music info for multiple tracks at once?
2. Click Songs or a playlist on the left sidebar in iTunes window and then you can see all songs in iTunes library or the selected playlist.
3. Highlight songs you want to edit info and right click. A message pops up asking if you're sure to edit information for multiple items. Click Edit Items.
4. Now you can modify the information including artist, album, composer, genre etc, for all selected songs.
#2. Top 10 Questions on iTunes Podcast Submit/Download/Transfer etc.
Find brief guides below on how to create, submit, upload podcast files into iTunes (Store), along with a couple of techniques and workarounds for popular iTunes podcast errors regarding downloading, playing, subscribing and transferring.
How to subscribe iTunes Podcast and how to download a podcast in iTunes?
Open and log in iTunes with your Apple ID, choose "Podcasts" under the menu at top left corner or just enter "Ctrl + 4"keyboard shortcut to access podcast panel, where you can browse podcasts of various categories at iTunes Store. When you click to move into the detail page of a certain one, just click "Subscribe" button in the left to subscribe the podcast. A list of podcast pieces are listed right near the button. To download any single episode, just press the tiny "Get" button.
How do I create, make a podcast of my own and upload it to iTunes?
So, record your podcast of a theme with related equipments and software, do the post-producing editing if possible, and then create an RSS feed to host your self-made podcast on WordPress, Blogger or so, whose URL is absolutely what you can submit to iTunes Store via Podcast Connect by clicking "Submit a Podcast"at its right area of store.
Why my iTunes 12.x won't download podcast at all on my Windows 10 (64-bit) computer?
Many users are complaining "download all podcasts option is missing at iTunes 12.6". Well, try the workaround to make it up:
Go to Podcasts -> subscribe podcasts at store -> click Library -> click the podcast you'd like to download, select Feed -> check one episode and Ctrl + A to choose all (or Ctrl + Shift to choose multiple ones) -> right click to choose "Download Episode", then all of the chosen podcasts will be downloaded automatically to your iTunes.
Note: Generally, iTunes can download all podcasts you choose with no limit. But "Podcast Settings" provides option to customize "Limit Episodes", confining the number of podcast episodes to download at a time, like 10 most recent and 1 day (subscribed podcasts).
Help! The podcasts won't play in my iTunes. What's the problem and what should I do?
My podcast artwork/image is not showing up (correctly) in iTunes. How to make it visible?
File size: 1400x1400px ~ 3000x3000 px (500kb at most);
File format: JPEG or PNG in RGB color space.
If a standard podcast thumbnail cannot display in iTunes, you can try to rename and upload it to iTunes again, deleted your podcast episodes in iTunes and unsubscribed from my podcast. Clearing iTunes cache is also an effective solution at times. Surprisingly, many users even claim that they finally see the artwork appearing after waiting overnight or several days.
What should I do when iTunes is "unable to download podcast" after iOS upgrade?
What's the reason for podcast not syncing (properly) between iPhone and iTunes?
- Upgrade iTunes to the newest version.
- Check "Sync playback information across devices" and "Sync podcast subscription and settings" at iTunes Store Preferences under Edit drop-down menu.
- Put a tick at Sync Podcasts check box in iPhone iTunes, select the podcasts you want to sync, and then click "Sync."
For iOS 7 users only: Since iOS 7 brings about some podcasts not syncing errors itself, the additional proposal is to reset podcast subscription settings in iTunes.
How do I get my iTunes podcasts to play consecutively in order, like "from Newest to Oldest"?
Not long ago, "iTunes 12.6.0.95 do not play consecutively" is a new bug, which can be settled by creating a playlist to play each podcast consecutively from order like oldest to newest. And Apple Support said they would try and fix this problem in latter updates.
100% CPU usage with high temp when to refresh, download or listen to podcast in iTunes on Mac. What am I supposed to do?
Why do some of my podcasts disappeared from my iTunes library? Can I get it back?
To start with, you should know that iTunes podcast library features deleting episodes that have been played in 24 hours if you didn't change the default setting of "Delete Played Episodes (On)".
Another case is iTunes wiped out podcasts you've downloaded but not listened to or listened with different settings. It seems to be a trouble brought by iTunes 11(.1) & iOS 7, which can be fixed by uninstall and set up an elder or the latest version. Still, many forum commenters suggest to uncheck Sync podcast subscriptions and playback option(s) under Edit -> Preferences -> Store.
Unfortunately, the gone podcast files will never come back.
#3. iTunes Errors and Solutions in Regards to Video, DRM, eBook, Photo, etc.
This part provides solutions for some intractable iTunes (DRM) video playing/converting/syncing problems, as well as iTunes eBooks and photo transfer issues. Check answers for how to convert iTunes M4V to non-DRM MP4 or other formats, how to sync iTunes movies from PC to Mac, how to add photos from PC to iPhone without data loss, etc. below.
How to convert iTunes DRM M4V to non-DRM MP4 without quality loss?
The purchased iTunes movies are always DRM-protected and the video format is M4V. If you'd like to play iTunes DRM M4V video on other devices like Android, you need to do two things: turn iTunes DRM M4V to non-DRM file and convert it to MP4 or other desired formats. You need a professional tool to accomplish this. Here take WinX MediaTrans as an example.
Step 1: Download, install and launch WinX MediaTrans and connect your iPhone with computer via USB cable. Click "Video Manager" button.
Step 2: Select the iTunes DRM M4V files you'd like to convert to MP4 and click "Export" to offload them to computer.
Step 3: In the pop-up window, click "Decode" and you'll then get DRM-free MP4 files stored onto computer.
(Disclaimer: We do not advocate removing DRM for any commercial purpose since it's illegal. Please abide by the copyright laws in your country.)
How to play iTunes protected M4V files on Windows 10? / VLC can't play iTunes M4V movie files
Can't play M4V files on Windows (10) computer? Want to know what M4V player you can use to play iTunes protected M4V files? Normally, iTunes protected M4V movies/videos can only be recognized and played by Apple iTunes and QuickTime Player with authorization. The popular VLC also can't resolve this, since VLC doesn't support M4V format, let alone protected M4V file. Try to turn iTunes protected M4V file into DRM-free with WinX MediaTrans and then it will not be a problem to play iTunes M4V on Windows 10. Good news is WinX MediaTrans can not only unlock M4V DRM but also convert it to MP4, one of the most compatible video formats.
You may also be interested in: how to solve when iTunes won't play HD movies >>
iTunes video is encrypted. How can I convert iTunes video to other formats?
You cannot watch purchased iTunes movies/TV shows on home HDTV directly since they are encrypted M4V files. Though converting iTunes encrypted video isn't an easy task, but still can achieve in some ways.
1) Some people may try screen capture method but result in laggy video and muddy audio, which is a bad experience.
2) Spend more than $50 for some so-called programs like Noteburner to remove the encryption, which turns out single-functioned and doesn't worth the money.
3) Switch to a good multi-functional yet inexpensive tool to help you kill two birds with one stone, namely, convert protected iTunes video to regular MP4. Top recommended is WinX MediaTrans.
Why can't I transfer some videos to iTunes? / Why can't I add MP4 to iTunes library?
First, check the properties of the movies you want to add to iTunes to sync onto iPad/iPhone to see if the videos are "read-only" files, if so, untick that box and then drag them to the iTunes library.
Second, the movies have to be in the correct format. Please make sure the videos formats you are gonna add are supported by iTunes. iTunes compatible video formats are MP4, MOV, M4V. If not, use a free video converter to convert video to MP4 first.
Third, even if the video is in MP4 format, please make sure it's in the right codec. iTunes only supports few video and audio codec like MPEG-4 video codec and AAC audio codec; H.264 video codec and AAC audio codec. If the MP4 video is encoded with iTunes unsupported video or audio codec, iTunes will not add and play it.
How to upload iTunes videos to YouTube or Facebook?
One thing needs to make clear first. YouTube supported formats are MPEG4, MP4, FLV, Facebook supported formats are MP4, MOV, AVI, FLV. iTunes videos downloaded from iTunes Store are always in M4V format with DRM.
1) If the iTunes video is with no DRM, utilize an efficient video converter to convert iTunes video to the above mentioned YouTube/Facebook compatible format.
2) If the iTunes video is with DRM, then you may refer to the detailed answer of the first question in this category "How to convert iTunes DRM M4V to non-DRM MP4?" to get solution.
Then you can log in your YouTube or Facebook account to upload iTunes videos. You may also read best video size for YouTube uploading.
How can I burn iTunes video files to DVD?
Please make sure you have a DVD burning program (like free WinX DVD Author) that accepts iTunes downloads at hand and the iTunes video files are not protected.
1) For unprotected iTunes videos files: Download, install and launch WinX DVD Author and insert a blank DVD disc to DVD-ROM --> Select and add iTunes video files into the program --> Start converting iTunes video files to DVD.
2) In regard to iTunes video purchases with protection: Remove DRM from the M4V files first with WinX MediaTrans (refer Q1) --> Use free WinX DVD Author to burn them to DVD in a few clicks.
Detailed guide, please refer: https://www.winxdvd.com/resource/convert-m4v-to-dvd.htm
How to delete duplicate TV episodes in iTunes?
1) How to delete iTunes duplicates manually?
Step 1: Open iTunes and click "TV Shows" on the left column.
Step 2: Then click File > Library > Show Duplicate Items.
Step 3: Select the duplicate items you want to delete, and right click a duplicate TV episode and click "Delete".
Step 4: After you finished deleting all duplicate TV episodes in iTunes library, press "Done" button.
External info: https://support.apple.com/en-us/HT201812
2) Tips for avoiding duplicate items in iTunes.
To avoid duplicates iTunes library, it's advised to organize your iTunes files correctly by making these two settings. Click iTunes > Preferences > Advanced > Check "Keep iTunes Media folder organized" and "Copy files to iTunes media folder when adding to library" boxes > Click Reset all dialog warnings.
Why can't I delete the purchased iTunes videos and music?
Some of you may wonder why deleting a purchased item can't remove it entirely from the Videos app; this is because iTunes purchases in Videos and Music apps are enabled in Settings.
1) How to delete purchased iTunes videos/music in Settings?
Step 1: Open Settings app on your device. Navigate General > Usage > Manage Storage.
Step 2: Tap Edit button on the upper right and the red minus sign will appear next to all locally stored video, music, TV show files.
Step 3: Click "Delete" to delete one or more videos/music files.
2) How to delete purchased iTunes videos/music in iTunes?
Step 1: Open iTunes and click Store > Sign in > Login with your Apple ID and password.
Step 2: Click iTunes Store > Click Purchased under Quick Links > Choose Music/Video from content > Choose a track/album and click "x" to hide this purchase.
Step 3: Head back to Library, and delete those items with "cloud" sign > Sync your device with iTunes library. This will remove purchased from library only not from the cloud.
Step 4: Go to Settings > iTunes & App Store > Music/Video > Turn off show music/video.
Tip: To hide your purchases, go to Settings > Music > Show All Music > Off.
How can I sync my iTunes movies from PC to Mac?
Moving iTunes library between PC and Mac is complicated because of their different file systems. However, the good news is that since iTunes will default to looking for any missing files in its normal iTunes Media folder, you can leverage this behavior when migrating your library to a different operating system.
To make this work, you must first ensure that iTunes has organized all of the files according to its default naming standard. This way when you move the files onto the new operating system iTunes will be able to find them in their default locations.
First, Go to iTunes Preferences > Advanced. If the "Keep iTunes Media folder organized" option is enabled, deselect it and click OK. Then, go back into your Advanced preferences and RE-select this option and again click OK.
Then simply copy your entire iTunes folder and iTunes Media folder to the new computer. When iTunes starts, it won't be able to find the music files by their specific location, but it will automatically and transparently "fall back" to looking in the default location where it would expect those files to be—in the iTunes Media folder.
Tip: If you don't have a backup of your iTunes library and your old computer is unavailable, you can download past purchases made with your Apple ID.
Detailed guide, please refer:
http://www.ilounge.com/index.php/articles/comments/moving-your-itunes-library-to-a-new-hard-drive/
How to copy videos into iTunes from an external drive?
iTunes supported video formats are MP4, M4V, MOV. Please make sure the videos are in iTunes supported video formats, if not, use a top free video converter like Free Video Converter to convert them to MP4 (H.264/MPEG4) first.
As for further syncing these videos to iPad/iPhone, if you fail with iTunes or fear causing some data loss, you can turn to WinX MediaTrans – a smart 2-in-1 media sync software & video converter. This tool can transfer videos from PC to iPhone/iPad and convert any video to MP4 at one go. Just set auto convert any video format to MP4 (H.264), then add videos into the program and hit Sync button, it will transfer any video to iPhone/iPad connected to computer in a playable MP4 format.
Why won't iTunes on Windows play (iTunes purchased) HD movies?
Some of you may accouter this problem when playing iTunes purchased HD movies: "This movie cannot be played because a display that is not authorized to play protected movies is connected. Try disconnecting any displays that are not HDCP authorized."
HDCP stands for High-bandwidth Digital Content Protection - are you attempting to view the HD content on an external display or different setup than your previous viewing? If so, this may contribute to the issue: https://support.apple.com/en-us/HT203375
You can download and watch high-definition (HD) videos that you buy or rent from the iTunes Store on iPhone, iPad, iPod touch, Apple TV, and computers with high-bandwidth Digital Content Protection (HDCP)-compatible components.
In iTunes Store, HD content is offered in either 720p or 1080p. If you're using a PC or an external monitor, you'll need a display that supports HDCP with a screen resolution of 1024 x 768 or higher with a digital connection (DVI, DisplayPort, or HDMI).
Can you recommend a professional DRM removal program to remove iTunes DRM protection?
It's illegal to remove DRM for commercial use. But if you may sometimes need to do it for personal use, check these top 8 DRM removal programs: WinX MediaTrans (How it works?), Tune4mac iTunes Video Converter Platinum, Noteburner M4V Converter, Tuneskit, Pavtube, Requiem, Aimersoft DRM Media Converter, Tunebite.
Is there a way to edit (cut) an iTunes DRM video file?
iTunes protected video files cannot be directly edited with common video/movie editing programs owing to the encryption. You have to bypass the DRM first with some professional tools to turn iTunes video into regular video file.
With WinX MediaTrans, you can easily free iTunes videos from DRM and output them in plain MP4 video. Just connect your iPhone/iPad with computer and run the software > Click Video Manager, choose the DRM-ed video files and click "Export" > Click "Decode" to export them to computer in regular MP4.
By turning iTunes video into unprotected MP4 file, then you can trim 30 seconds or any period of the video at your will with a top video editor.
How to strip DRM from downloaded iTunes 1080p content?
Best easiest way to convert iTunes downloaded 1080p/720p HD movies to non-protected MP4 is using WinX MediaTrans now. Below is the detailed guide:
1) Go to WinX MediaTrans official site to download and install this program. It is a 100% clean and safe tool.
2) Open it and connect your iPhone/iPad with computer via USB.
3) Click "Video Manager" button, select the downloaded iTunes 1080p/720p HD movies and click "Export".
4) Click "Decode" to get DRM-free MP4 files of iTunes HD movies.
Is it legal to convert iTunes DRM video?
It's hard to say. These are some people's thoughts from online:
"I just convert my paid o rented movies to MP4 for personal use, such as watching them on my non-Apple device. Of course, I never share with others. So I think it's legal for this kind of use."
"It is legal as long as you take it for personal use instead of commercial use. Any commercial spread and social media sharing is illegal."
"Most consumers don't use it maliciously. It's merely a means to gain cross-platform access to their legally purchased content. This is reasonable."
It seems that some people think it's OK only for personal use, but commercial purpose will be strongly prohibited.
How to add photos from PC to iPhone without data loss?
Talking about adding photos from PC to iPhone, most of you may turn to iTunes, but here are the cases:
Case 1: "I add some photos from PC to my iPhone 6S using iTunes, none of my 60 main albums now show on the iPhone, what am I missing?" – iTunes will sync your iPhone with the latest iTunes library, which means you are risking losing your existed iPhone photos, music, videos.
Case 2: "iTunes gives me the option to download photos from the iCloud but it does not give me an option to import from my PC." - Turned off iCloud photo sharing and it will give the option to choose a folder to sync with. Assuming that if you want to upload certain pictures to iPhone, you have to create a folder first as iTunes does not seem to be able to select individual photos.
If you are seek a quick and easy way to transfer photos from PC to iPhone or in reverse without any data loss, WinX MediaTrans is a good way to go.
How to delete photos from iPad? / How can I delete photos imported to an iPhone from a PC?
3 ways are provided here for you to remove photos from iPad/iPhone.
1. For those pictures directly downloaded to iPad/iPhone or shot by camera.
Open Photos app on your iPad/iPhone --> Open the album and choose the photos you want to delete by taping the "Select" button on the upper-right corner and click "Trashcan" icon.
2. For those photos added from your computer using iTunes, you can not directly delete them from your iPad, the Delete option will be not available. In order to delete them, you can unsync it with iTunes to make them not appearing on your iPad.
Connect your iPhone/iPad with computer --> Open iTunes and select your iPad device --> Click Photos tab --> Scroll the synced albums and uncheck those you want them not showing on your iPad, and click "Apply" --> Hit "Sync" to resync your photo albums to remove them from your iPad. (Note: You can only sync and unsync full albums with iTunes.)
Refer: http://www.wikihow.com/Delete-Pictures-on-an-iPad
3. A more flexible and easy way to delete synced photos from iPad/iPhone is using WinX MediaTrans. It enables users to freely delete single, multiple or all synced photo albums from iPhone/iPad in a few clicks with no data loss, much easier than iTunes, and help you perfectly steer away iTunes erasing all iPhone/iPad data risk.
Detailed guide, please refer:
https://www.winxdvd.com/ios-android-mobile/how-to-delete-photo-album-from-iphone.htm
Where does iTunes back up your pictures?
Usually iTunes backups your photos in this path on computer: C:\Users\YourUsernameHere\AppData\Roaming\Apple Computer\MobileSync\Backup.
But iTunes has some drawbacks when making backup of your iPhone photos like slow and occurring data loss. Some people reflect that iTunes can't delete the photo albums added into iPhone which is a big headache. Therefore, if you are looking for a much smarter and faster program to manage, transfer and backup your iPhone photos, WinX MediaTrans is worth of a try, and it lets you freely set output folders.
Is there any way to add an ePub book to iBooks on PC?
iBooks is now backed by iCloud. Enable iCloud for iBooks on both your Mac computer and your iPhone/iPad. When you add a book to your library on one device, it will automatically be uploaded and available on your other devices. But if you mean transferring an ePub book from PC to iBooks in iPhone/iPad, here's the solution.
Of course you can easily add ePub books to iBooks with iTunes, but about iTunes, there are some words to say. The sync process of iTunes is really so complicated. The essence of iTunes syncing is: Your iPhone/iPad iBooks library will be synced with the latest iTunes library. If your iPhone/iPad iBooks library has some books iTunes doesn't have, then you'll lose them in the iTunes syncing. Sounds pretty horrible? You need a securer way to add ePub, PDF, etc. to iBooks. Below is the how-to guide of using WinX MediaTrans to add ePubs to iBooks with no data loss.
Step 1: Run WinX MediaTrans and plug in your iPhone/iPad with computer via USB cable.
Step 2: Click "Book" button on the main UI. Then click "Add Book" button to select and add ePub files from PC.
Step 3: Hit "Sync" to transfer the ePub books to iPhone/iPad iBooks.
How can I add books from my MacBook to my iPhone?
1) Using iCloud should sync all your iBooks between your devices automatically. Enable iCloud on both your MacBook and iPhone and add the books to iBooks on your MacBook, they will be auto synced onto your iPhone.
2) Connect iPhone with your computer > Launch iTunes and click the iPhone device above > Click on "Books" in the left side bar > Select "Sync Books" and check the books you want to sync > Click "Sync".
3) Turn to third-party iPhone transfer software to easily transfer eBooks to iPhone.
Part 7. FAQ about iTunes
In addition to the knotty iTunes errors above, there are some other frequently asked iTunes questions, involving iTunes gift cards, Apple music, third-part apps, contacts, iTunes library, etc. If those questions are also yours, see how they are answered and solved.
What is the difference between iTunes and Apple Music?
A: First take a quick look at the differences between Apple Music and iTunes itself:
| iTunes | Apple Music | |
|---|---|---|
| What is it? | App: media player, media library, online radio broadcaster, mobile device manager | Music streaming service |
| Payment term | Pay for a license of a song | Monthly subscription |
| Main purpose of paying | Ownership | Streaming |
| Permission for the purchase | Own & download | Access (the catalog) & play |
In a still confusing way, many people want to know the differences between iTunes Match and Apple Music. One of the biggest differences is the pricing: iTunes Match charges for $24.99/year for streaming up to 25,000 songs from your iTunes Music library, which is way cheaper than Apple Music ($9.99/month, or say $119.88/year).
Another is the DRM protection. With iTunes Match, your older files will be matched in DRM-free AAC format, but the music matched with Apple Music catalog will be DRM-encrypted when you re-download them onto another device. In conclusion, iTunes Match can be considered as an upgrade to Apple Music.
What should I do if my Apple Mobile Device USB Driver is missing?
A: If Apple Mobile Device USB driver is missing or corrupted in your PC or Mac (such as in Windows 10 computer), your iPhone will not be recognized by your computer. In this case, different solutions are provided:
1) Try unplugging and re-plugging your USB cable.
2) Shut down the third-party security software on your PC to have a try.
3) Restart the Apple Mobile Device Service.
4) Update the Apple Mobile Device USB driver
5) Uninstall and reinstall the Apple Mobile Device USB driver.
6) Uninstall and reinstall the Apple Mobile Device Support.
What's the best way to legally get free iTunes gift cards?
A: There are rewards programs you can sign up to get or redeem free iTunes gift cards legally. For example, QuickThoughts will reward you with free iTunes Gift Cards if you share your thoughts via quick surveys and local survey events.
Similarly, earn points by playing games or watching advertisements may also help you achieve this.
But it is impossible if you want to get free iTunes gift cards without any survey, app downloads or the like. The websites that claim to give free ones are always spamming or scams.
How do I use an iTunes gift card instead of my credit card?
A: When you buy something in the iTunes Store, content credits are supposed to be used first, before the gift cards, and then the credit card, as long as the value of the item that you're buying is less than or equal to the value of the credits. But that's not always the case. To use your iTunes gift card before credit card successfully, you can try:
1) Checking your store credit balance and purchase history in iTunes to see which payment method has been charged. If it is not right, correcting the settings.
2) Removing the credit card from your account to make the purchase using gift card.
3) Redeeming iTunes gift card on iPhone, iPad or iPad touch:
Open iTunes Store/App Store/iBooks Store -> click Featured Section on the bottom left -> tap "You can also enter your code manually" -> type the 16-digit code of your gift card -> Redeem
I am trying to add money to my balance in my itunes account. How can I do that?
A: Go to your account settings by tapping on your email on the bottom on the main screen of the App Store or iTunes Store and add a credit card. Or just scroll down and click on redeem to redeem an iTunes gift card.
* To add money to iTunes account from credit card:
Put a credit card in your account settings. When you go to check out or purchase an item, it will automatically get debited from your credit card, so there is no need to "add money."
* To add money to iTunes account with debit card:
Settings -> iTunes & App Store -> Apple ID -> View Apple ID -> Add Money -> Select a payment type -> debit card -> Next
How do I cancel iTunes gift card transactions?
A: If you have lost your iTunes card, or for any other reason want to cancel the transaction, you can try canceling and disusing the iTunes Gift Card itself. Alternatively, try claim a refund by contacting the Apple support team, and providing your card serial number, address, name, and the day of purchase, etc.
How do I transfer a (purchased) app from iTunes?
A: When backing up an iPhone/iPad/iPod, you may need to transfer the apps purchased from iTunes Store to a computer on the premise that the computer is authorized with your Apple ID.
1) Sign in to iTunes on your computer with the Apple ID that is used to purchase the apps.
2) Connect the iOS device to the computer using the USB cable until you see the device (iPhone) icon at the top of the iTunes screen.
3) Click "Apps" on the iTunes screen.
4) Choose the app(s) you want to transfer.
Alternatively, you can re-download the apps and also some in-app purchases from iTunes Store following the guide in https://support.apple.com/en-us/HT201272.
Why are apps not shown on iTunes?
There are many possible causes for apps not showing on iTunes, such as iTunes version, iOS firmware and jailbreaking. Try the fixes below:
1) Install or make sure that you've had the latest version of iTunes on your computer.
2) Re-download all apps, including the paid apps: Sign in with your Apple ID -> "iTunes Store" -> click the "Purchased" link -> Apps -> Download.
3) For jailbroken iPhone, iPad or iPod touch: install a special app such as "AppSync" through the Cydia store on the device.
How do I sync my Outlook contacts to my iPhone?
A: Generally, the outlook contacts can be synced to iPhone through: connecting iPhone to your computer, running iTunes, clicking on "Device", choosing "Info" tab and selecting to sync contacts. However, there come some problems, such as "the 'selected groups' option is gone in Windows 10 64 bit", and "the sync after updating Outlook to 2016 has wiped all the contacts from iPhone". The following tricks are hopefully helpful to cope with the issues.
1) Make sure you have a Microsoft account (not an exchange one) -> set "First Last" as the display order -> change all the existing contacts to First.
* On your PC:
a. Download and install the hotmail connector.
b. Add your Microsoft account to outlook using the hotmail connector.
c. Drag all your contacts in Outlook from their current location to your hotmail contacts.
* On your iPhone:
a. Settings->Mail, contacts, Calendars->Add Account
b. Select outlook.com.
c. Enter your email and password.
2) Try some 3rd party product.
3) Subscribe to Office 365 or Google to sync your iPhone via the Exchange account.
How to set up an iTunes library on a NAS?
Using a NAS, you can have a large iTunes library accessible from a computer or from other Hi-Fi streaming devices. This is how you can set up an iTunes library and move iTunes library to NAS:
1) Ensure that the NAS is mounted in the Finder.
2) Create a new folder for iTunes on the NAS.
3) Open iTunes -> Preferences -> Advanced -> make sure that the iTunes Media folder location is set to the default path
On a PC: press CTRL + B or press the ALT key to see the navigation menu, choose Organize Library.
On a Mac: open navigation bar, click on File and choose Organize Library.
Check Consolidate files -> OK.
4) Move iTunes Library: connect the NAS, navigate to the iTunes Music folder on your Mac or PC according to the location you set in your iTunes, copy the music folder to the root of your NAS.
5) Open iTunes specially: on a PC: hold down the SHIFT key and then double-click to open iTunes; on a Mac: hold down the Option key and then click on iTunes to open.
6) Click on Choose Library -> navigate -> find iTunes.itl file -> open.