Top 5 Ways to Free Transfer 4K/HD Videos from iPhone to Computer
How to easily transfer 4K videos movies from iPhone to computer to free up iPhone space or watch on bigger screen?
Three most obvious advantages of transferring videos from iPhone to computer are: to spare storage for iPhone devices; to enjoy iPhone 4K videos movies on bigger screen; to back up recorded precious iPhone 4K/1080p/720p videos movies to computer local drive. But transferring 4K videos can be very slow with some apps as the 4K resolution will result iPhone recordings in large size, not to mention 4K 60FPS videos recorded by iPhone. In this post, you'll learn how to transfer videos from iPhone to computer on Windows 11/10/8/7, macOS with best fastest iPhone transfer software.
How to Transfer Videos from iPhone to Computer? - Best Solution
No.1 Fast Tool to Transfer Videos - WinX MediaTrans
- - Transfer any 4K/HD video, slo-mo/time-lapse video, 4K ProRes from iPhone to Windows 10/11/macOS computer at fastest speed.
- - Transfer photos, music, movies, iBooks, podcast, iTunes purchases between iPhone iPad and PC Windows/Mac.
- - Safeguard your personal photos, videos with password. No one can access to them without your permission.
Top 5 Ways to Transfer Videos from iPhone to Computer without iTunes
- Part 1. Is it Possible to Use iTunes for Exporting iPhone Videos to Computer?
- Part 2. How to Use WinX MediaTrans to Transfer iPhone Videos to Computer (4GB in 3 Mins)?
- Part 3. How to Copy Videos from iPhone to PC Windows 10/11/Mac via iCloud Drive?
- Part 4. How to Transfer Videos from iPhone to PC via Windows Photos App (USB Cable)?
- Part 5. How to Sync iPhone Videos to Windows 10/11 via AutoPlay (USB Cable)?
- Part 6. How to Backup Videos from iPhone to Windows 11/10/8 via Windows File Explorer?
Part 1. Import Videos from iPhone to PC Windows 10/11/Mac Computer with iTunes, Possible?
On macOS Catalina and later, no, you can use iTunes to transfer iPhone videos anymore. iTunes is dead on newer macOS so you can use Finder to transfer iPhone videos now.
On Windows (11/10/8/7/Vista), yes, you can still use iTunes. But unfortunately, iTunes would be useless in regard to transferring the iPhone videos synced from iTunes or the 4K/HD videos recorded by iPhone camera back to computer.
You need to turn to third-party top-notch iPhone video transfer software like WinX MediaTrans which can help you transfer any downloaded or recorded 4K ProRes videos movies, slo-mo/time-lapse videos from iPhone to computer with no hassle. You don't need to worry about the large size of video, because it can deliver fastest video transfer speed, for instance, it can transfer a 4GB movie in about 3 minutes. Beyond that, there are also another top 4 ways to bulk sync videos from iPhone to computer without iTunes.
Part 2. How to Use WinX MediaTrans to Transfer iPhone Videos to Computer (4GB in 3 Mins)?
WinX MediaTrans is a super-fast, stable, clean and safe iPhone transfer program. It could seamlessly transfer videos movies from iPhone to computer without data loss, helping you to transfer any iPhone recorded 4K 60fps/30fps/24fps, 1080P/720P HD videos movies to PC Windows 10/11, MacBook Pro/Air, iMac at fastest speed. It can transfer 1GB video from iPhone to computer in less than one minute, 4GB within 3 mins. It can auto convert any video like AVI, WMV, MKV, FLV, MOV, etc. to the popular MP4 format with original quality. Besides, it can auto-rotate video from vertical to horizontal so as to normally watch the video.
The supported transferring files include videos, movies (VR movies included), TV shows, photos, music, ringtones, iBooks and many other files. It supports music management, like edit music info, create playlist/albums, bulk delete music songs, auto remove DRM and convert iTunes music to MP3, as well as mount your iPhone as USB hard drive for file storage.
[Tutorial] How to Bulk Import Videos from iPhone to Windows 10/11/MacBook/iMac
Free download and install WinX MediaTrans on your computer or free download MediaTrans of Mac version. Then follow the detailed guide below to transfer any video/movie from iPhone to computer. You can bulk sync iPhone videos to PC at one time at GPU accelerated speed.
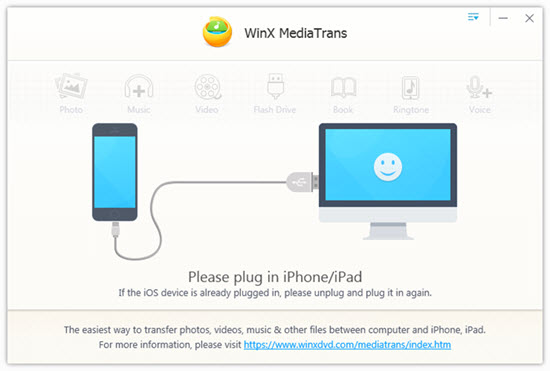
Step 1: Load iPhone videos into the iPhone transfer program. Launch the iPhone video transfer software and plug in your iPhone with computer via USB cable without using iTunes. The software will auto detect all your iPhone files.
Note: If you have iTunes installed on your PC, you should go to iTunes "Preferences --> Devices" to Prevent iPods, iPhones and iPads from syncing automatically" option to avoid iTunes wiping your iPhone data. This setting only needs to be conducted once. Thus, you don't need to worry about the sync of iTunes when using WinX MediaTrans to transfer iPhone videos to computer any more.
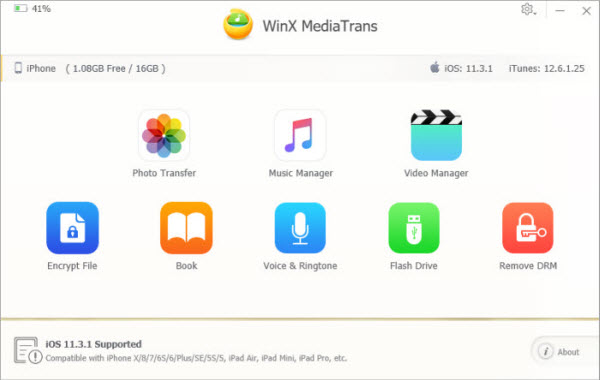
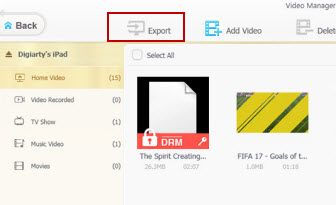
Step 2: Select iPhone videos you'd like to transfer to computer. Click "Video Manager" icon to enter into the video transfer interface and this program will display all your iPhone videos folders in left sidebar including Home Video, Video Recorded, TV Show, Music Video, Movies, etc. Browse these video folders to select all the videos you want to transfer to computer from iPhone.
Step 3: Start transferring videos from iPhone to computer at GPU hardware accelerated speed.
Then click "Export" button on the tool-bar to transfer selected iPhone videos to computer. After the transferring process completed, you can choose to delete them on your iPhone to make more room for your iPhone.
Tip: You can drag and drop the selected iPhone videos/movies to computer folders directly.
Part 3. How to Copy Videos from iPhone to PC Windows 10/11/Mac via iCloud Drive?
There are always more than one road to Rome. On top of iTunes, iCloud photos always strikes on your radar when it comes to transfer video footages from iPhone to computer (Mac or PC). Well, you need to be aware that videos stored in iCloud photos should be within 15-min in length. Thus, if you need to sync larger video from iPhone to PC/Mac, iCloud Drive is your silver bullet. iCloud Drive accepts your iPhone videos that are less than 50GB and doesn't go beyond your iCloud storage limit. Providing your video is up to the mark, read the below tutorial:
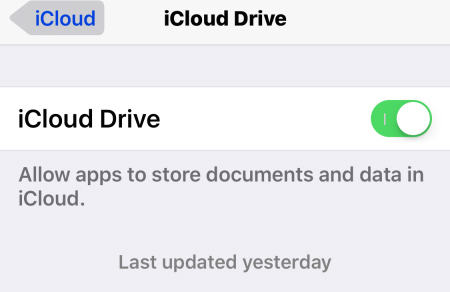
Step 1. Navigate to "Settings" on your iPhone > [your Apple ID] > "iCloud" and scroll down to enable "iCloud Drive".
Step 2. Find your video file you wanna backup to computer and tap Share icon.
Step 3. Choose "Save to Files" > "iCloud Drive" and choose a folder in iCloud Drive to save the the video item.
Step 4. Open iCloud.com on your Windows 11/10 PC or MacBook iMac and sign in with the Apple ID you use on the iPhone.
Step 5. Choose "iCloud Drive" among the options and click the folder you saved the video file.
Step 6. Select and download your desired videos from iPhone to PC Windows or MacBook Pro/Air iMac.
Part 4. How to Transfer Videos from iPhone to PC via Windows Photos App (USB Cable)?
Backing up iPhone videos to Windows 10/11 can also be achieved by Windows Photos app. Certainly, you need to connect your iPhone to Windows PC with USB cable, as well as iTunes installed on your PC. After everything is ready, free sync now:
- Check if your iTunes installed on PC is the latest version. If not, upgrade to the latest version. Importing photos to your PC requires iTunes 12.5.1 or later.
- Connect your iPhone to Windows 11/10/8 PC with a USB cable.
- Unlock your iPhone using your passcode if asked.
- Tap Trust or Allow on the prompt message on iPhone to trust your computer.
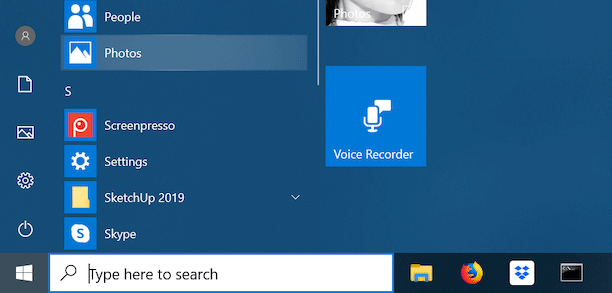
- Open Photos app on Windows > select your video file and sync to Windows PC.
If you have iCloud Photos enabled, you need to download the original, full resolution versions of your videos to iPhone before you import to your PC Windows 11/10/8. You can open the synced videos to see if they're distorted in orientation. Rotate your video if they're.
Part 5. How to Sync iPhone Videos to Windows 10/11 via AutoPlay (USB Cable)?
Part 4 mentioned the simple way to transfer videos from iPhone to Windows 11/10/8, and this part shares with you the simple approach to import iPhone videos to Windows 7. That is AutoPlay, a USB cable needed too. Here are steps if you don't try this way before:
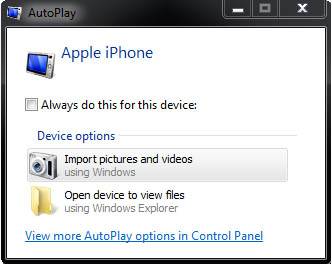
- Connect your iPhone to Windows 7 and AutoPlay will auto pop up.
- Choose Import pictures and videos on the prompt window.
- Select or create a folder to save the videos you'd like to sync on the import settings.
- Pick up the videos > click Import to import videos from iPhone to PC Windows 7.
Part 6. How to Backup Videos from iPhone to Windows 11/10/8 via Windows File Explorer?
Windows File Explorer is the low-profile tool you might ignore at high likelihood. However, you'll be rejoiced at its performance once you give it a chance for syncing iPhone videos to Windows 10/11. Follow the instructions if you're interested in this method:
- Connect your iPhone to Windows PC with a USB cable.
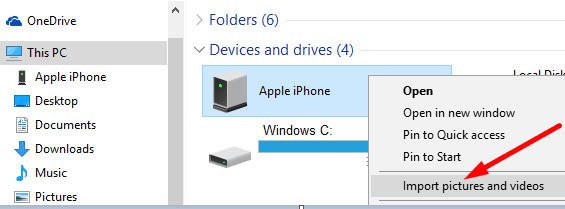
- Click This PC and find your iPhone under "Devices and drives".
- Right-click your iPhone > select Import pictures and videos. For Windows 10/11 users: go to Start > File Explorer > This PC.
- Choose Review, organize, and group items to import > hit Next to continue.
- Opt for the video clips you wanna transfer to Windows > click Import to start importing the selected video items from iPhone to Windows.
On top of the afore-mentioned ways, there are still other effective methods or software available. You're welcomed to share with us your approachs to export iPhone videos to computer PC or Mac if they're not mentioned here. And feel free to Mail Us if you have something to share or still have any problem in iPhone video to computer backup.