


How to Use Denoise in Lightroom Classic [Lightroom Denoise Tutorial]
 Mike Rule
Updated on
Lightroom 6.3 and Lightroom Classic 12.3 ship with AI-powered Denoise tool. The Denoise feature helps achieve more with less effort and devote your time to capturing the perfect shot. It’s quite easy to use Denoise in Lightroom, just import file, go to Edit > Details, and the Denoise option lays on the Details panel. Follow the step-by-step guide to learn how to use Denoise in Lightroom. If you are running into Lightroom denoise not working issues, for example, the denoise is so slow or doesn’t work for all the photos, noise reduction is terminated/crashes, use the troubleshooting tips shared in the post.
Get Winxvideo AI, A More Powerful AI Image Denoiser
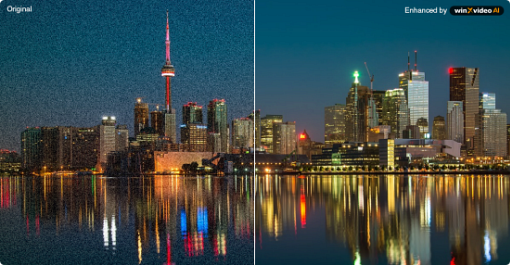
With Winxvideo AI, a powerful AI image enhancer, you can effortlessly upscale images to 4K, 8K, or even 10K resolutions, breathing new life into old photos by removing noise, blur, and compression artifacts. The unique CineAI model ensures a remarkable enlargement of images by 200%, 300%, and 400%, while full GPU acceleration allows for swift batch processing of various formats such as PNG, JPG, BMP, PBM, WebP, and more. Bid farewell to pixelation issues as you scale images intelligently, preserving every detail without compromise.
You are free to restore vintage photos with ease, whether they are noisy, blurry, old, or heavily compressed. Scale images up to 4K, 8K, and 10K effortlessly, filling in missing information intelligently without any pixilation concerns.
 Free Download
 Free Download
Winxvideo AI is for PC, while Macxvideo AI (from our MacXDVD brand) is for macOS.
Part 1. How to Use Denoise in Lightroom
Make sure you meet the minimum system requirement to run Lightroom with the Denoise feature. To optimize performance, you need a GPU boasting a minimum of 8 GB. For macOS, prioritize an Apple silicon device with generous memory. On Windows, leverage GPUs equipped with ML acceleration hardware, such as NVIDIA RTX featuring TensorCores. A swifter GPU directly translates to expedited outcomes. The use the following steps to learn how to use Denoise in Lightroom Classic 12.3/6.3 and get image noise reduction efficiently.
Step 1. Import the file in Lightroom
Begin by launching a compatible file in Lightroom, then go to Edit > Details. Make sure the file is compatible with Lightroom.
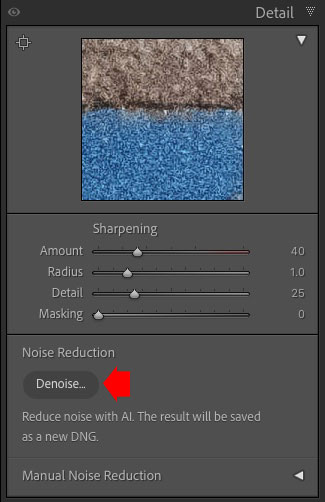
Step 2. Select Denoise option
Lightroom's AI-powered technology will automatically identify and eliminate noise within the image. The Denoise feature can be found within the Detail panel. After the preview is generated, fine-tune the Denoise intensity using the slider. For a comparison, hold and select the preview to view the original and edited versions side by side.
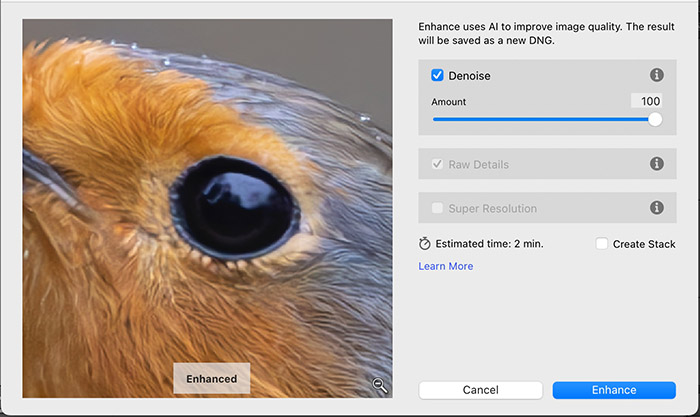
Step 3. Enhance the image
Opt for Enhance to generate a DNG version of the chosen image. This new DNG file will be stacked with the original image for convenience. On the Enhance Preview window, you can move the Amount slider. The default Amount figure is 50. You can increase or decrese the amount of Denoise effect. 50 is a recommended setting since it makes the image look good. Click the Enhance button to start the denoise process.
Part 2. Lightroom Denoise Not Working
1. Make sure your file is compatible
Denoise is exclusively compatible with mosaic raw files produced by Bayer and X-Trans sensors during its initial reales. Denoise is viable for standard raw files containing the original mosaic sensor data. Raw images taken via the Lightroom mobile camera, still retaining the original sensor data, are compatible.
Currently, it's incompatible with rendered file types like JPEG/HEIC, IFF, and PSD and raw files that have undergone demosaicing, such as sRAW or ProRAW. Notably, Denoise collaborates effectively with raw files produced by Lightroom's camera on iPhones, excluding Apple's camera app's linear DNGs. Certain cameras generate reduced-size raw files like sRAW and mRaw formats, preprocessed by the camera to decrease size. As a result, these formats are not currently supported by Denoise. Apple's ProRAW format is incompatible with Lightroom. There are many other ways to fix grainy photos.
2. Check your hardware
The Denoise feature requires more powerful hardware. For better performance, you should have a GPU with at least 8GB. Apple silicon machine, GPUs with ML acceleration hardware, such as NVIDIA RTX with TensorCores are recommended to make the denoise process faster. Laptops with dual GPUs may encounter challenges as well.
3. Update your drivers
updating outdated drivers has proven beneficial, particularly on Windows. Instances have been reported where updating drivers has resulted in faster processing. Some users have found that disabling the integrated graphics to exclusively utilize the dedicated graphics card can lead to enhanced processing speeds. Older graphics cards are usually no longer supported by Intel, Nvidia and AMD, so errors like unexpected crashes can happen.
Part 3. FAQs about Denoise in LightRoom
1. How do I use Denoise in Lightroom?
It’s very easy to use Denoise in Lightroom: import the file compatible with Lightroom, click the Denoise button under the Detail panel, and the Enhance Preview window pops up. On the Enhance Preview window, drag the Amount slider to decrease or increase the denoise. Click the Enhance button to apply the denoise effect.
2. Where is the Denoise tool in Lightroom?
The Denoise tool in Lightroom is located in the "Detail" panel. To access to Denoise tool in Lightroom, go to Edit > Details, and select the Denoise option. The Denoise tool is available in Adobe Lightroom Classic 12.3 and Lightroom 6.3.
3. Why does Denoise not work in Lightroom?
The Denoise tool in Lightroom doesn’t work for several reasons, including incompatible file format, insufficient system resources, software version, etc. If you're experiencing issues with the Denoise tool in Lightroom, you can try adjusting settings, using different images, updating your software, and ensuring your hardware meets the requirements.
4. What files are compatible with Lightroom Denoise?
Lightroom denoise is currently compatible only with Bayer and X-Trans mosaic RAW files, for example, .NEF (Nikon), .CR2 (Canon), .ARW (Sony), .DNG (Adobe Digital Negative), .PEF (Pentax), .ORF (Olympus), .RW2 (Panasonic), etc. Apple's camera app's linear DNGs are not supported. The denoise is incompatible with rendered file types like JPEG/HEIC, IFF, and PSD and raw files such as sRAW or ProRAW.
5. Is Topaz Denoise better than Lightroom?
If you frequently work with images that have significant noise, require extensive noise reduction, or need to achieve the highest quality results, Topaz Denoise might offer more advanced and tailored noise reduction capabilities. If you prefer an all-in-one solution for photo management, basic editing, and noise reduction, Lightroom's noise reduction tools can be sufficient for most situations. It's especially useful if you're looking for a more integrated workflow.


