


How to Record Audio (System Sound/Microphone Voice) on Windows 10
 Mike Rule
Updated on
Sometimes, you don't need screen recording Windows 10 video. Instead, you just need capture audio from Windows 10 computer. To save audio track from Windows 10 PC, there are a wide selection of ways to help you reach this goal.
Here we assemble the top voice recorders for Windows 10 (free & paid) to let you record audio track from Windows 10, including computer sound and microphone voice for your later educational project, product demo, creative video audio track or voiceover purpose.
Part 1. How to Record Audio on Windows 10 using Voice Recorder
Windows 10 and Windows 11 come along with a built-in screen recorder – Xbox Game Bar, and meanwhile they also come in with an internal audio recording software - Voice Recorder. Therefore, you don't have to look high and low for a free voice recording program. Just activate your built-in voice recorder to capture any sound on Windows 10.
This user-friendly built-in audio recorder freeware doesn't put any entrance barrier for newbies. Thus, you can easily capture computer sound or microphone voice from Windows 10, especially by courtesy of the following detailed tutorial.
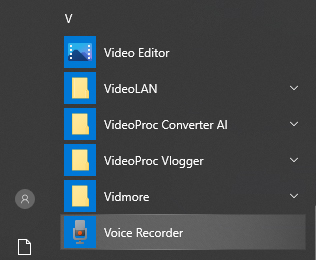
Step 1. Open Voice Recorder. Click the Start menu > choose "Voice Recorder" > hit Enter to launch the app.
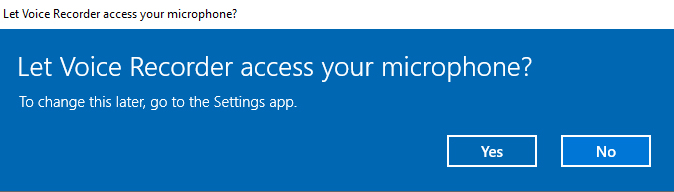
Step 2. Tap Yes on the pop-up window - "Let Voice Recorder access your microphone?" if you want to capture microphone sound on Windows 10 PC.
Step 3. Start recording. Connect your microphone to Windows PC and click the big red button in the center that looks like a microphone. This will begin recording audio.
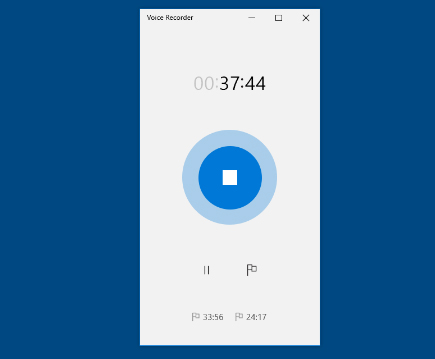
Optionally: If you need to take a break during computer sound recording, click the pause button (a square within a rectangle). To resume recording, simply tap the pause button again.
While recording, you can click the flag icon to insert a marker at that specific point in the recording. This can be helpful for easily finding important parts later.
Step 4. Stop microphone sound or system audio recording. When you're finished recording, click the red button again - it will now have a square inside it.
Step 5. Save voice recording. Your recording will automatically be saved in M4A format in the "Sound recordings" folder within your Documents folder. You can also rename the recording here.
Part 2. How to Free Capture Audio Sound on Windows using Audacity
The built-in Voice Recorder only provides you with the basic voice recording feature, no advanced features attached. Differently, another world-renowned audio capture tool - Audacity delivers itself an impressive showing with both basic audio recording feature and more customizable features, including multi-track recording (beneficial for podcasts creating or music project), audio editing, background noise reduction, VST plugins supports for more effects and processing.
Also learn: how to record computer audio step by step
Certainly, as we mentioned before, Audacity comes loaded with advanced features, which equally demands higher in user experience and skill. And the interface might seem cluttered to beginners, and some advanced features require familiarization. So, if you're an expert, you're suggested to use Audacity to record system sound or microphone voice on Windows 10 and make full use of its audio editing features.
Step 1. Head to the official Audacity website to download and install Audacity on your Windows 10 PC. Run the downloaded installer and follow the on-screen instructions..
Step 2. Configure Microphone and Recording Settings. In the top menu bar, find "Edit" -> "Preferences" > Go to the "Devices" section > under "Recording," choose your microphone from the "Microphone" dropdown menu. Make sure it's the one you want to use for recording your voice.
Go back to "Recording" again to select the appropriate option from the "Recording device" dropdown menu. Typically, "Windows WASAPI" is a good choice for most setups.
Step 3. Hit the big red "Record" button in the Audacity interface. Speak into your microphone - you should see the sound waves appear on the screen.
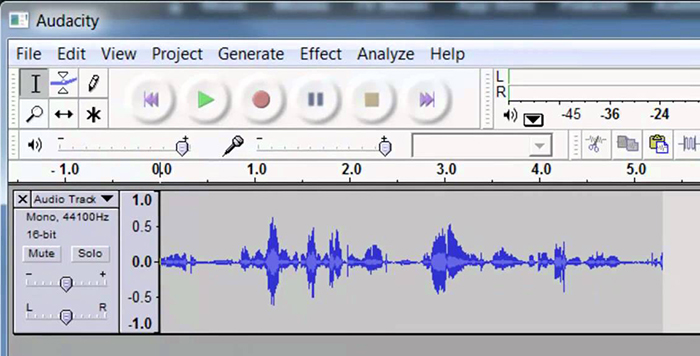
Step 4. To pause recording, click the yellow "Pause" button (looks like two vertical lines). Click it again to resume. When you're finished recording, click Stop to end your voice sound recording.
Audacity offers a variety of editing tools. You can trim unwanted parts, adjust volume, or apply effects to your recording. To save your recording, go to "File" -> "Export." Choose a file format (MP3 is a common choice) and a location to save the file.
Under the "Recording" tab in Audacity preferences, you might find advanced options like "Sample Rate" and "Sample Format." These can affect audio quality, but typically the default settings are good for most recordings. By following these steps, you're supposed to record your voice using Audacity on Windows 10 with high quality. If you want to delve into Audacity more functionalities, you can go to its official complete user guide to have an overview first and then conduct on your Windows 10.
Part 3. How to Record Sound (Microphone/System) on Windows 10 with Winxvideo AI
The above two audio recorders for Windows 10 only support you to record audio sound with limited output formats like AAC or M4A, no audio conversion feature either. Luckily, Winxvideo AI happens having them all. It helps you record computer audio, microphone voice on Windows 10 and saves as MP3, WAV, AAC, M4A, FLAC, OGG, AC3, WMA, iPhone ringtone, etc. a wide range of audio formats. And you're available to adjust audio settings like audio sample rate, audio bit rate, audio channel, audio codec, etc. to get as high quality as you want, 192kbps, 320kbps.
Meanwhile, it's also a top screen recorder software for Windows 10 feature to screen record a full screen, part screen, webcam video or picture-in-picture video with virtual background up to 4K 2160p high quality.
 Free Download
 Free Download
Winxvideo AI is for PC, while Macxvideo AI (from our MacXDVD brand) is for macOS.
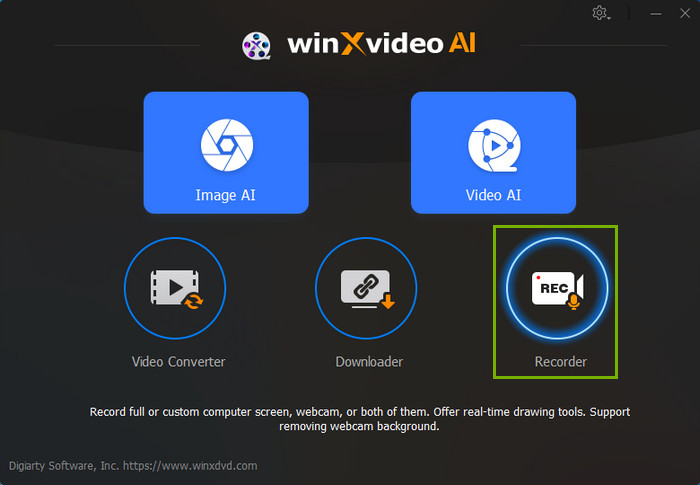
Step 1. Launch Winxvideo AI after installation and select Recorder on the main interface.
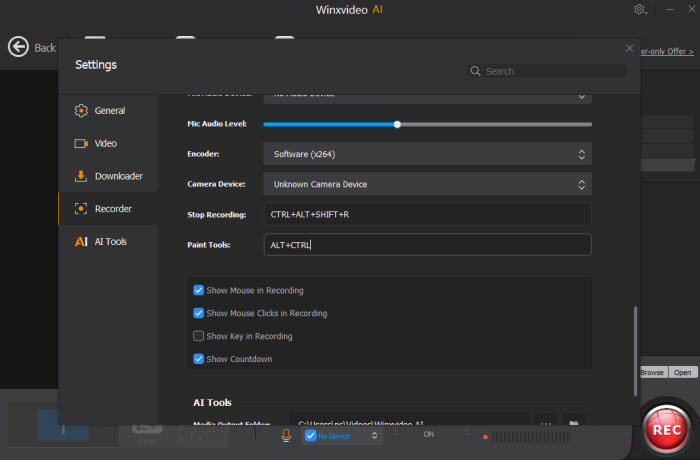
Note: tap the Setting icon on the top right corner of the UI and choose Recorder to adjust settings if needed. You're allowed to change recording quality, format, audio level/device, and know the shortcut for drawing (Ctrl+Alt+Shift+T).
Step 2. Select Audio Recorder mode at the top menu.
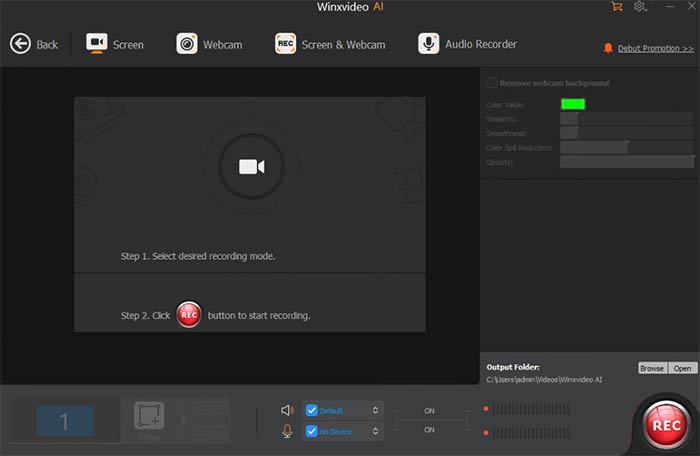
Step 3. Enable audio device(s), including your microphone volume, system sound volume.
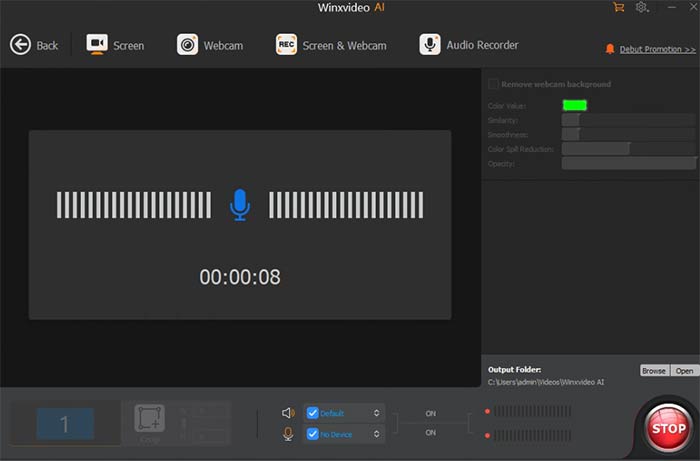
Step 4. Click on the REC button to start recording audio voice on Windows 10. When everything is OK, click on the Stop button to end. Now the resulting file will be auto saved to your local drive on Windows 10 PC.
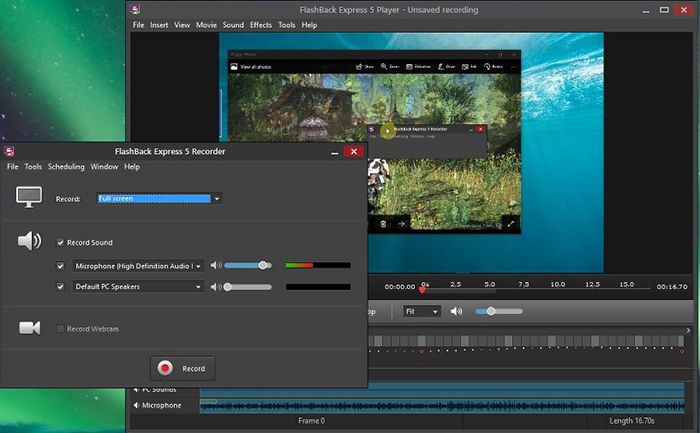
Part 4. How to Record Voice on Windows 10 using FlashBack Express
FlashBack Express is a free screen recorder by Blueberry Software that focuses on ease of use. Straightforward design with minimal options, it's especially nice for beginners to record system audio, microphone audio, or both without time limit or watermark.
Certainly, there is scarcely a man but has weakness. This free voice recorder for Windows 10 records system and microphone audio together into a single track. This can make it difficult to adjust levels or edit them independently later. Worse still, you can only trim the recording, with no options for noise reduction, level adjustments, or other effects.
Step 1. Download and install FlashBack Express from its official website.
Step 2. Configure audio recording. Look at the bottom left corner of the FlashBack Express window > locate to "Record Sound" (a speaker icon with a dropdown menu) > Click the dropdown menu and choose your desired audio options:
- Record No Sound: Captures only the screen content, no audio.
- Record Microphone: Records audio only from your microphone (your voice).
- Record Sound & Microphone: Captures both system sounds (computer sounds) and microphone audio (your voice).
Step 3. Once you've chosen your recording area and audio settings, click the big red "Record" button in the center of the FlashBack Express window.
Step 4. When you're finished recording, click the red "Stop" button (now a square inside a rectangle).
Note: FlashBack Express doesn't have a direct audio-only saving option. Since you're capturing the screen along with audio, you'll save the recording as a video file. Click the "Save" button and choose a filename and location to save your video recording. Certainly, you can go back to Part 3 to use Winxvideo AI to convert recording video to audio MP3, AAC, AC3, FLAC, WAV, etc. audio format then.


