How to Expand An Image in Photoshop: A Step-by-Step Tutorial
 Mike Rule
Post on
Enlarging images in Photoshop without compromising quality is a common task for designers, photographers, and anyone who works with visuals. Whether you need to increase the size of a family photo for printing or a product image for online marketing, Photoshop offers powerful tools to achieve your desired results. This tutorial will guide you through the steps of expanding an image in Photoshop while maintaining its integrity. We'll cover techniques to prevent distortion, stretching, and quality loss, ensuring that your enlarged images look sharp and professional.
Expand an Image in Photoshop to the Size You Need
The Generative Fill tool often provides options to adjust the generated content's style, color, and details. Starting with a high-resolution, well-lit image will generally yield better results from Generative Fill. Here’s how to expand an image in Photoshop without losing quality/distortion/stretching.
Step 1. Prepare Your Image
Create a duplicate of your original image layer to preserve the original. This way, you can always revert to the original if needed. Choose a suitable background. If you want a specific background, fill the canvas with that color before proceeding. This can help the AI generate content that blends seamlessly with the desired background.

Step 2. Extend the Canvas
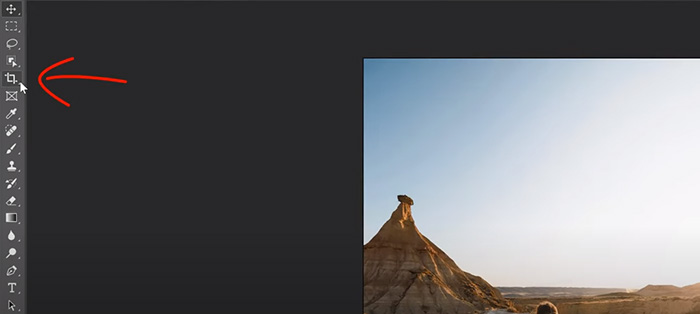
Select the crop tool. Find the Crop Tool in the toolbar. This tool allows you to adjust the canvas size.
Adjust the canvas size. In the Options Bar, make sure the aspect ratio is set to "Ratio." This ensures that the image maintains its proportions. Adjust the width and height values to extend the canvas in the desired direction. For example, if you want to add more space to the right side of the image, increase the width value.
Step 3. Create a Selection
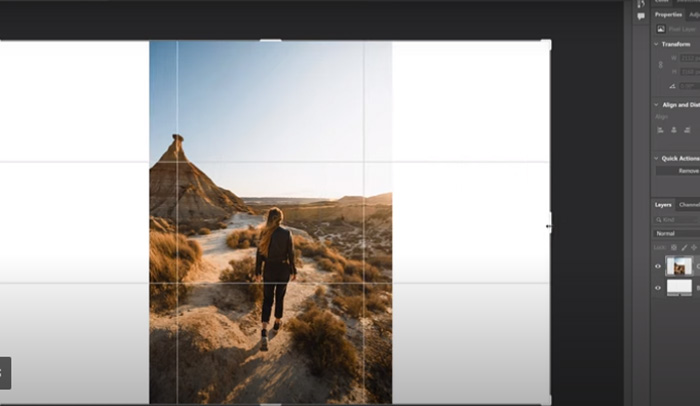
Select this tool from the toolbar. This tool allows you to create rectangular selections. Drag a selection outline around the area you want to extend. Ensure it overlaps the original image slightly for seamless blending. This overlap provides the AI with context to generate content that matches the existing image.
Step 4. Apply Generative Fill
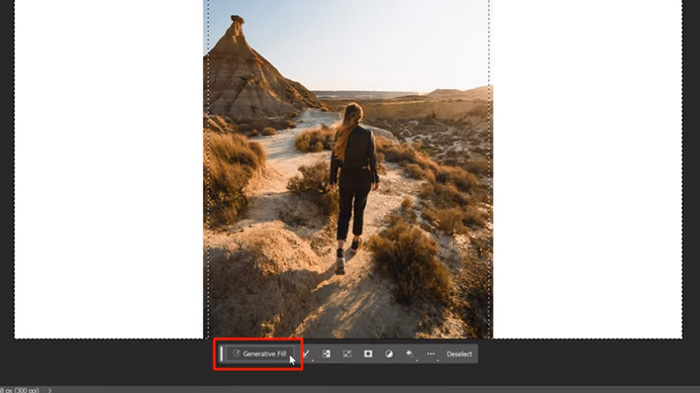
If not visible, go to Window > Contextual Task Bar. This bar displays context-specific tools and options. Locate and click this button in the Task Bar. This will activate the Generative Fill feature. Leave the prompt box empty for extending the image and click "Generate." This will initiate the AI process to generate content for the selected area.
The AI will process the request, and a progress bar will indicate the status. Depending on the image complexity and your system's processing power, this may take a few seconds or longer.
Tips: The Contextual Task Bar is a valuable tool that provides relevant options based on your current actions. Keep it visible for quick access to Generative Fill and other relevant features. While leaving the prompt box empty is ideal for extending the image, you can also experiment with entering text prompts. This can provide more specific instructions to the AI, potentially resulting in even better outcomes.
Step 5. Review and Choose Variations
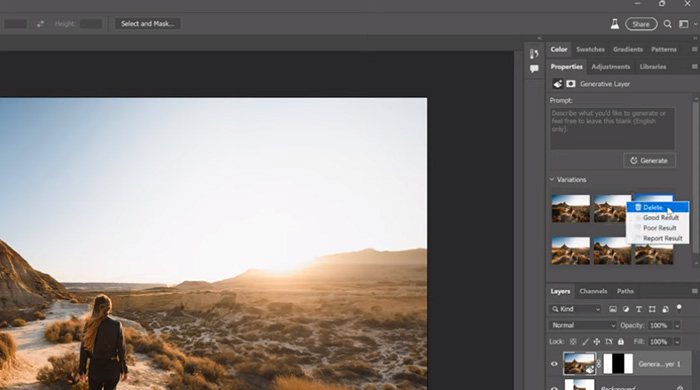
Examine the generated content and choose the variation that best matches your original image. Look for consistency in terms of color, texture, and overall style. Use the left and right arrows in the Contextual Task Bar to explore additional variations. This can help you find the perfect match for your image.
Tips: If you're unsatisfied with the initial results, click "Generate" again for more variations. Generative AI can often produce diverse results, so it's worth trying multiple options.
Step 6. Refine with Remove Tool (Optional)
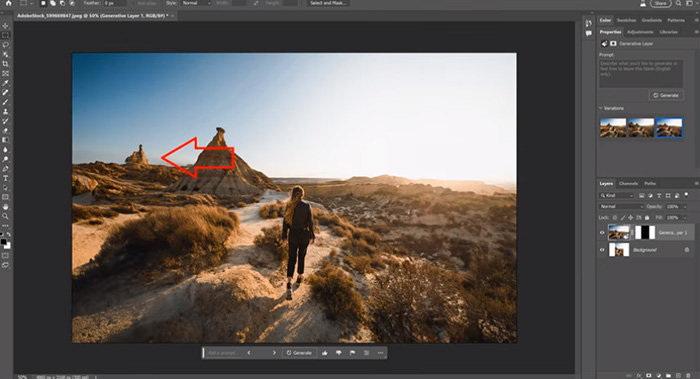
Find it in the toolbar or use the shortcut "F." This tool is designed to remove unwanted elements from images. Carefully brush over areas you want to remove. The AI will intelligently fill in the space with content that matches the surrounding area. This can be useful for fixing minor imperfections or artifacts in the generated content.
Tips: Use the bracket keys to quickly change the brush size. A smaller brush is better for precise removal, while a larger brush is suitable for removing larger areas. Use the Shift+F keys to toggle between hard and soft brushes. A hard brush creates a more defined edge, while a soft brush blends the edges more smoothly.
Step 7. Adjust and Finalize
Use other Photoshop tools (e.g., Clone Stamp, Healing Brush) to make minor adjustments if needed. These tools can help you refine the details of the generated content or blend it more seamlessly with the original image. Save your final result in the desired format. Ensure you choose a format that maintains the quality of the image, such as JPEG or PNG.

Learn more: how to restore old photos with Photoshop.
 FAQs about How to Expand an Image in Photoshop
Use Content Aware Scale: This powerful tool analyzes the image and fills in the new canvas area with content that is similar to the existing content.
Choose the right image format: Save your image in a lossless format like PNG or TIFF to maintain image quality.
Use the Crop Tool: This tool allows you to extend the canvas while maintaining the image's aspect ratio. Avoid excessive stretching: Stretching the image too much can lead to distortion. Try to keep the new dimensions close to the original aspect ratio.
Use Content Aware Scale: This tool can help prevent stretching by filling in the new canvas area with content that is similar to the existing content. Choose the right anchor point: When resizing the canvas, consider the anchor point to avoid unintended stretching.
Expanding an image refers to increasing the size of the canvas and adding new content. Enlarging an image refers to increasing the resolution of the image, making it appear larger and sharper.


