


Top 5 MP4 Splitters to Cut Your Videos Down to Size
 Mike Rule
Updated on
Do you have a long MP4 video that you need to split into smaller parts? Whether you want to share clips on social media, shorten a video for easier editing, or isolate specific scenes, an MP4 splitter can be a handy tool. Here's a breakdown of the top 5 MP4 splitters, categorized by their platform compatibility, to help you choose the right one for your needs:
Top 5 Best Free MP4 Splitter for Windows and Mac
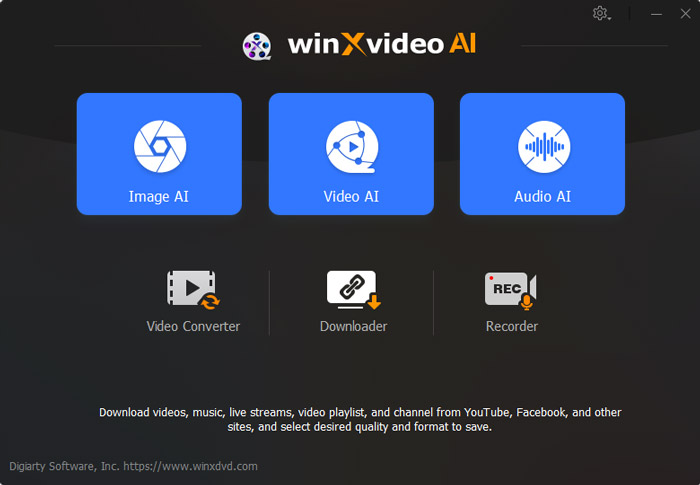
#1. Winxvideo AI
Being an all-in-one video converter and editor, Winxvideo AI is powerful enough for splitting MP4 videos on Windows 11/10 and macOS. It offers a splitting feature that allows you to slice a lengthy video into a series of shorter clips. You have the flexibility to choose how you want to divide the video: either by splitting it into a specific number of segments, or by chopping it up into bite-sized clips at regular intervals like every X seconds. Winxvideo AI stands out with its "Auto-Copy" feature, allowing you to split an H.264 MP4 video without re-encoding, with a wide compatibility on virtually any website.
Winxvideo AI goes far beyond simple splitting. It empowers you to resize your video files in various ways, cutting out unwanted sections, cropping specific areas, or fine-tuning parameters like resolution, bit rate, and frame rate – all while preserving the high quality of your video. But that's not all! This free MP4 splitter also lets you edit subtitles, merge multiple clips, rotate videos for the perfect orientation, and stabilize shaky footage, enhance video quality, and increase the FPS of video for super fluidity.
 Free Download
 Free Download
Winxvideo AI is for PC, while Macxvideo AI (from our MacXDVD brand) is for macOS.
Pros: Either slice MP4 into specific numbers, or at regular intervals. Easy to use. Split MP4 no watermark.
Cons: Limited to handle videos no more than 5 minutes in free version.
Why Choose Winxvideo AI: Offer flexible options to split MP4 in multiple parts at once.
How to Split MP4 into Segments in Winxvideo AI
Step 1. Free download and install Winxvideo AI.
Free download and install the MP4 splitter on your computer. Open it up, then choose Video Converter option to get ready for stamping watermark on video.
Step 2. Import the MP4 files.
Either drag and drop or click on the +Video button to load your video that you want to split. Also, if you have a tons of MP4 video to split, you can click on the +Video Folder button to import them all at once.
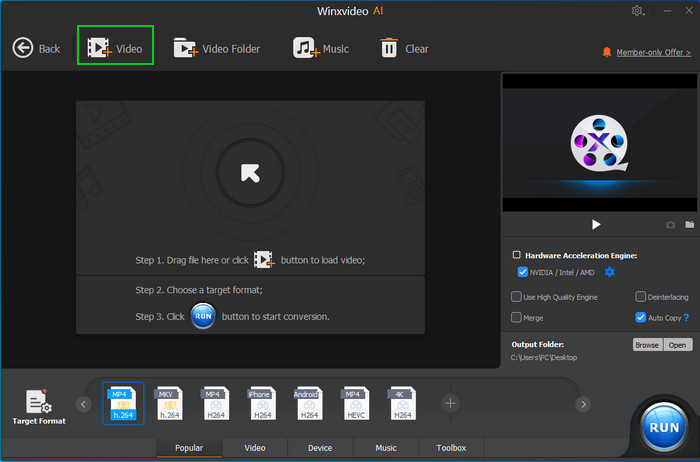
Step 3. Choose Split feature.
At the bottom section, click on the Toolbox cloumn, find Split feature and double-click on it. This will lead you to a new window.

Step 4. Set MP4 splitting parameters.
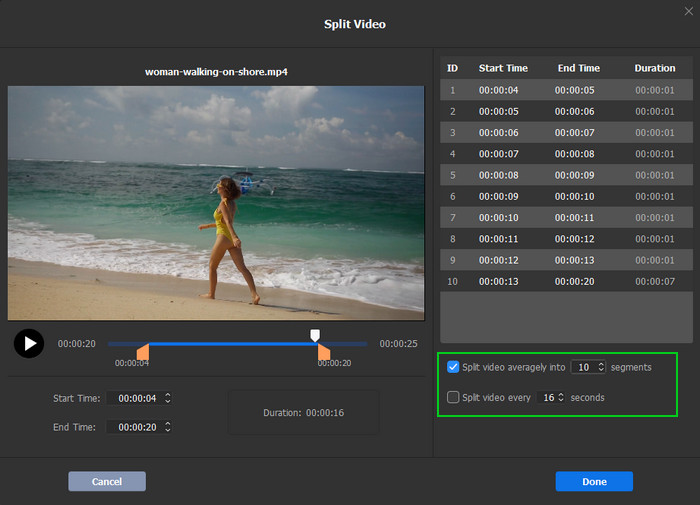
In the new splitting window, you can decide how to split your MP4 video files.
- In the left panel, you can see a preview window, move the green knobs to cut out the unwanted part if needed. Or you can manually input the start and end time of the MP4 clip.
- In the right panel, tick on the box of split video averagely into xxx segments. Here I type in 10, you will see the MP4 file was divided into 10 clips. And the first 9 clips are all in 1 second length, the last one in 7 seconds.
- You can also choose split video every xxx frame, this will split your MP4 into segments at the intervals you've selected.
When you've done, click on the Done button to make your settings valid.
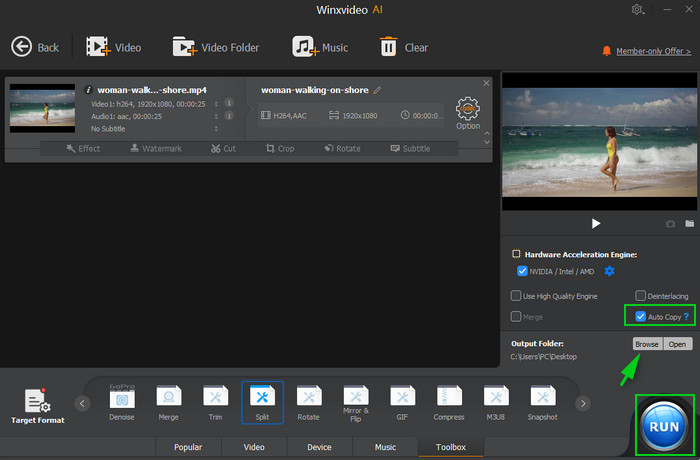
Step 4. Start to segment MP4 into parts.
Click "Browse" button to choose an output folder. Then tap "RUN" button to start split MP4 files into parts in Winxvideo AI.
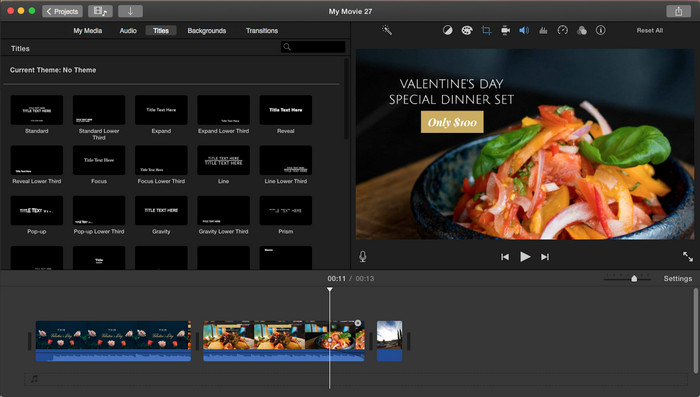
#2. iMovie
If you're a Mac user, you're in luck! Your Mac comes pre-installed with iMovie, a user-friendly video editing program that can also handle splitting your MP4 files with ease. iMovie allows you to effortlessly cut your video into smaller clips based on your preferences.
But iMovie's capabilities extend beyond just splitting. This powerful MP4 splitter for Mac offers a full timeline where you can arrange your MP4 video segments. It even lets you add special effects and soundtracks to specific portions of the video you're editing. Plus, with a handy preview feature, you can see your edits come to life before finalizing your project.
Pros: User-friendly, great for beginners, no installation required.
Cons: Lacks some advanced editing features.
Why Choose iMovie: Perfect for Mac users who need a quick and easy way to split MP4s without any complex features to learn.
How to Split MP4 Video with iMovie on Mac
Step 1. Launch iMovie on macOS. Open a new project in iMovie.
Step 2. Import your MP4 video into your iMovie project. Drag it to the timeline.
Step 3. Select the video clip on the timeline, and position the playhead at the point where you want to split.
Step 4. Click the scissors-shaped Split Clip button.
Step 5. Repeat the step 3 and step 4 if you want to create additional splits.
Step 6. Preview and export the desired video sections.
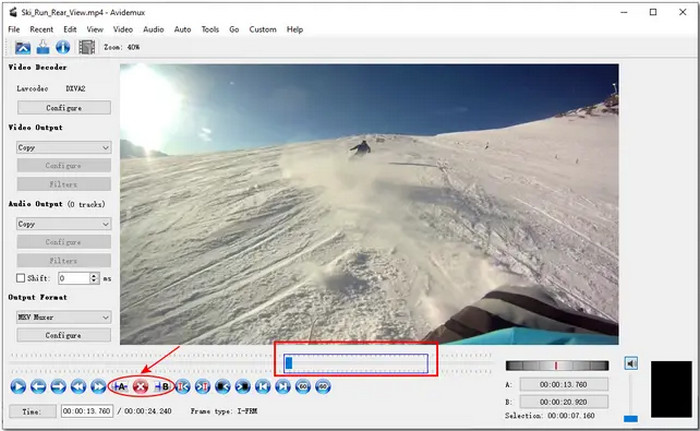
#3. Avidemux
For users seeking a free MP4 splitter, look no further than Avidemux! It's an open-source video editing powerhouse that rivals even expensive software. While its MP4 splitting tool is a standout feature, enabling you to effortlessly split MP4 files into smaller segments with just a few clicks. Avidemux is known for its intuitive interface and minimal resource requirements, making it ideal for those with limited experience or older computers.
However, Avidemux doesn't stop at splitting. This open source MP4 splitter offers a plethora of editing tools like cutting, flipping, rotating, and applying color filters to your videos. It's a one-stop shop to edit your videos, encode and decode your MP4 videos before saving.
Pros: Powerful video splitter with frame-accurate editing, lightweight, open-source.
Cons: Interface can be complex for beginners.
Why Choose Avidemux: If you need precise frame-accurate editing and additional video editing features beyond just splitting, Avidemux is a powerful free option.
How to Divide MP4 Video into Segments Using Avidemux
Step 1. Download and install Avidemux on your computer. Open it and click "File" and then "Open" to browse and select the MP4 video you want to split.
Step 2. Then you have two options to pinpoint where you want to split the video:
- Chapter Markers: If your video has pre-existing chapter markers, you can use them to easily define your split points. Click on the desired chapter marker to position the playhead at that location in the video.
- Slider Bar: For more precise control, utilize the slider bar located at the bottom of the Avidemux window. Drag the slider back and forth to preview different sections of your video and identify your exact split points.
Step 3. Once you've located your desired split point, use the following methods to set the selection start and end points:
- Left/Right Selection Markers: Avidemux displays two vertical markers on the timeline – one red (left) and one green (right). Drag the red marker to the beginning of the section you want to keep and the green marker to the end of that section.
- Frame Numbers: Locate the frame number display box near the slider bar. You can manually enter the specific frame numbers for your start and end points to achieve frame-accurate splitting.
Step 4. Navigate to the "Edit" menu at the top of the Avidemux window and select "Cut" (Ctrl+X is the keyboard shortcut). This action effectively removes the highlighted section from your video.
Step 5. Avidemux provides you with a choice after cutting the section: To save the cut section, just click "Copy" from the "Edit" menu (Ctrl+C) before proceeding. Later, navigate to "File" and "Save" to export this section as a new video file. To delete the cut section, simply proceed step 6 to export the remaining portion of your video.
Step 6. To create additional splits in your video, simply repeat steps 3-5, adjusting your selection points for each cut. Once you're finished splitting, navigate to "File" and "Save" to export the final video containing your desired clips. Avidemux allows you to choose the output format and desired video settings during the export process.
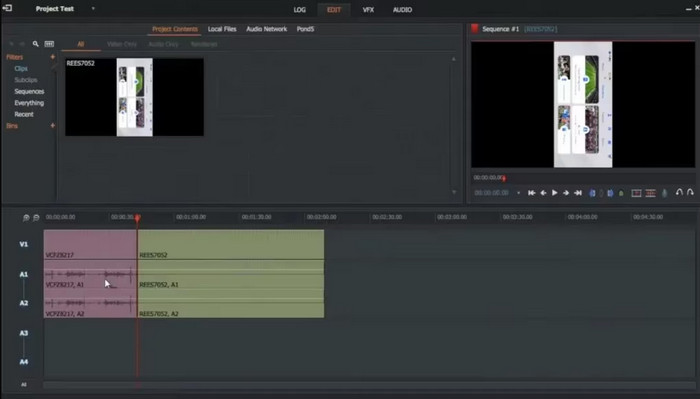
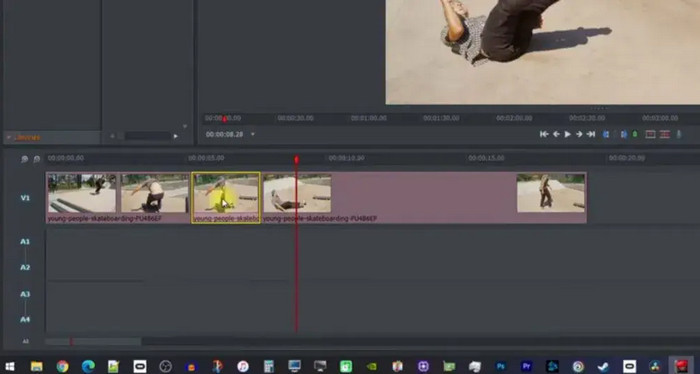
#4. Lightworks
Lightworks is a well-regarded video editing software that offers both a free and a pro version. While the free version limits some features, it shines brightly when it comes to splitting MP4 videos. This functionality is readily available without needing to upgrade. It lets you save your split MP4 videos without sacrificing quality. This means you can confidently split your videos into smaller segments without worrying about any degradation in the final product.
Moreover, Lightworks works far more than basic splitting. It boasts a customizable interface that allows you to tailor your workspace to your preferences. This adaptability, coupled with its free MP4 splitting capability, makes it a compelling choice for many users.
Pros: Supports high-resolution videos, offers advanced editing features in the free version.
Cons: Interface might seem overwhelming for simple splitting tasks.
Why Choose Lightworks: If you plan on doing more video editing in the future and want a free option with professional-grade features, including MP4 splitting, Lightworks is a great choice. However, if you just need a simple splitter, the interface might be more complex than necessary.
How to Split MP4 Video Using Lightworks
Step 1. Download and install Lightworks on your computer. Simply drag and drop the video file you want to split directly onto the timeline.
Step 2. Use the playhead to navigate through the video preview and identify your desired split points. When you've found the exact spot for a cut, simply press the "C" key on your keyboard. Lightworks will create a clean split at that location, dividing your video into two separate clips on the timeline.
Step 3. After splitting the video, you might want to remove the unwanted section. To do this, select the portion you don't need (the clip remaining after the split). And simply press the "Delete" key on your keyboard.
Step 4. Right-click on the option labeled "All" on the timeline (typically located on the lower left side). This will open a menu where you can select the "Export" option.
#5. Clideo (Web-based)
Online MP4 splitters are a popular choice for their instant gratification. They eliminate the need to download and install any software, allowing you to jump right into splitting your video. This can be a major time-saver for simple editing tasks. However, there's a trade-off for this convenience. Online MP4 splitters often require you to upload your video to their servers, which can take time depending on your internet speed and the size of the video file. Additionally, you'll need to wait again to download the split MP4 video once the processing is complete. These processes can be further hampered by potential network connection issues.
Clideo is more than an online MP4 splitter; it's a toolbox for all your basic video editing needs. In addition to splitting, Clideo offers features like merging clips, adding captions, cropping unwanted areas from your video, and more. If you're looking for a convenient online solution with some extra bells and whistles, Clideo is definitely worth considering.
Pros: Easy online MP4 splitting without downloads, offers additional features like merging and captions
Cons: Relies on internet speed for uploads and downloads, might have limitations on file size or processing power.
Why Choose Clideo: Perfect for quick online edits when you need to split and perform basic video tweaks without software installation.
How to Split MP4 Online Using Clideo
Step 1. Head over to the Clideo homepage and navigate to the "MP4 Splitter" tool.
Step 2. Drag and drop your video file directly onto the designated editing panel.
Step 3. Once your video is uploaded, Clideo displays it on a timeline. Use the green selection box on the timeline to pinpoint the section you want to keep. Clideo provides two options on the right-hand editing bar: Extract selected or delete selected.
Step 4. After selecting the portion you want to keep with "Extract Selected," click the "Export" button. Clideo will process your video and prepare the extracted clip for download.
Step 5. If you need to create additional splits in your video, simply repeat steps 3 and 4, adjusting the selection box on the timeline for each desired clip. Clideo allows you to make multiple splits and download each extracted section as a separate video file.
Step 6. Once you're satisfied with your splits, click the "Download" button to save the extracted clip(s) to your local device.
In Conclusion: Find Your Perfect MP4 Splitter
The ideal MP4 splitter depends on your needs and preferences. Here's a quick recap to help you choose:
- For powerful editing with seamless splitting - WinX Video AI: offers top-notch features and lossless splitting, but comes at a cost for videos more than 5 minutes.
- For Mac users seeking simplicity- iMovie: is a free, user-friendly option for basic splitting.
- For free and powerful editing - Avidemux: is a great open-source choice for beginners and casual users on any computer.
- For pro-level splitting without breaking the bank - Lightworks: delivers professional-grade splitting without sacrificing quality in free version.
- For quick online edits - Clideo: provides a convenient solution for splitting and basic video tweaks on the fly, but relies on internet speed and may have limitations.
No matter your choice, there's a perfect MP4 splitter out there to help you slice your lengthy videos into bite-sized clips. Here we go to split MP4 videos right now!


