


How to Add Soft/Hard Subtitles and Remove Subtitles with HandBrake
The more you use HandBrake, the more you will discover its mightiness. Not only can it rip DVDs, Blu-rays, and transcode viceos, but also gives you a full control over subtitles (VOBSub, PGS, SRT, etc). It can help you add soft, hard coded subtitles, open or closed captions to movies, rip discs with subtitles, and remove subtitles from videos.
This article is a complete guide on how to manage subtitles with HandBrake. Besides, we' ll show you how to troubleshoot some common errors, such as HandBrake subtitles not showing up and HandBrake subtitles burn in greyed out. If you haven't converted your DVD, you can check the Handbrake DVD ripping guide here.
Table of Contents
Part 1. How to Add Soft/Hard Subtitles or Captions with HandBrake
HandBrake allows you to add both soft coded and hard coded subtitles, as well as open captions (hardcoded) and closed captions (softcoded, often saved as .srt file format). Soft subtitles means that the subtitles appear as separate selectable tracks and can be turned on or off. Yet, hardcoded subtitles are written onto the image permanently and cannot be turned off.
Now let's download, install, and open HandBrake. Once done, follow our guide below to embed subtitles with HandBrake.
Step 1. Select the video file you want to add subtitles to. Then HandBrake will scan your content immediately. If you import DVD or Blu-ray, you will also need to specify the title and chapters you want to rip. Note:
- Soft subtitles are currently unsupported in the WebM container.
- HandBrake cannot handle DVD copy protection schemes on its own. To cope with copy-protected Blu-rays and DVDs, you need to download libdvdcss or switch to a HandBrake alternative.
Step 2. Choose desired output preset (e.g., General -> Fast 1080p30).
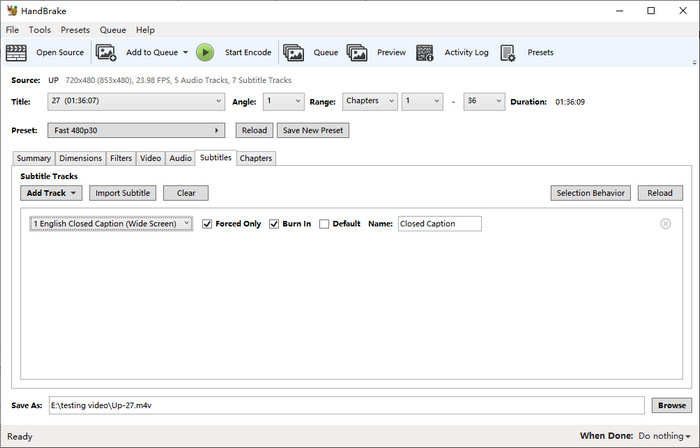
Step 3. Go to Subtitles tab and then you can select desired subtitle track(s) from existing tracks or add an external subtitle file by clicking Import Subtitle. HandBrake supports subtitle files in SRT, ASS, and SSA format. Before doing so, please make sure you've already downloaded subtitles from online websites.
Step 4. Click Browse to specify output file name and save path.
Step 5. Hit Start Encode and then HandBrake will start working. Once done, you will get a new file with added soft/hard subtitles or captions.
Click here to see more tools and apps to add subtitles to a video file.
In-Depth Handbrake Subtitle Settings Guide
You'll find some subtitle options on HandBrake, including Forced Only, Burn In, and Default. What do Forced Only, Burn In, and Default mean in HandBrake? How to set subtitles in HandBrake? Below is the essential information you need to understand when setting up your subtitles.
1. Definition of Forced Only, Burn in, and Default
- Forced Only: When enabled, HandBrake will only display subtitles that the disc producer has pre-flagged as "forced." These subtitles typically translate key foreign dialogue, on-screen text, signs, or locations that are essential for plot comprehension but are not covered by the dubbing.
- Burn In (Hardcoded): When you enable Burn In, the subtitles are permanently rendered onto the video image. This guarantees playback compatibility on all devices but prevents viewers from turning the subtitles off or changing their appearance.
- Default: When enabled, this subtitle track will be turned on automatically when the output file is played, although the viewer can still disable it during playback (softcoded subtitles only).
2. How to Check for Forced Subtitles?
First, look for a track labeled with the language AND 'Forced.' If unavailable, select the main track and click 'Forced Only.' Crucial Tip: Due to disc variations, you may need to preview the track to confirm it only contains forced text.
3. Burn In vs. Softcoded
Choose Burn In if your target device (e.g., an older TV, basic media players) doesn't support soft subtitles, or if you need the exact font/style. Meanwhile, VOBSub or PGS graphic subtitles consume more processing power to display. Burning them in can sometimes lead to smoother playback on low-power devices. Choose Softcoded if you want smaller files, the ability to turn subtitles off, switch languages, or customize their appearance during playback.
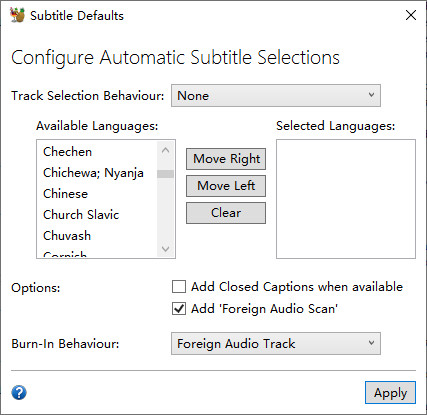
4. Advanced Handbrake Subtitle Settings
HandBrake often selects subtitles automatically. You can configure this automatic selection by clicking Selection Behavior (usually found near the Subtitles tab). This opens the Subtitle Defaults window, allowing you to set preferences based on track language or type.
Part 2. How to Remove Soft Subtitles on HandBrake?
Sometimes we don't want to see subtitles on the movie. HandBrake can remove subtitles from MP4 and more files. But before any further, we want to remind you that HandBrake cannot remove hardcoded subtitles. HandBrake can only remove soft subtitles from video.
Step 1. Import your video. Launch HandBrake and select the video file you wish to process.
Step 2. Select output format. Select the format that best suits your needs, whether it's MP4, AVI, MKV, or another compatible format.
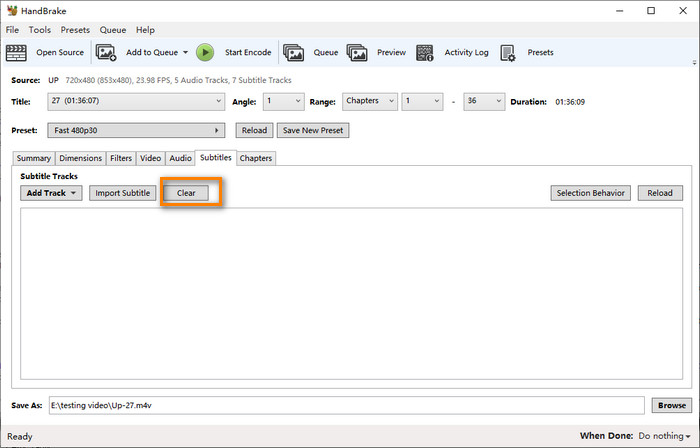
Step 3. Go to Subtitles tab and click Clear. Then, you will notice that all subtitle tracks below will disappear immediately.
Step 4. Rename your destination file and destination folder.
Step 5. Hit Start Encode and then HandBrake will begin working to export a new video file with subtitles being removed.
Part 3. Best HandBrake Alternative to Add Subtitles to Copy-Protected DVD Movies
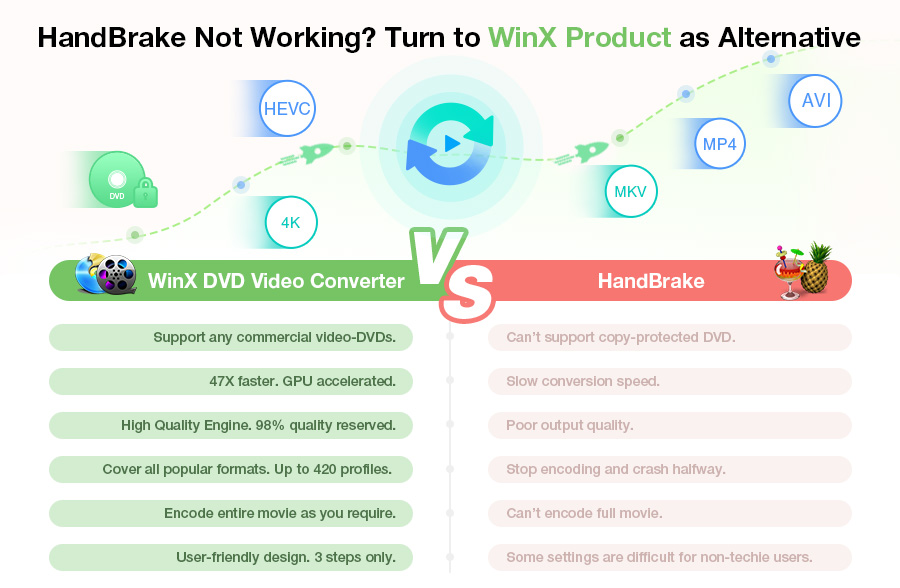
HandBrake often forces you into frustrating manual work, requiring external decryption tools and tedious track hunting just to find the correct forced subtitles. Stop wasting time guessing which track to select or dealing with automatic hardcoding failures that limit flexibility, try the best HandBrake alternative - WinX DVD Ripper Platinum.
It solves these pain points by offering built-in decryption and intelligent subtitle recognition, ensuring you get accurate, soft- or hardcoded subtitles automatically. You can also select soft, hard or forced subtitles, captions (open or closed) while rip any protected DVD, including Disney 99-title DVD, bad sector DVD, region code 1-6 DVD, DVD with fake playlist, oversized 75GB DVD, unplayable/damaged DVD, workout/AV DVD. It can also add the external SRT subtitle files to DVDs in any language.
Tutorial: How to Add SRT Subtitle/Caption to DVD Video with WinX DVD Ripper
Free download and install the best subtitle adding alternative to HandBrake for Windows and macOS. After that, download an SRT subtitle or caption files online corresponding to the target movies.
Step 1. Insert a DVD or prepare a movie source in ISO or VIDEO_TS format, click the related button on the top left of the software until it adds your movie source.
Step 2. Select any output format according to your need before adding external movie subtitles.
Step 3. Click the Edit button to select "Add External SRT" option from the drop-down list or click Subtitle Disabled button on the main title bar.
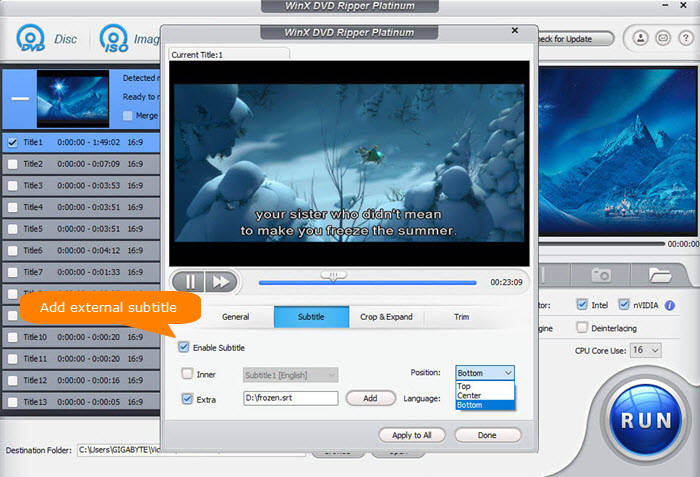
Step 4. Choose the "Subtitle" button, select the "Enable Subtitle" and check "Extra" below it. Click "Add" button to build in the downloaded SRT subtitle or open/closed caption just as shown in the picture.
Step 5. Select language and position of subtitle or caption and then hit "Apply to All" or "Done".
Step 6. Hit RUN button as the final step before the DVD subtitle ripping begins.
Video Tutorial: How to Add SRT Subtitles/Captions to DVD Movie While Ripping (Encrypted) DVD
Part 4. FAQs for HandBrake Subtitles
1. How to fix HandBrake subtitles not showing up?
Some users say that subtitles cannot show up after the video is converted with HandBrake. To fix this, you can try:
- Change your output container format. For example, if you chose M4V, now try MKV and see if the subtitles can show up.
- Extract the subtitle file from the original video and save it as a srt file.
- Change your subtitle/caption settings in HandBrake. Some programs may be unable to read image based subtitles (hardcoded subtitles). So if you checked Burn In, this time uncheck it and let HandBrake export text based subtitles (soft subtitles).
2. Why subtitles are always burned in when Burn In isn't checked in HandBrake?
Actually, this is a limitation of the MP4 format. If you choose MP4 or M4V, it'll hardcode. Because MP4 doesn't support bitmap subtitles, you cannot pass-through PGS into MP4. To fix this, you can either use MKV container or find a third party text subtitle and mux it in to use that.
3. Which subtitle formats does HandBrake support? (VOBSub, PGS, SRT, etc.)
HandBrake supports two main types of subtitles: Bitmap-based formats (like VOBSub from DVD and PGS from Blu-ray) and Text-based formats (like SRT, ASS, and SSA). While HandBrake can read all these formats, only text-based formats (SRT/ASS/SSA) can be passed through as softcoded tracks in the highly compatible MP4 container. Bitmap formats are often limited to the MKV container if you wish to keep them softcoded.
4. Why isn't the .SRT file I imported showing up in the output?
There are usually two common causes:
- The most common reason is th at you did not explicitly select the imported track and check the Default to ensure it appears on playback.
- The output container does not support soft subtitles (e.g., trying to use soft subtitles in a WebM file). Ensure you have selected the track and verified your container choice.
5. How do I import an external .SRT file into HandBrake?
Navigate to the Subtitles tab in HandBrake. In the track selection area, click the Import Subtitle button, and then select your external .srt, .ass, or .ssa file from your computer. Once imported, remember to select it from the tracks list and set it as Default or Burn In.


