


How to Record Facetime Calls with Audio on iPhone iPad Mac
 Mike Rule
Updated on
FaceTime calls are a fantastic way to connect with loved ones, but sometimes you want to hold onto those moments for a little longer. Maybe it's a virtual celebration you want to cherish, a cooking lesson you don't want to forget, or simply some good old-fashioned catching up. Thankfully, recording your FaceTime chats is easier than you might think! In this guide, I'll walk you through the process on iPhone, iPad, and Mac, with some handy tips for beginners along the way. So, grab your device and get ready to capture those special FaceTime interactions!
Part 1. How to Record Facetime Video Calls with Audio on iPhone iPad
To capture a facetime call on iPhone or iPad, you need a screen recorder application. Luckily, your iPhone and iPad have internal screen recording feature. This guide will show you how to record your FaceTime calls with audio using built-in screen recording features on Apple devices.
Step 1. Prep Your Control Center. Enable screen recording in your Control Center. Head to Settings > Control Center > Customize Controls. Find "Screen Recording" and tap the green "+" button to add it.
Step 2. Fire Up FaceTime app on iPhone iPad. Open the FaceTime app and initiate your call.
Step 3. Activate the Recorder. Swipe down from the top right corner of your screen (iPhone X and later) or swipe up from the bottom (iPhone 8 and earlier/iPads) to open Control Center. Locate the screen recording icon (it looks like a circle with a dot inside) and hold it down.
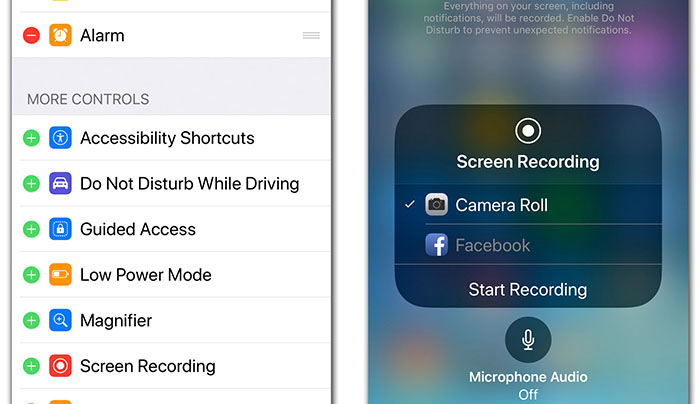
Step 4. Turn on Microphone Audio. To capture facetime video conversations with audio, you'll need to long-press the Screen Recording icon. That ought to bring up the screen below, where you can tap the Microphone icon at the bottom.
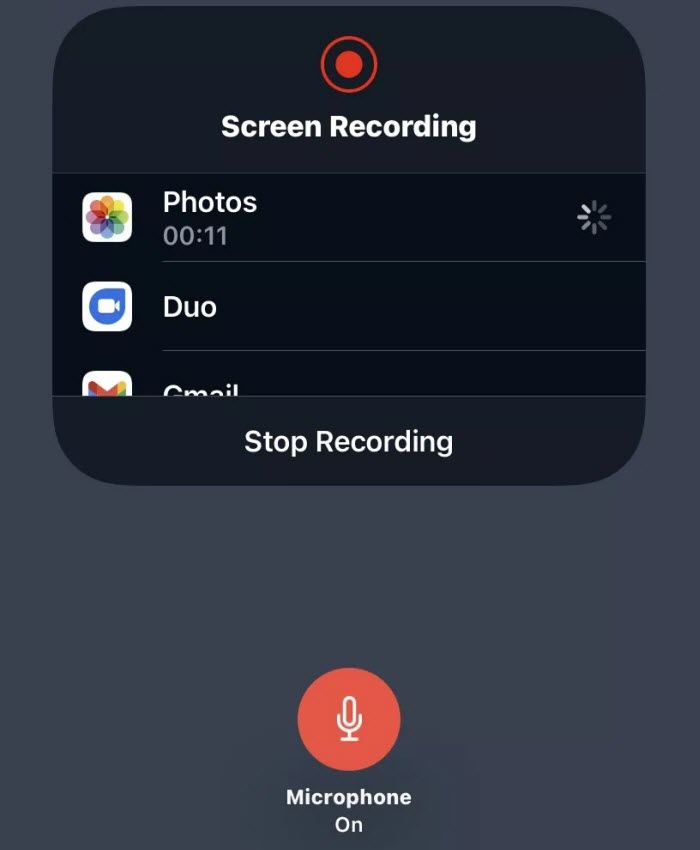
Step 5. Hit Record. Once you've selected your recording preferences, tap "Start Recording." A countdown will appear, then your Facetime call will be captured with audio sound of both sides. Continue your conversation as usual!
Step 6. Stop Recording. When you're finished, open Control Center again and tap the red recording icon to stop facetime video call capturing. Your recorded FaceTime call will be saved in your Photos app, typically within a new folder titled "Screen Recordings."
Part 2. How to Capture a Facetime Video Call on Mac
To record a facetime call on MacBook, Mac Pro or iMac, the internal QuickTime player can be your silver bullet. Follow the below guide to capture your facetime video conversations with audio if you had no such experience before.
Step 1. Fire up Facetime app on your Mac first.
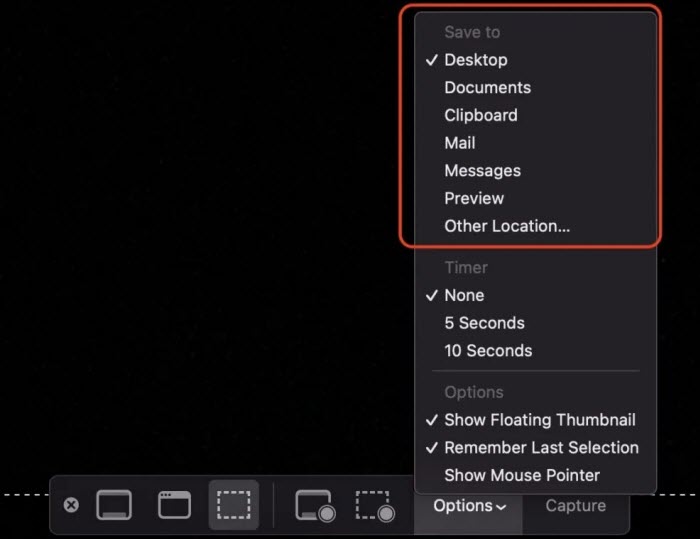
Step 2. Open QuickTime Player. Head over to your Applications folder and launch QuickTime Player. Navigate to the top menu bar and select "File" followed by "New Screen Recording."
Or hit CMD + Shift + 5 on your Mac keyboard. This brings up controls at the bottom of your screen.

Step 3. Record Facetime full screen or part screen. In the highlighted section, the button on the left records everything happened on your Facetime video call, and the one on the right records a selected portion. If you just want a part of screen to be captured, select the latter one and you'll get a dotted, draggable window to resize at your full disposal. Once you've made a choice, click Options and choose a place to save your recording.
Step 4. Microphone Selection. Click the down arrow next to the record button. Here, you'll choose "Built-in Microphone" to capture both sides of the conversation.
Step 5. Hit Record. Click the red record button to begin capturing your Facetime video conversations on your Mac.
Step 6. Stop Recording and save the final file. Once you're done, click the record button again to stop recording. Generally, the output recording file will auto show up in the destination folder and you can directly open to play it for playback and testing its video quality and sound.
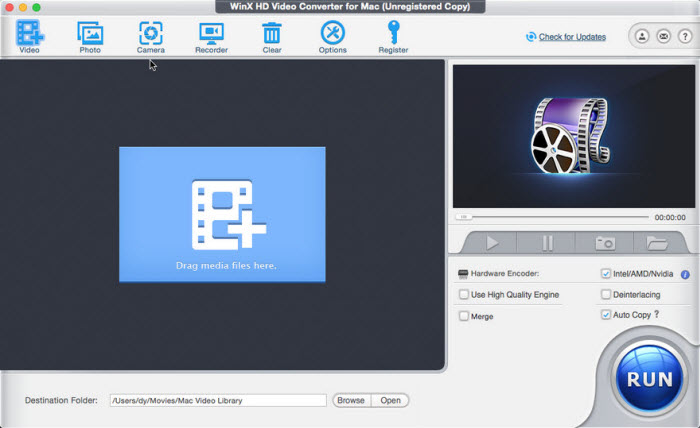
Though the built-in screen recording features on iPhone iPad and Mac help you capture facetime video chats with sound easily, they lack video editing features and video compressing feature (if the recording file is too large to save on your devices). In such case, use QuickTime player alternative - WinX HD Video Converter for Mac to hassle-free record Facetime video calls, conversations, interviews, as well as capture Skype calls, WhatsApp video calls, Google Meet videos, gameplay videos, streaming videos, product demons, etc. with microphone/system sound in 1080p, 4K 2160p high quality.
After Facetime call recording on Mac, you can even use its editing features to trim recording video length, crop facetime video image, merge clips, add subtitles, etc. Meanwhile, you can compress Facetime screen recording file to smaller file size from 64% to 90% bit rate reduction via its codec conversion, parameters adjustment and trimming methods.
 Free Download
 Free Download
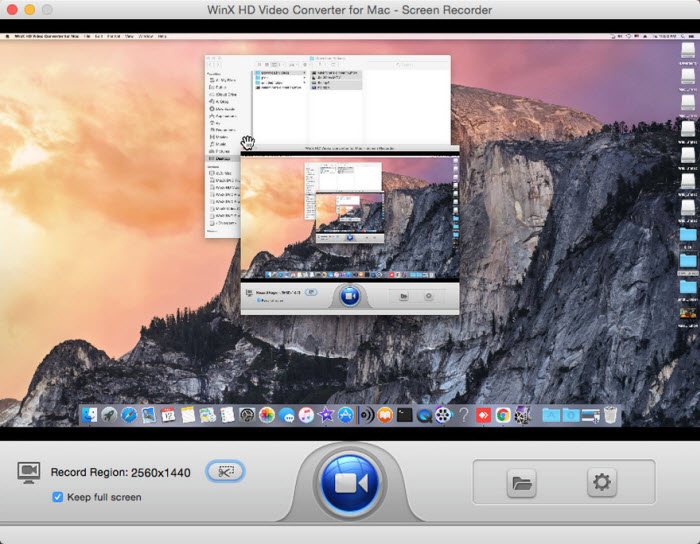
How to Record Facetime Video Calls with Audio on Mac, No Big Size
Step 1. Launch this top Mac screen recorder after downloading. Click "Recorder" at the top menu.
Note: If you only want to record yourself in Facetime video call, you can choose "Camera" to record webcam video with sound, no screen picture.
Step 2. Launch your Facetime app and start your video call on Mac. Afterwards, go back to the screen recorder software and choose record region: full or partial. If you only capture a part of your screen, the adjustable window is available to zoom in or zoom out.
Step 3. After the recording region settles down, enable audio device(s). Here you might need to record both system and microphone sound if you speak in your Facetime chat, too.
Step 4. Click on the REC button to start screen recording Facetime video chats on Mac. When the Facetime call is over, click on the Stop button to end recording. The recorded facetime video call will auto pop up for you to preview or playback.
Note: If your resulting Facetime video call file is too large to save to your iPhone iPad or cloud storage, you can convert Facetime video call recording file to MP4 HEVC video codec with 57% size off in 1080p resolution and 64% size off in 4K 2160p while keeping the same quality. Meanwhile, go to its settings windows to lower 60FPS to 30FPS, reduce video bitrate, change constant bitrate to virable bitrate or use its trimming feature to cut off unnecessary clips to shorten video duration to further reduce Facetime recording file size up to 90% off.
 Part 3. FAQs about Facetime Calls Recording
No, FaceTime does not currently notify you if someone is screen recording the call. This means the other person on the call can capture the video and audio of the conversation without you knowing.
Whether it's illegal to record a FaceTime call without consent depends on where you live. There are two main legal approaches:
- One-party consent: In these states, you only need your own consent to record a conversation you're part of. This applies in many US states.
- Two-party consent: In these states, everyone involved in the conversation needs to agree to being recorded. This is the law in California, for instance.
Even if it's legal in your area to record without consent, it's generally considered good etiquette to get permission before recording someone.
There are various reasons to result in Facetime screen recording not working issue. Let's go through the below troubleshooting steps to get problem solved:
- Check for software issues. A simple restart can often resolve temporary glitches. Meanwhile, outdated software can cause bugs. Make sure your device is running the latest version of iOS [Settings > General > Software Update].
- Verify FaceTime settings. Go to Settings > FaceTime and ensure FaceTime is toggled on.
- A strong Wi-Fi connection is crucial for recording FaceTime calls. Try switching to a different Wi-Fi network or using cellular data (if available).
- Not Screen Recording. FaceTime video recording is a separate function from Screen Recording. Screen Recording won't capture audio from FaceTime calls due to privacy restrictions.
If you've tried these steps and FaceTime recording is still not working, it's recommended to contact Apple Support for further assistance.
You can't record FaceTime calls with audio directly through FaceTime itself due to privacy concerns or legal considerations.
To troubleshoot this issue, obtain consent first. If everyone on the call agrees, you can use the Screen Recording feature and enable the microphone option to capture your own microphone and device audio. Additionally, try using third-party screen recorder program for Facetime video calls capture. There might be third-party apps with recording functionalities, but be cautious about privacy policies and only use reputable sources.


