


How to Stabilize Video in Adobe Premiere Pro [2024 Comprehensive Guide]
 Mike Rule
Updated on
You may have noticed that our captured videos, especially handheld footages, often have a bit of shaking, which affects the viewing experience negatively. Before sharing them on social platforms, it's crucial to preprocess the videos to make them as stable and smooth as possible. So, how can we achieve video stabilization? One approach is to use Premiere Pro. This video editing software features a "Warp Stabilizer" effect designed to assist in stabilizing videos. So in this article we’ll show you how to stabilize video in Premiere Pro.
How to Stabilize Video in Adobe Premiere Pro
Now we'll walk you through the process of stabilizing footage in Premiere Pro, from importing your video to exporting the final result.
Step 1. Download and install Adobe Premiere Pro.
Adobe Premiere Pro has relatively high system requirements, so you need to check if your computer meets the minimum system requirements.
Once installed, pick a subscription and enter your license key to activate Premiere Pro.
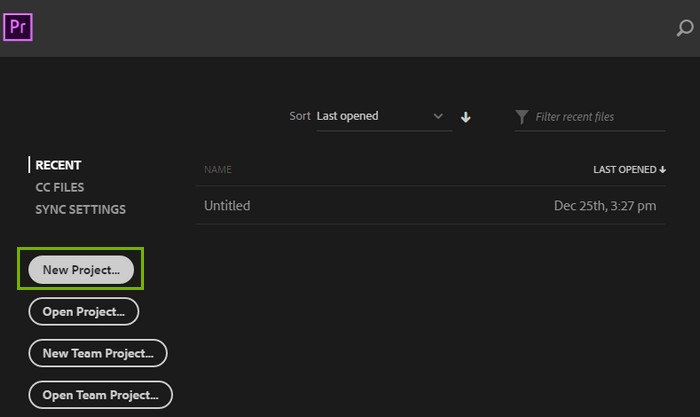
Step 2. Open Adobe Premiere Pro and create new project.
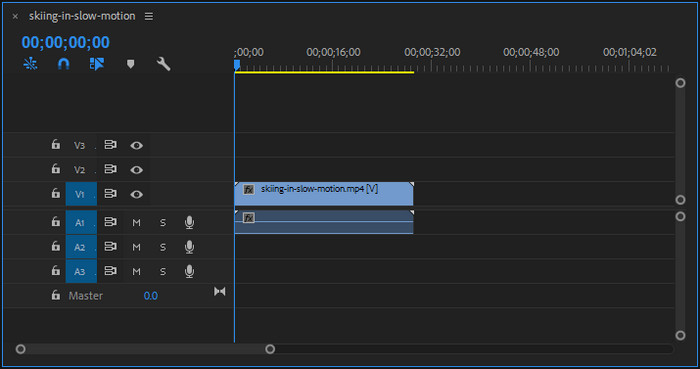
Step 3. Locate the video you want to stabilize and drag it to the timeline.
Step 4. Navigate to the "Effects" panel and search for "Warp Stabilizer". You'll find the "Warp Stabilizer VFX" effect.
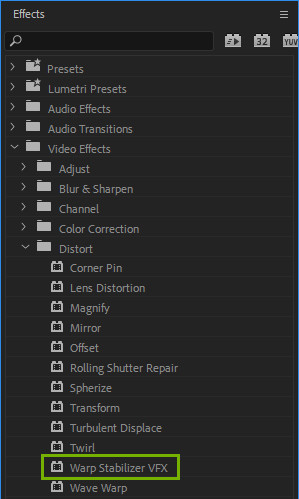
Step 5. Drag and drop Warp Stabilizer VFX onto your shaky video.
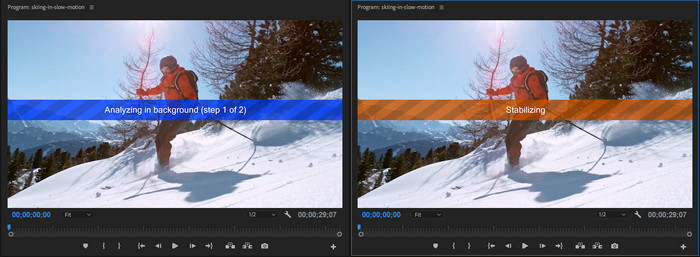
Then, Adobe Premiere Pro will seamlessly embark on a dual-step sequence: first, it undertakes a background analysis of your video, followed by its stabilization. This entire process operates in an automatic manner. The processing time depends on your video length and other factors such as exposure.
Once done, you can preview the outcome. If you find it meets your expectations, you can proceed to export it. However, should you feel dissatisfied with the result, you possess the option to fine-tune the effect using the steps outlined below.
Step 6. Fine-tune the effect.
Premiere Pro offers a multitude of setting options in Warp Stabilizer tool. Figuring out how to set them up can be a challenge for ordinary users. Below, we'll provide some tips and explanations to help navigate this process.
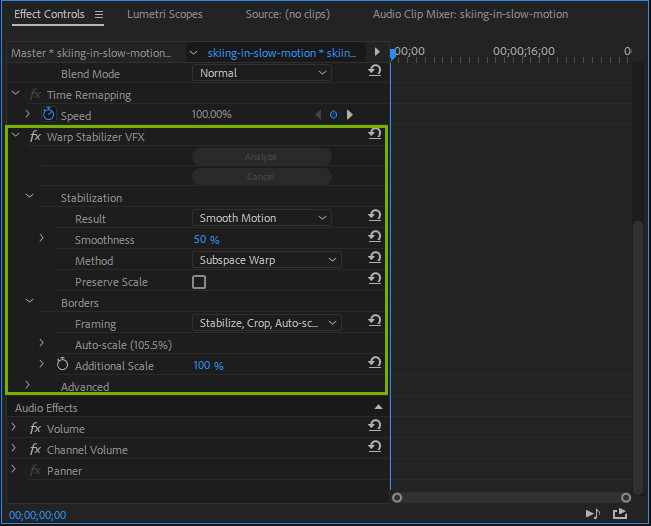
1. Smooth Motion or No Motion
By default, the Warp Stabilizer effect presets the 'Stabilization Result' as 'Smooth Motion.' However, if you prefer your footage to exhibit no motion at all, the effect can accommodate that too. Simply switch the 'Result' option to 'No Motion.' If you don't see an immediate change, remember to click the 'Analyze' button once more.
2. Adjust the Smoothness
The "Smoothness" parameter controls the intensity of stabilization. A higher value smooths out the motion but might make the footage look too artificial. Lower values retain more of the original motion but with less stabilization. Setting it to zero will essentially return the footage to its original, unstabilized state in terms of motion. Adjust the "Smoothness" slider to strike the right balance between stability and a natural look.
Keep in mind that this percentage can surpass 100% and even reach up to 1,000%, providing ample room for experimentation to achieve the desired level of smoothness.
3. Choose Stabilization
Premiere Pro offers 4 different stabilization methods, namely "Position", "Position, Scale And Rotation", "Perspective", and "Subspace Warp" (default). These four methods yield slightly varied outcomes using the same footage. While none of them is inherently superior, certain circumstances may favor one over the others. If refining other parameters doesn't yield satisfactory results, consider experimenting with different stabilization methods. This trial and error approach can help you determine which method best suits your specific scenario.
4. Choose Framing Options
The Framing setting determines how the edges of the stabilized result are presented. There are four framing options available: Stabilize Only; Stabilize, Crop; Stabilize, Crop, Auto-scale (default) and Stabilize, Synthesize Edges.
- Stabilize Only: This option displays the entire frame, including the moving edges. Choosing Stabilize Only showcases the extent of stabilization work being applied to the image. This setting is useful when you plan to crop the footage using alternative methods. When selected, the Auto-scale section and the Crop Less Smooth More property become inactive.
- Stabilize, Crop: With this choice, the moving edges are cropped without any scaling. Stabilize, Crop is functionally the same as using Stabilize, Crop, Auto-scale and setting Maximum Scale to 100%. When you enable this option, the Auto-scale section is deactivated, but the Crop Less Smooth More property remains accessible.
- Stabilize, Crop, Auto-scale (default): This default option involves cropping the moving edges while also scaling up the image to fit the frame. Automatic scaling is managed by various properties found in the Auto-scale section.
- Stabilize, Synthesize Edges: This selection involves filling the blank space left by the moving edges with content extracted from frames earlier and later in the timeline (regulated by Synthesize Input Range in the Advanced section). If you opt for this, the Auto-scale section and the Crop Less Smooth More property are disabled.
5. Adjust Advanced options
In the advanced options list, you'll find additional parameters for refining or correcting the results. Activating the "Detailed Analysis" checkbox prompts Premiere to delve deeper into your footage during analysis and motion tracking.
Another valuable option is "Rolling Shutter Ripple" which specifically addresses the distortions caused by the rolling shutter effect in footage.
Step 7. Export the stabilized video.
Go to the "File" menu and choose "Export" > "Media." Alternatively, you can use the shortcut key "Ctrl + M" (Windows) or "Cmd + M" (Mac).
In the Export Settings window that appears, you can adjust various export settings such as format, preset, output location, and more. Choose an appropriate format and preset that suits your requirements. Common options include H.264, MPEG-4, or QuickTime for video formats. You can select a preset based on the desired resolution and quality.
Under the "Output Name" field, enter a name for your exported video file.
Choose the destination folder where you want to save the exported file by clicking the "Browse" button next to the "Output Name" field.
Once you've configured all the export settings, click the "Export" button to start the export process.
Premiere Pro will start rendering and exporting your stabilized video based on the chosen settings. The time it takes to export depends on factors such as the length of your video, your computer's performance, and the chosen export settings.
Once the export is complete, navigate to the output destination you specified earlier to locate your stabilized video. Play the exported video to ensure that the stabilization effect has been successfully applied and that the video looks as desired.
So above are the steps on how to stabilize video in Premiere Pro. I hope you're able to achieve a satisfactory outcome.
If you find Premiere Pro too complex, expensive, or if your computer isn't compatible, you can explore alternative solutions. One option is Winxvideo AI, which might suit your needs better.
Adobe Premiere Pro Alternative to Stabilize Video
Winxvideo AI, a versatile video tool, comes with a wide range of powerful features, including video stabilization, super resolution, and frame interpolation. In comparison to Adobe Premiere Pro, Winxvideo AI stands out for being more user-friendly, cost-effective, and having lower computer system requirements. In the following, we'll demonstrate how Winxvideo AI effectively stabilizes videos.
Step 1. Download and install Winxvideo AI on your computer.
 Free Download
  Free Download
Winxvideo AI is for PC, while Macxvideo AI (from our MacXDVD brand) is for macOS.
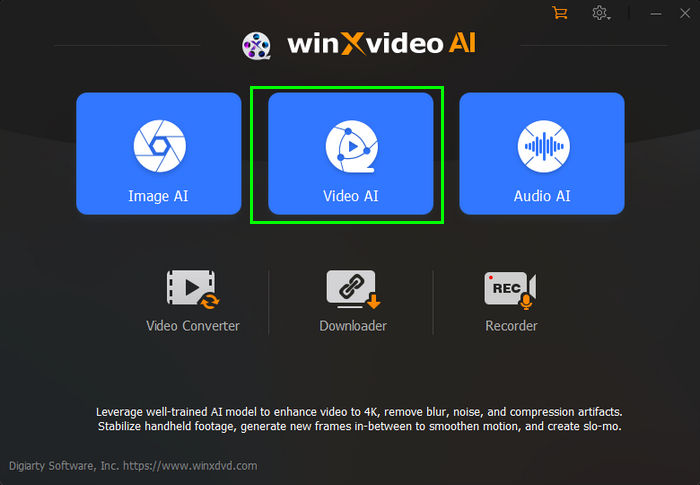
Step 2. Open Winxvideo AI and click on the "Video AI" option to access the video enhancing tool.
Step 3. Import the video you wish to stabilize by clicking the "Add Video" button located at the bottom left corner. Certainly, you can also do this by drag-and-drop.
Tips: Winxvideo AI allows you to import multiple video clips for batch processing.
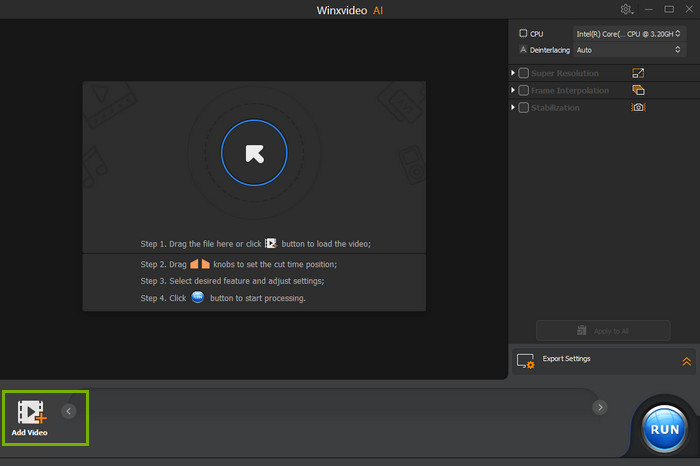
Step 4. Check the box before Stabilization to enable it and select desired analysis mode and preset.
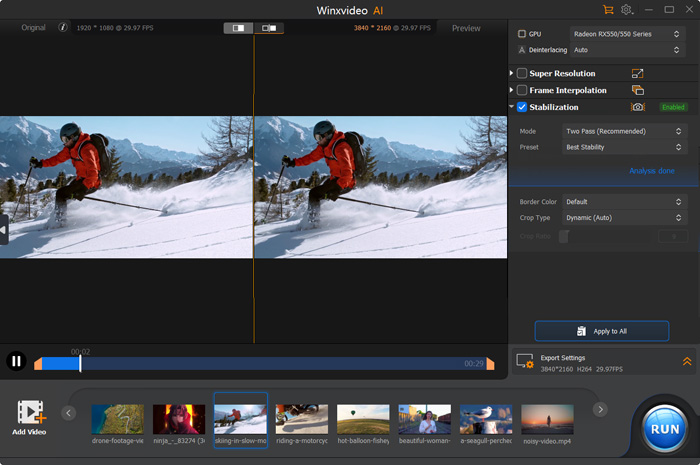
There exist two analysis modes: One Pass and Two Pass. The One Pass mode prioritizes speed by analyzing a reduced set of data, albeit delivering marginally inferior results. Conversely, the Two Pass mode, while slower due to processing a more extensive dataset, furnishes superior stabilization.
Regarding preset, there are four available options:
- Best Stability: This preset provides top-tier video stabilization, albeit with some cropping involved.
- Balanced: It strikes a balance among video stabilization, cropping, and processing speed.
- Fastest: This option offers the highest speed but compromises with average stabilization and a degree of cropping.
- Minimum Crop: It minimizes cropping while maintaining an average stabilization effect.
These presets cater to different preferences, offering a spectrum of trade-offs between stabilization, cropping, and processing speed for your video content.
After you specify a mode and preset, just hit the "Analyze" button to analyze and stabilize your video. Winxvideo AI will then employ its advanced AI algorithm to meticulously analyze and stabilize the video. It will display the progress on the preview window. After completion, you can preview the stabilized result.
Tips: If you are not satisfied with the result, you can try other mode and preset, and fine-tune other settings: Border Color, Crop Type, and Crop Ratio.
Step 5. If you are satisfied with the stabilized result, specify the export settings and click the "RUN" button to export the final output.
So above are the steps on how to stabilize video with Premiere Pro alternative – Winxvideo AI. You can give it a try and assess whether it aligns with your expectations.


