


How to Isolate Vocals in Audacity – Complete Beginner’s Guide
 Mike Rule
Updated on
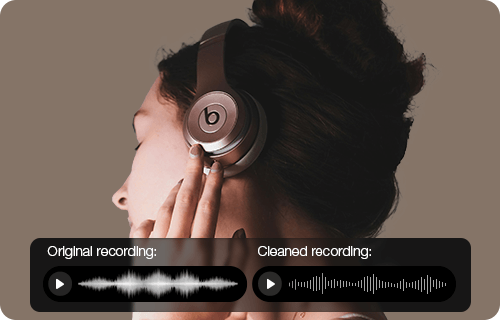
Summary: Isolating vocals in Audacity isn’t as simple as clicking a button. You can use AI plugins like Intel OpenVINO for cleaner separation, or try the classic stereo split and phase inversion trick for a quick, free solution. Practical tips, like blending with the original track, can help improve the final result for karaoke, remixes, or acapella projects.
Isolating vocals from a song remains one of the most common challenges for music creators. Audacity, a widely used free audio editor, offers built-in options, but navigating them can be confusing, and results often fall short of expectations. This guide takes a hands-on approach, testing Audacity’s tools, collecting tips from real users, and exploring AI Audacity vocal remover plugins that deliver cleaner, faster vocal separation.
How to Isolate Vocals in Audacity [2 Ways]
If you’ve ever opened up Audacity hoping to strip vocals from a song for a karaoke night or a remix project, you’ll know it’s not as straightforward as hitting a single button. Different tracks behave differently, and there isn’t a universal perfect removal option. That said, Audacity gives you a few solid paths to experiment with, from AI vocal remover plugins that do the heavy lifting to quick stereo tricks you can try in just a few clicks. Here’s a breakdown of what actually works, plus a few practical tips users have learned the hard way.
Using AI to Separate Vocals
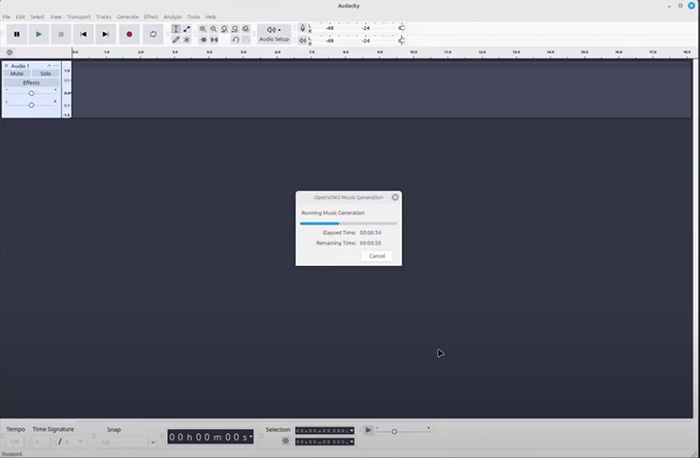
Modern AI plugins make it easier than ever to peel apart vocals and instruments. On Windows and Linux, Audacity users can install the Intel OpenVINO Music Separation plugin. After downloading and setting it up, you’ll find it under Effect → OpenVINO AI Effects → OpenVINO Music Separation.
The plugin gives you two main options:
- 2-stem mode: Splits the audio into vocals and instrumental. This is the go-to setting for most tracks.
- 4-stem mode: Breaks things down further (vocals, drums, bass, and other). Handy if you only want to isolate percussion or basslines in addition to vocals.
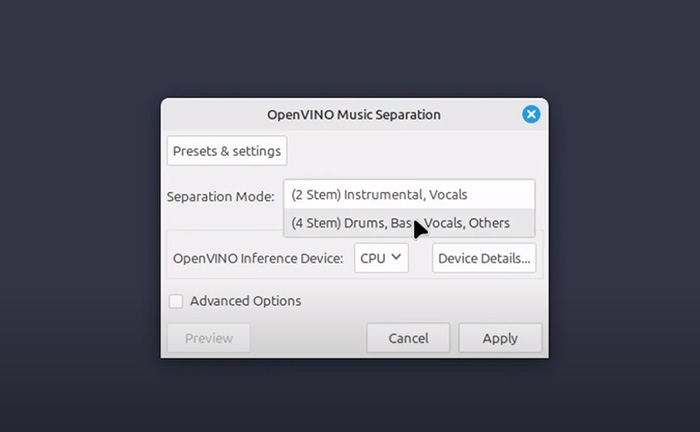
Performance depends heavily on your hardware:
- CPU: Works on almost any machine, but tends to be slow.
- GPU: Much faster if you have a decent graphics card.
- NPU: Available on newer Intel processors, roughly on par with GPU speed.
User tip: Don’t worry if the first run feels painfully slow — the model “warms up” after the first attempt, so the second try is usually much quicker. Also, expect mixed results: AI handles clean studio mixes better than live recordings or songs drenched in reverb.
Manually Separating the Stereo Field
If you don’t want to mess with plugins, there’s a classic DIY trick that uses stereo positioning. Most vocals are mixed dead center in a track, so you can cancel them out by splitting the stereo track and flipping the phase on one side.
- In Audacity, click the dropdown menu on the track and select Split Stereo to Mono.
- You’ll now have two mono tracks. Select one and go to Effect → Invert.
- Play it back. Anything panned center — usually the vocals — will drop out.
The downside? This method doesn’t just cut vocals. Anything else in the center (like snare drums or bass) may vanish too. On top of that, reverb, harmonies, or layered vocals often survive, leaving ghostly traces. Still, if you just need a quick karaoke-ready track, it’s a fast and free option.
Tips: If the result sounds thin or hollow, try blending the processed track back with a copy of the original instrumental. It won’t be perfect, but it can mask some of the artifacts.
Common Issues with How to Separate Vocals in Audacity
Vocal removal is one of those features that sounds better on paper than it usually performs in reality. If you spend time in user forums or watch how beginners experiment in Audacity, a pattern quickly emerges: the tools work in certain cases, but there are plenty of frustrations and half-baked results along the way.
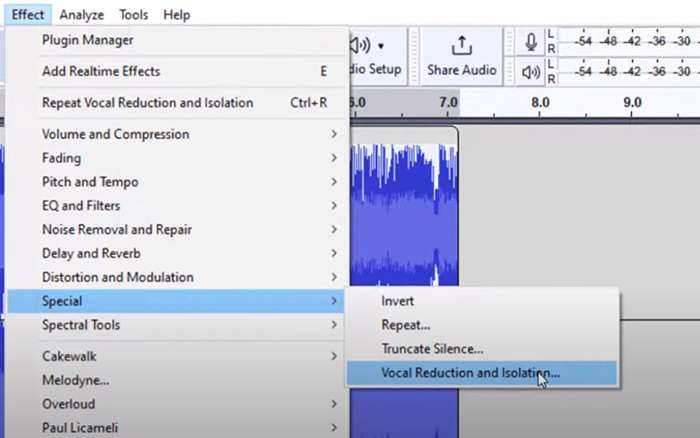
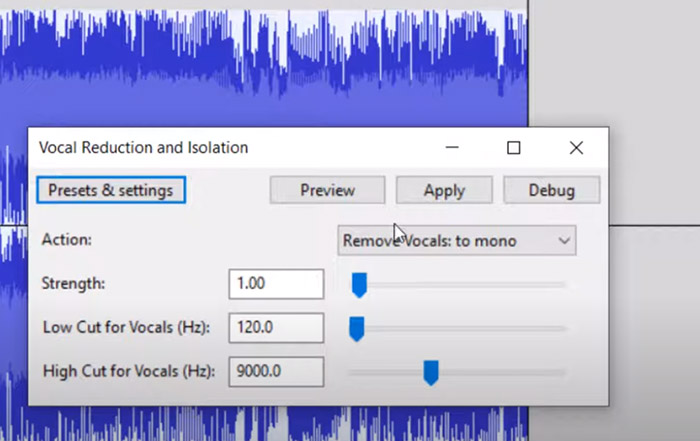
The root cause is simple: in a finished stereo track, vocals aren’t sitting on a separate channel waiting to be muted. They’re already mixed together with drums, guitars, synths, and a healthy dose of reverb or effects. Think of it like trying to un-bake a cake. That’s why Audacity’s own Vocal Reduction and Isolation effect can only do so much. It may reduce the prominence of a singer, but it rarely scrubs them out cleanly without chewing into other instruments at the same time.
What users actually report:
- Unrealistic expectations: Many newcomers expect a crystal-clear karaoke track. What they get is often a muffled instrumental with ghostly echoes of the vocal still lurking.
- Plugin headaches: A recurring complaint is “the plugin doesn’t show up.” In most cases, the OpenVINO AI plugin is installed but Audacity wasn’t restarted, or the files weren’t dropped into the right folder.
- Settings confusion: Adjusting parameters like “Strength” or “Frequency Band” sometimes feels pointless — especially with modern pop or hip-hop tracks where vocals are layered with harmonies and drenched in effects.
- Classic trick frustrations: Long-time users say the old split-stereo-and-invert method gives hollow, unnatural results. The vocals may fade, but bass, snares, or anything else in the center disappears too.
It’s also worth noting that AI models aren’t immune to these issues. They perform best on clean studio mixes but stumble on live recordings, complex stereo imaging, or heavy reverb. This explains why searches like “why Audacity vocal reduction doesn’t work” and “limitations of Audacity vocal isolation” keep popping up in community discussions. The tools aren’t broken; they’re just limited by the physics of how audio is mixed and mastered.
In short, Audacity gives you several paths to experiment with, but users should set realistic expectations. If you’re chasing a flawless, studio-quality acapella or instrumental, you’ll probably hit roadblocks. If your goal is just to make a passable karaoke track or lower the vocals enough to sing over, the software can still get the job done — with some patience and a willingness to accept imperfections.
Audacity Alternatives for Vocal Removal
Many users hit the same roadblock: Audacity’s vocal reduction tools are decent for experiments but rarely deliver the clean, studio-like results people want. Since most songs are mixed down into a single stereo file where vocals and instruments are already blended, tricks like channel inversion or frequency filters can only go so far. That’s why searches for “limitations of Audacity vocal isolation” are so common — the tool itself isn’t broken, it’s just not designed for perfect vocal separation.
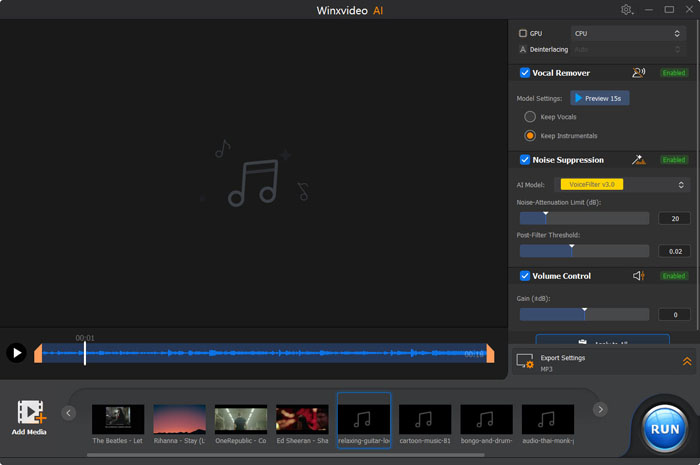
So what’s the alternative? For anyone serious about making karaoke tracks, mashups, or acapella extractions, AI-powered software is quickly becoming the go-to solution. Tools like Winxvideo AI use trained models that actually learn to distinguish human voices from instruments. Instead of guessing based on stereo placement or frequency range, the AI can split out stems — vocals, drums, bass, and background — with much higher accuracy.
Users who switched from Audacity to Winxvideo AI often highlight three big improvements:
- Cleaner separation: Fewer ghostly artifacts and less damage to the instrumental track.
- Better with modern mixes: Handles tracks with reverb, harmonies, or heavy processing that trip up Audacity.
- Time-saving: No endless tweaking of parameters — the AI handles most of the heavy lifting automatically.
 Free Download
 Free Download
Winxvideo AI is for PC, while Macxvideo AI (from our MacXDVD brand) is for macOS.
- Launch Winxvideo AI and click on the "Audio AI" option from the main interface.
- Drag and drop one or more songs or videos directly into the window. You can also hit the “Add Media” button to browse and select files.
- Keep Vocals – Create acapella tracks, extracting vocals for remixes, or isolating voices for dubbing and covers.
- Keep Instrumentals – Great for generating karaoke-ready tracks, making DJ edits, or create background music for videos and presentations.
- Select from a wide range of formats (MP3, FLAC, WAV, AAC, H264, HEVC, and more) and hit the “RUN” button to start processing.
Bottom line: Audacity is fine if you just want to experiment or mute vocals enough for casual karaoke. But if you want professional-level results without spending hours tweaking settings, an alternative like Winxvideo AI is a far more practical choice.
 Audacity Vocal Isolation FAQs
Audacity works with mixed-down stereo or mono files, where vocals are already blended with instruments and effects. Its Vocal Reduction / Isolation feature or the phase inversion trick can only target sounds placed dead center in the stereo field. On modern pop or EDM tracks with layered harmonies and reverb, these methods leave behind “ghost vocals” or cut important instruments. This is why forum posts often mention frustration with searches like “why Audacity vocal reduction doesn’t work.”
The Vocal Reduction and Isolation effect is located under the Effect menu. Beginners often miss it because the menu names can differ slightly between Audacity versions. If you don’t see it, make sure you’re running a recent version of Audacity and that the effect hasn’t been disabled in the plugin manager.
Older tutorials often mention converting tracks to Mono before applying the inversion trick. In newer versions of Audacity, the “Mono” option isn’t always labeled the same or may be replaced by the “Split Stereo to Mono” feature. Users should check the track dropdown menu to split stereo tracks if mono conversion is needed for vocal isolation.
A frequent beginner issue is installing the OpenVINO AI plugin but not restarting Audacity, or placing the files in the wrong plugin directory. Users in forums confirm that a restart is always required after installation. On Linux systems, permission errors or missing dependencies are also common causes. Double-check that you are running a compatible version of Audacity and that “Rescan Plugins” has been run in Preferences.
These controls rely on detecting vocal frequencies, but modern mixes often overlap vocals with synths, guitars, or effects. Many users report that sliding these parameters only slightly changes the result. Community advice suggests trying multiple passes or pairing vocal reduction with EQ and noise gating. Still, expectations should remain realistic — Audacity wasn’t built for stem-quality separation.
The “Split Stereo to Mono + Invert” method cancels out everything placed in the center of the stereo field, not just vocals. That usually includes bass, snare drums, or piano. Users often complain about “hollow” results or missing rhythm sections. This method is fast but works best only on simple tracks with very clean vocal panning.
This is one of the most common pain points. Community consensus is that Audacity is fine for casual karaoke prep or learning how separation works, but not for professional stems. Many users turn to dedicated AI tools like Winxvideo AI or other machine-learning vocal removers, which are designed to pull apart vocals, drums, and instruments with fewer artifacts. These alternatives save time and produce tracks that are closer to what remixers or DJs actually need.


