


How to Edit AVCHD Videos in Windows Movie Maker
Windows Movie Maker is no longer available for download in Windows 10/8/7. But if you have it installed, it should continue to work on your Windows PC. Many users still resort to Windows Movie Maker to edit their 4K Ultra HD AVCHD footages recorded by Sony, Panasonic cameras, and other devices. Here we offer a basic guide on how to edit AVCHD videos in Windows movie maker and how to troubleshoot the program not working errors when processing AVCHD videos.

Free Download Windows Movie Maker Alternative to Edit 4K/HD AVCHD Video Files
Winxvideo AI is a good Windows Movie Maker alternative to split, compress, trim, cut, crop, add sub/watermark to 4K/HD 1080P AVCHD videos, etc. without problem. It will also convert 4K/1080P AVCHD files shot by Sony/Panasonic cameras to Windows Movie Maker accepted format such as WMV or MP4, and other formats. Easily solve problems like WMM won't open AVCHD, black screen, AVCHD not loading to Windows Movie Maker, etc.
Steps to Edit AVCHD Files in Windows Movie Maker
Step 1: Import the AVCHD footage to the video editor for Windows
Click the Add videos and photos button and select a source clip from your Sony/Panasonic camera, computer, or other devices. Windows Movie Maker supports ASF, AV1, MPEG, MPE, MPG, M1V, DVR-MS, MPV2, WM, WMV video files. If you have any issue, check to import AVCHD to Windows Movie Maker.
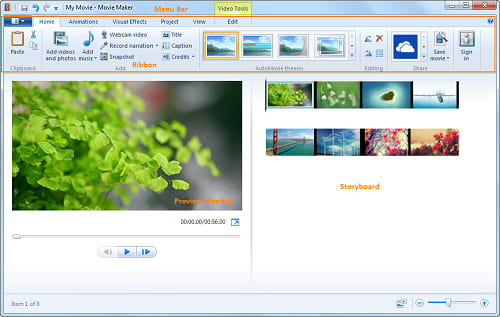
Step 2: Start editing your AVCHD videos
Windows Movie Maker can add titles to your AVCHD clips, add transitions and effects such as the control of contrast, brightness, etc.
- Click the Title tab on the menu bar, double click the title of the video clip, and type the new title you would like to change to.
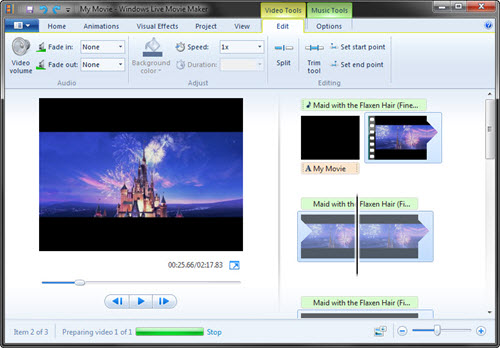
- Select the clip, and you should see the Video Tools menu, offering options to split and trim your footages, or change the speed. Click CTRL + L, and your long AVCHD footages will also cut into two parts.
- Select a video clip, and add transition to the beginning of the clip under the Animation menu.
Step 3: Export your AVCHD video files
Click the Save movie button to finish the video editing process. If Windows Movie Maker doesn't work, check the troubleshooting tips below or resort to other free video editors for Windows 10.
Troubleshoot Issues with Editing AVCHD Videos in Windows Movie Maker
1. Can't Open Camcorder AVCHD Videos for Editing in Windows Movie Maker
If you can't open and import your AVCHD video files in Windows Movie Maker, try the following solutions.
1. Check if the source AVCHD video is corrupted by other programs.
2. Convert AVCHD video format to WMV or MP4 format with H.264 AAC codec format.
3. Try deleting the temp files.
2. AVCHD Videos Have No Sound/No Video in Windows Movie Maker
AVCHD (.mts) videos recorded in Panasonic and Sony camcorder play no sound/n+o picture in Windows Movie Maker. An issue stated by a user on Microsoft forum as below. "I upload an AVCHD video shot by a Panasonic camera to my PC and open it with Movie Maker. It recognizes the file but it says they are not compatible. There is just sound, no picture. But when I open them with QuickTime player, they play just fine."
Test the source AVCHD video with other media player to see if it's the problem with the file. If works and you receive the compatibility error message, try converting AVCHD videos to MP4 with H.264 MP3 or H.264 AAC format.
3. Windows Movie Maker Runs Slow/Freezes When Editing AVCHD Files
Some users imported the AVCHD video from Sony camera or other devices to Windows Movie Maker, the program started to run very slow and they couldn't do editing anymore. It's very common to run into lagging edit performance issues with AVCHD .mts files in Windows Movie Maker.
AVCHD videos shot by cameras are always in high quality. HD or 4K Ultra HD AVCHD videos are very large and consume more memory while editing. You can split long AVCHD footages into several smaller parts and then edit them using Windows Movie Maker. Also, go to File > Options, click the Advanced tab, check to Prepare files for faster editing, and click OK. If you have many 4K AVCHD videos, check our pick of 4K video editors for Windows 10.


