


How to Upscale 1080p to 4K in HandBrake – Steps and Best Settings
 Mike Rule
Updated on
Summary: Handbrake video upscaling uses the Lanczos algorithm via FFmpeg for resizing, which some users find delivers surprisingly clean results on low-res videos, sometimes outperforming lightweight AI models like FRSCNN in Chainner. While HandBrake doesn’t upscale by default, you need to manually adjust video quality settings under the Video tab to trigger upscaling.
I’ve seen a lot of people ask if HandBrake can upscale videos — short answer: it can, but it’s not obvious and the results aren’t always worth it. You’ll need to tweak a couple of settings manually, otherwise it just keeps the original resolution. I’ll break down how to upscale with HandBrake, which settings you actually need to touch, and what kind of results you can realistically expect.
Does HandBrake Actually Support Video Upscaling?
Yes. HandBrake does allow you to increase the resolution of your videos, but it’s crucial to know what kind of upscaling it actually performs. Unlike AI-based upscalers that try to add or recreate fine details, HandBrake uses a straightforward, linear scaling method. This means it simply stretches the original pixels to fill a larger frame without generating new image information or improving visual quality.
This pixel-stretching can make the video appear softer, highlight compression artifacts, or create blockiness—especially when upscaling low-resolution sources like DVDs or 480p videos. Moreover, the file size often grows significantly because you’re encoding more pixels without any real quality gain.
How to Upscale a Video with HandBrake (Complete Steps)
If you’ve decided to try HandBrake’s built-in upscaling—even knowing its limits—the process is straightforward. With manual adjustments, you can resize your videos to a higher resolution. To enable upscaling in HandBrake, you must manually adjust the output resolution in the Picture tab—HandBrake won’t automatically increase resolution just by selecting a preset like "1080p" or "4K". Below is a step-by-step guide to help you upscale your video files using HandBrake, so you get the best possible output within its capabilities.
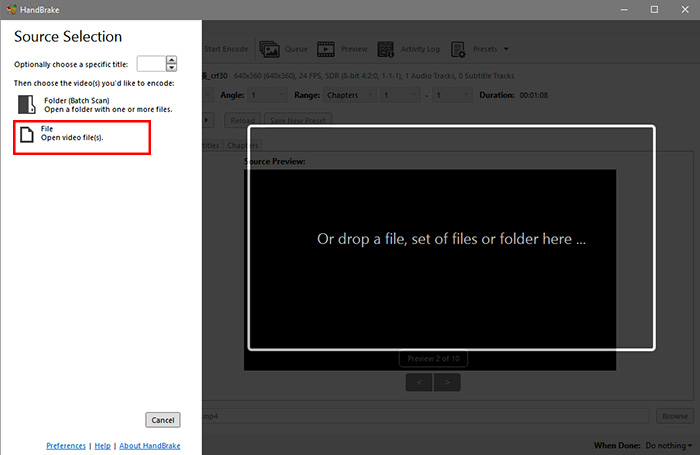
Step 1: Open HandBrake and Import Your Video
Launch HandBrake on your computer. Click the “Open Source” button near the top-left corner and browse to select the video file you want to upscale. The file will load into HandBrake’s workspace, ready for editing.
Note: HandBrake’s command-line interface (CLI) and Nightly build GUI versions support more flexible upscaling options. The standard HandBrake GUI did not allow upscaling in early versions and only added this feature after version 1.4. While CLI has always supported upscaling, it is generally not recommended. Some users have successfully upscaled videos from 1080p to 4K using the Nightly snapshot GUI build.
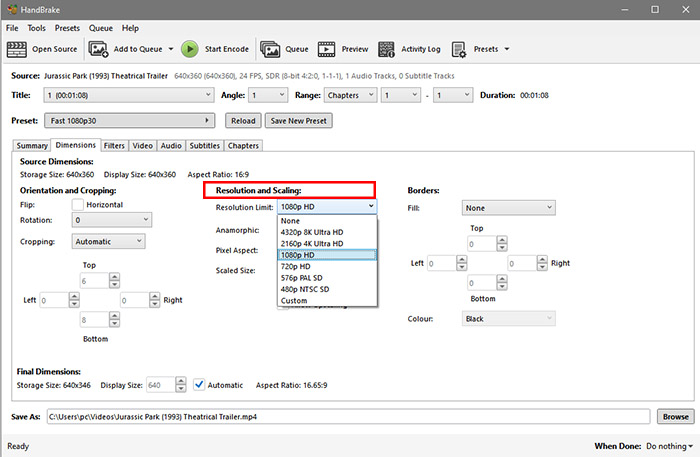
Step 2: Change the Output Resolution
Go to the Dimensions or Picture tab. Here, you must manually increase the width and height values to your desired resolution, such as upscaling 1080p to 4K. Keep in mind, HandBrake won’t automatically upscale unless you make these changes yourself.
Many beginners mistakenly believe that switching to a 1080p preset will automatically upscale the video. In reality, presets only configure encoding settings and do not change the video's resolution unless you manually adjust it.
Tip: DVD videos may use Anamorphic mode (non-square pixels), so you should first disable anamorphic before upscaling to avoid distorted aspect ratios. For example, convert 576p (4:3) → 1024x576 (16:9) → 1280x720 by restoring the widescreen ratio before scaling up.
Step 3: Adjust Video Quality Settings
Switch to the Video tab and locate the “Constant Quality” (RF) slider. Lower RF values mean better quality but larger file sizes. For 4K upscaling, aim for an RF value between 22 and 28 depending on your source and how much you want to balance quality and size.
Tip: HandBrake's frame rate upscaling is very limited. Even if you set a constant frame rate (CFR) of 60fps, it simply duplicates frames from a 30fps source rather than performing true AI frame interpolation or motion compensation. This leads to larger file sizes without smoother playback.

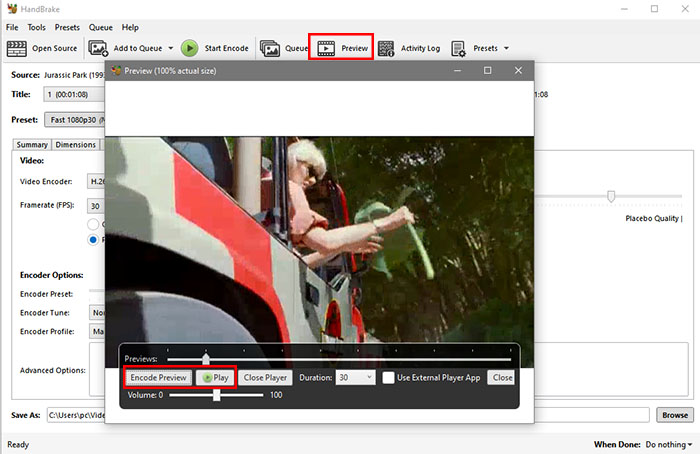
Step 4: Preview the Upscaled Video
Use HandBrake’s preview feature to check a short segment of your upscaled video. This helps you ensure the result meets your expectations before encoding the entire file.
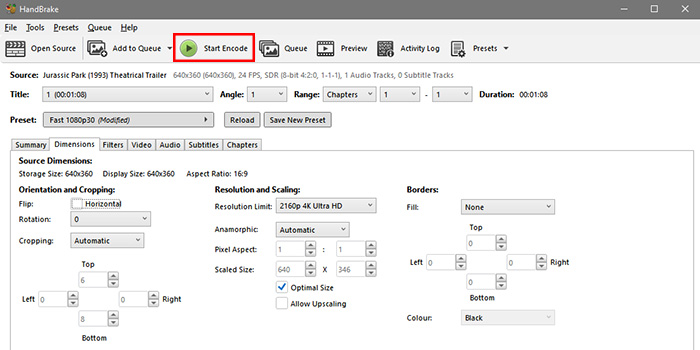
Step 5: Start Encoding
When you’re ready, click the “Start Encode” button. HandBrake will process the video and output the upscaled file. Remember, this process increases resolution by resizing pixels and does not add new visual detail.
Best Settings for HandBrake Upscaling (Dimensions, Filters & More)
When using HandBrake to upscale videos, knowing the right settings is key to avoid unnecessary file bloat and poor image quality. While HandBrake's upscaling is basic, adjusting dimensions, filters, and quality settings carefully can help you get the best possible result within its limits.
When HandBrake Upscaling Might Make Sense
- Compatibility and bitrate: Platforms like YouTube offer higher bitrate for 4K uploads, even if the original is 1080p. Upscaling can help you get better streaming quality by “tricking” the platform.
- Project requirements: When you need to match a specific resolution across multiple clips to maintain consistency in editing timelines.
- Intermediate step: Upscaling low-res content to 720p before letting a 4K TV do its own upscaling can sometimes produce smoother results.
Recommended HandBrake Upscaling Settings
- Dimensions tab: Manually increase width and height to the target resolution (e.g., 1920x1080 or 3840x2160). HandBrake won’t upscale unless you explicitly change these values.
- Filters: Avoid aggressive sharpening or denoise filters when upscaling, as these can amplify artifacts.
- Video quality (RF value): For upscaled output, use an RF range of 22-28 for 4K, balancing quality and file size. Lower RF values improve quality but increase size.
- Frame rate: Keep the original frame rate. HandBrake’s frame interpolation is limited and does not truly generate new frames.
Common Issues and Why HandBrake Upscaling Often Disappoints
- Relying on HandBrake to improve poor quality sources—it will only enlarge existing noise and compression artifacts.
- Expecting significant clarity improvements—HandBrake is “upsizing” not true “upscaling” with detail reconstruction.
- Using presets expecting automatic upscaling—presets only cap resolution and don’t trigger upscaling unless manually set.
If your goal is true image enhancement, AI upscalers like Winxvideo AI or free tools like Video2X and AVISynth are superior choices, although they demand powerful hardware and longer processing times. For casual viewing, modern 4K TVs and media players usually handle upscaling better on playback.
Handbrake Upsaling Alternative - AI Video Upscaler
Upscaling SD (480p) to 1080p or 1080p to 4K in HandBrake is essentially pointless visually — adds no clarity, keeps noise/artifacts, and bloats file size. HandBrake’s upscaling is a straightforward pixel resizing process—it increases resolution by stretching the original image without adding any new detail or improving quality. Compared to AI upscalers like Winxvideo AI or hardware scalers built into devices like Nvidia Shield Pro, HandBrake’s method is basic and best used only in specific situations.
Unlike HandBrake, which is often referred to as “upsizing” rather than true upscaling—Winxvideo AI offers a fundamentally different approach. Powered by cutting-edge AI reconstruction, Winxvideo AI intelligently estimates and rebuilds textures and fine details, effectively “recreating” the video for stunning clarity and sharpness. The latest update boosts processing speed by 40-80% and introduces two specialized AI models: Gen Detail V3 for enhancing complex textures like skin and hair, and Real Smooth V3 for smoother animations and line art.
Moreover, different from HandBrake’s limited frame rate handling that only duplicates frames (e.g., 30fps to 60fps), Winxvideo AI leverages AI-driven frame interpolation to deliver fluid, natural motion without bloating file size. For users seeking true quality upscaling beyond basic resolution changes, Winxvideo AI is a clear step up from traditional tools.
Getting started with Winxvideo AI’s video upscaling is quick and easy, even if you’re new to video editing. Follow these simple steps to enhance your videos with professional-quality results.
Step 1. Download and install Winxvideo AI on your device.
Winxvideo AI is designed to run efficiently on most computers, including older models, so you don’t need a powerful machine to enjoy its benefits.
 Free Download
 Free Download
Winxvideo AI is for PC, while Macxvideo AI (from our MacXDVD brand) is for macOS.
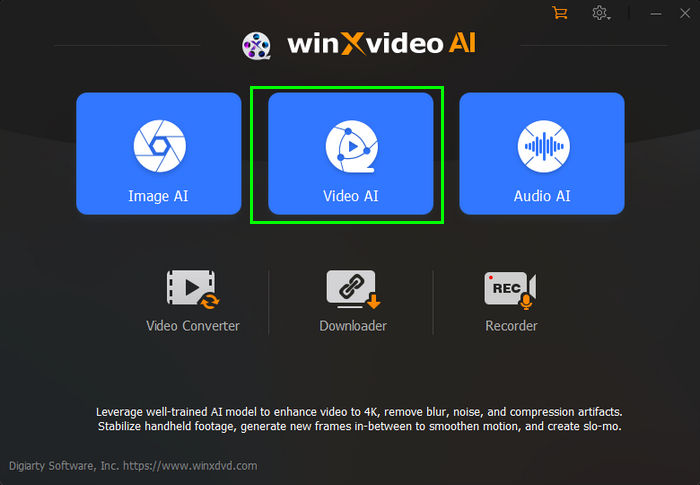
Step 2. Open Winxvideo AI and click the "Video AI" button to open the video upscaling window.
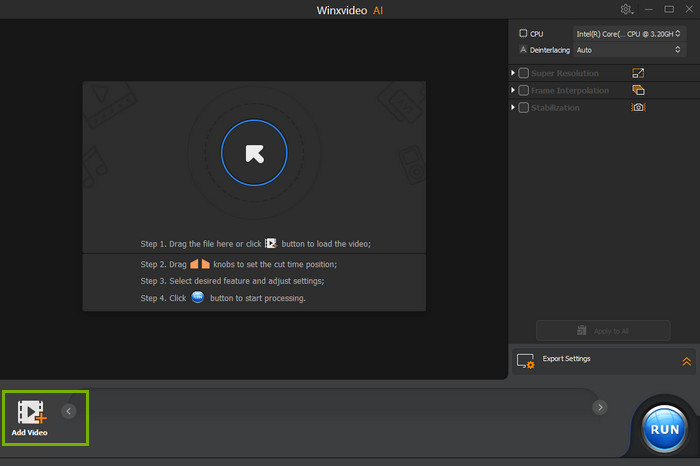
Step 3. Click on "Add Video" or simply drag your video file into the program window to import it for upscaling.
Step 4. Enable "Super Resolution" and pick the AI model that fits your needs. If you prefer to keep the original resolution but enhance clarity, select “Enhance Video (1x)”. The software will intelligently analyze your footage and apply sharpening automatically, so no advanced setup is necessary.
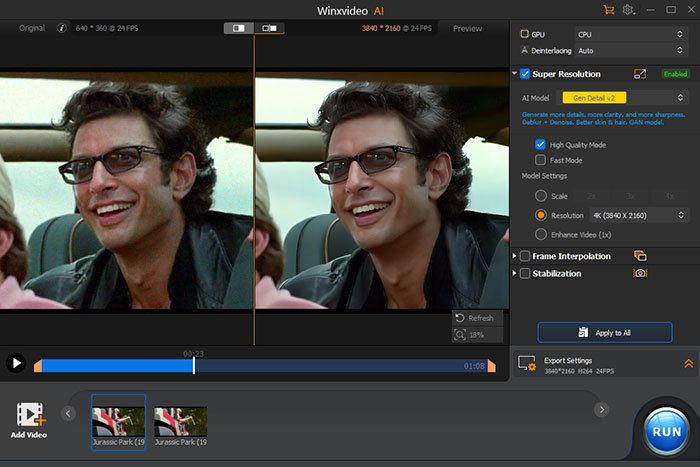
Step 5. Use the preview window to check how the upcaling looks. Once satisfied, hit the "RUN" button to begin exporting your improved video.
Winxvideo AI is more than just a sharpening tool—it’s an all-in-one video enhancement platform. Along with video enhancer, it offers frame rate enhancement, video stabilization, format conversion, compression, image/audio enhancement, and even video editing and screen recording capabilities.
 FAQs about Handbrake Upscaling
No. HandBrake's upscaling is basic pixel enlargement without adding detail. It increases resolution numerically but doesn't enhance sharpness or clarity. AI tools like Winxvideo AI or Topaz Video AI are recommended if you need meaningful improvements while increasing resolution.
To upscale in HandBrake, go to the "Dimensions" tab and manually increase the resolution values. Also, make sure the “Allow Upscaling” option is checked. Presets alone won't upscale your video unless you actively adjust the resolution settings yourself.
Because HandBrake uses linear scaling methods like Lanczos, it stretches existing pixels without adding new details. This often leads to softness or blocky artifacts, especially from low-resolution sources. AI-based upscaling software can intelligently reconstruct fine details for a noticeably clearer result.
Not effectively. HandBrake can set a higher frame rate, but it simply duplicates existing frames rather than interpolating new ones. This increases file size without making playback smoother. AI frame interpolation tools like RIFE or Topaz Video AI offer true frame rate enhancement.
Generally not. HandBrake's upscaling won’t recover lost detail from compressed DVDs. It’s better to use AI upscalers like Winxvideo AI, which reconstruct textures and fine details while removing compression artifacts, producing far cleaner results from old or low-resolution sources.


