


How to Add Subtitles to a Video with MKVToolNix GUI
Some of our movies may don't have subtitles embedded into them, so we need to add external subtitles to these videos. If you are looking for a free way, you can use MKVToolNix to add subtitles. MKVToolNix is a suite of free and open source tools which can be used to create, alter, inspect, and subtitle Matroska files. You can install and use MKVToolNix on various platforms including Linux and BSD distributions, macOS and Microsoft Windows.
Also check: How to edit SRT subtitle files on Mac >>
![]() Important: Before we show you how to add subtitles with MKVToolNix, you need to know that MKVToolNix cannot hardcode subtitles. If you want to add subtitles to a video permanently, try a different tool such as Winxvideo AI. This tool allows you to burn subtitles to any video format like MKV, MP4, and MOV. Apart from embedding subtitles, it can also extract subtitles, enhance images/videos using AI models, convert video/audio files, compress, shrink, merge, deinterlace, crop, trim, record, etc. Click the download button below to install it on your computer.
Important: Before we show you how to add subtitles with MKVToolNix, you need to know that MKVToolNix cannot hardcode subtitles. If you want to add subtitles to a video permanently, try a different tool such as Winxvideo AI. This tool allows you to burn subtitles to any video format like MKV, MP4, and MOV. Apart from embedding subtitles, it can also extract subtitles, enhance images/videos using AI models, convert video/audio files, compress, shrink, merge, deinterlace, crop, trim, record, etc. Click the download button below to install it on your computer.
Table of Contents
Part 1. How to Add Subtitles to MKV Video with MKVToolNix GUI
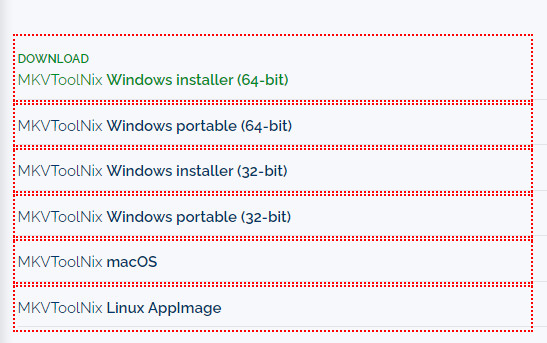
Step 1. Download and install MKVToolNix.
- Open your web browser and visit https://mkvtoolnix.download/downloads.html
- Scroll down the download page and find the portal to the download link of MKVToolNix. For example, if you are using a Windows computer, you should scroll down to Windows section, click "download from fosshub.com" and choose a version based on what Windows system you use. Then, the setup file will be downloaded to your computer.
- Double click on the setup file to install it. It's easy to install. Just follow the onscreen wizard.
Step 2. Add source video and subtitle files.
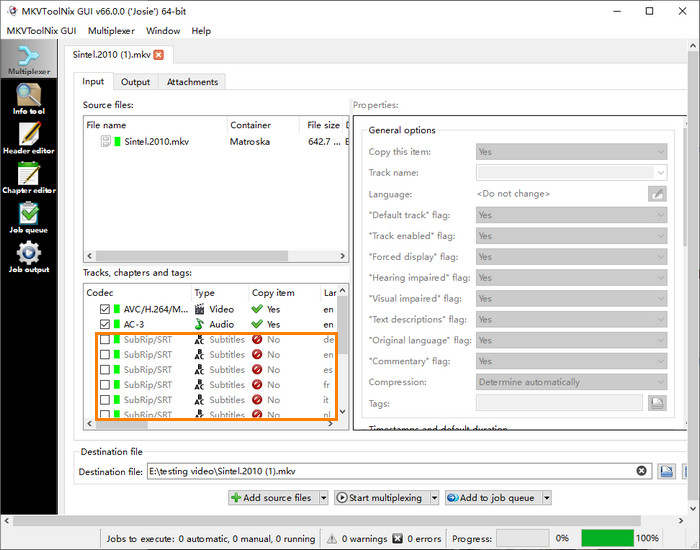
Open MKVToolNix and click the Add source files at the bottom to open the video file you need to embed subtitles to. Then, check the Tracks, chapters and tags section and deselect the tracks you don't want in your output file.
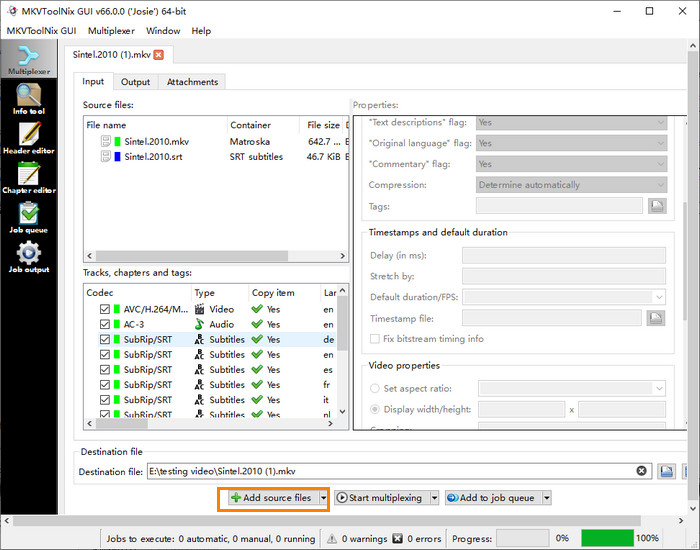
Next, click the Add source files button again to import the subtitle file to be used for the movie. Go to Tracks, chapters and tags, highlight the subtitle you just loaded, and you should see the options under Properties are now available to change. You can set these options according to your own needs, but Forced track flag is recommended to set as Yes to make subtitles display automatically by most video players.

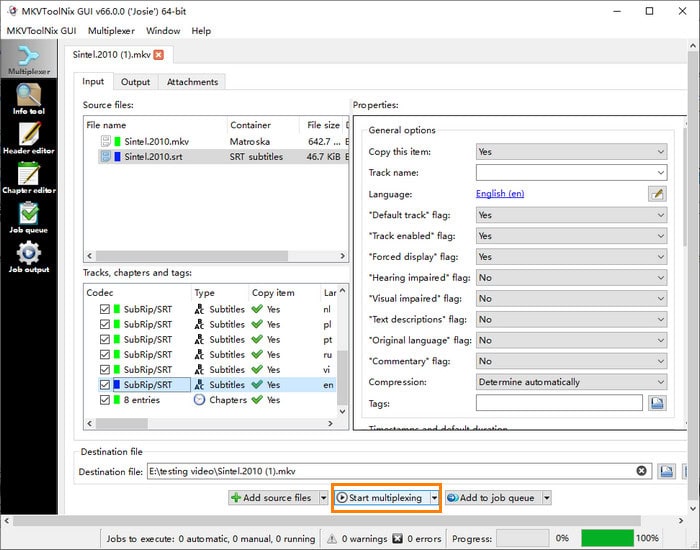
Step 3. Embed subtitle to video.
You just need to click the Start multiplexing button at the bottom. Moments later, MKVToolNix will deliver a new video file with the subtitle file you specify. You can merge SRT or other subtitles files like PGS with this tool.
Part 2. FAQs About Managing Subtitles with MKVToolNix
1. How to hardsub using MKVToolNix?
I'm afraid that it is impossible to hardcode subtitles with MKVToolNix. This tool can just add soft subtitle track within the video file allowing subtitles to be enabled or disabled during the video playback. If you need to add hard subtitles to a video, you might as well try Winxvideo AI we mentioned above.
To hardcode subtitles to a video using Winxvideo AI, follow these steps:
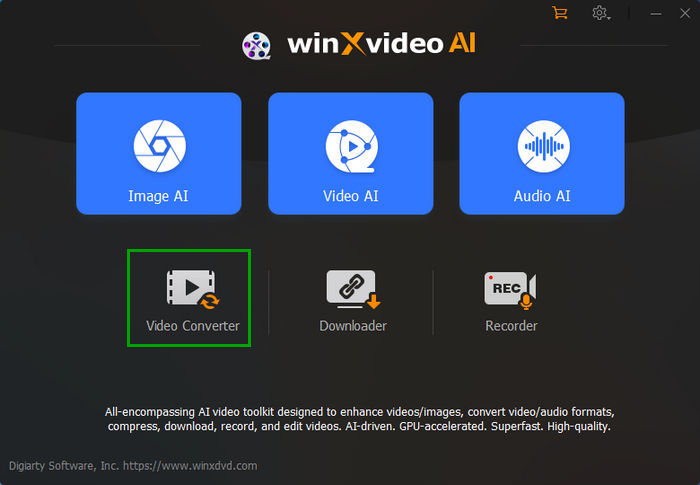
Step 1: Download and install Winxvideo AI on your computer.
Step 2: Open the program and select the Video Converter option.
Step 3: Click the +Video button to import the video you want to hardcode subtitles into. Choose an output format from the tabs at the bottom or click Target Format to explore more options.
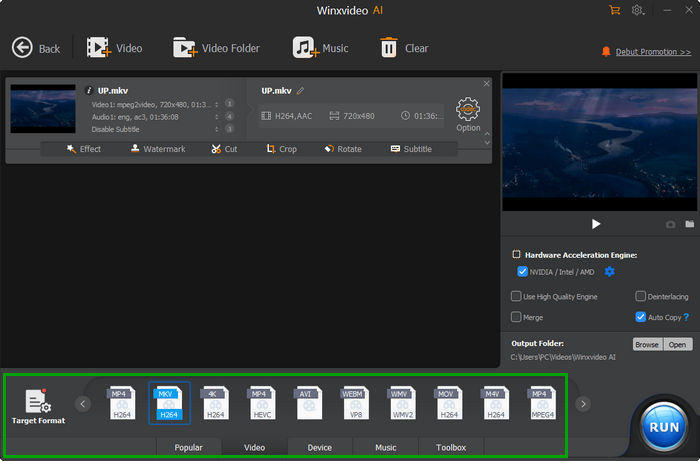
Step 4: Click Subtitle under your video file.
Step 5: Click the Add Subtitle File button to select the subtitle file you want to hardcode into the video.
Step 6: Choose Hardcode and then set the subtitle position, font, color, and size according to your preferences. When you're satisfied, click the Done button.
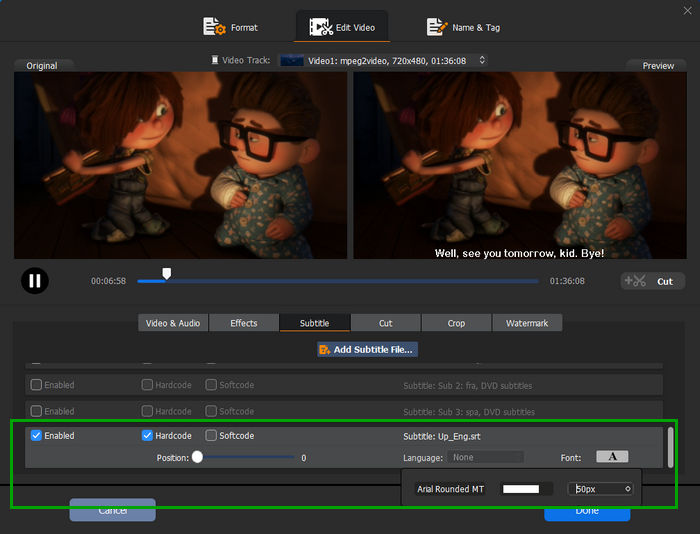
Step 7: Finally, click the RUN button at the bottom right to export the new video. Once completed, play the video, and you'll see the hardcoded subtitles.
2. How to remove subtitles with MKVToolNix?
- Open MKVToolNix.
- Click the Add source files button to open the movie that you want to remove subtitles from. After importing, MKVToolNix will display everything contained inside the file, including the video and audio, subtitles, chapters and tags.
- Untick the subtitle tracks you want to delete.
- Specify destination file.
- Click the Start multiplexing button. then, MKVToolNix will go to work and export a new file with specified subtitles being removed.
3. How to extract subtitles with MKVToolNix?
MKVToolNix cannot extract subtitles on its own. To do this, you also need to download gMKVExtractGUI and move the gMKVExtractGUI.exe file to the MKVToolNix folder. After that, you can follow the steps below to extract subtitles.
- Double click the gMKVExtractGUI.
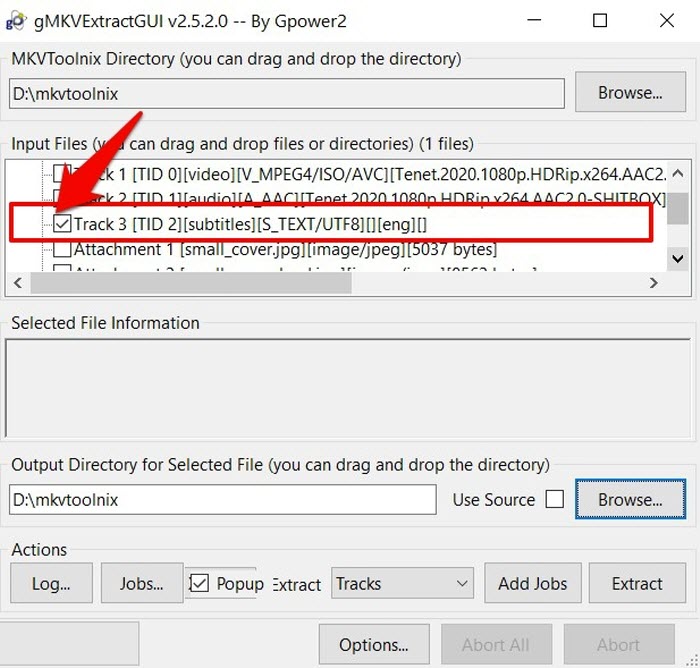
- Click the Browse button in the Input file section to find and open the video with the subtitles you want. Now you should see a list of every track inside the movie file.
- Check the subtitle track you want to extract from the video.
- Set the output directory for the selected subtitle track.
- Click the Extract button to begin extracting subtitles from your video.
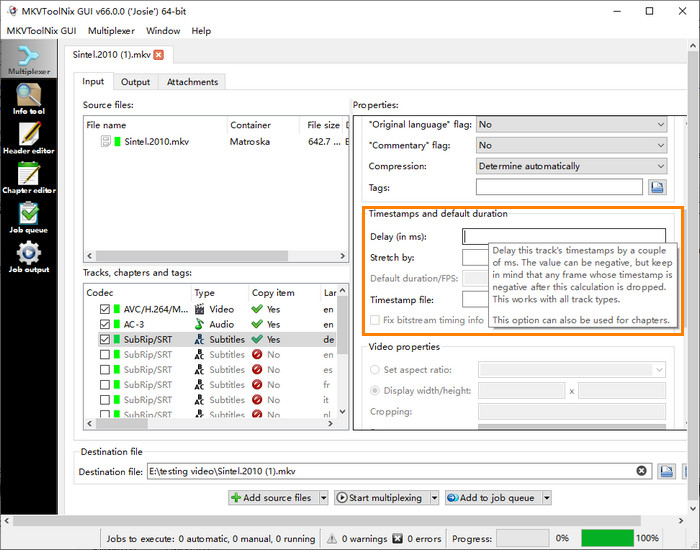
4. How to delay subtitles with MKVToolNix?
MKVToolNix has delay functionality which can be used to fix subtitle sync problem.
- After you load source file, highlight the subtitle track you want to delay timing.
- Find Delay (in ms) under Properties.
- Enter desired millisecond number. Type in negative millisecond number (1000 ms = 1 sec) if you want to make the subtitle appear earlier and positive millisecond number to make the subtitle appear later.
5. Why subtitles are not showing in MKVToolNix?
We may find MKVToolNix cannot recognize the subtitle files in our MKV file, although we are sure they exist. Actually, those unrecognized subtitles might be closed captions which are not supported by MKVToolNix. The data of closed captions is interleaved with the video packets and not stored as a separate track. So MKVToolNix cannot show them as a separate track and cannot remove them.


