How to Transfer Photos from Phone to Computer [iPhone & Android]
Tight on storage again but not willing to delete the precious photos taken by your smartphone? Most of you may choose to transfer photos from phone to computer hard drive or upload to cloud service to free up space for your phone to get more photos. Then, how to transfer photos from phone to computer? You’ve come to the right place.
As we don’t know whether you are using iPhone or Android phone, we provide different ways separately in two parts to let you find the best solution to transfer pictures from iPhone or Android to Mac or PC, no matter for backup or further editing.
Recommended iPhone Photo Transfer Software – WinX MediaTrans
WinX MediaTrans is a very fast iPhone photo transfer software that can recognize all types of iPhone photos and pictures, and transfer iPhone photos to computer without data loss.
- Transfer HEIC, JPG, PNG, etc. pictures between iPhone and computer.
- Recognize iPhone Live, Portrait, Panoramas photos, screenshots, & pics from online.
- Transfer music, videos, movies, iBooks, ringtones from/to iPhone.
- Export iTunes movies/music to PC and convert them to DRM-free.
Table of Contents
Part 1: How to Transfer Photos from iPhone to Computer?
- 1-1. via WinX MediaTrans
- 1-2. via Photos app on Mac
- 1-3. via Photos app on Windows
- 1-4. via iCloud.com
- 1-5. via Image Capture
Part 2: How to Transfer Photos from Android Phone to Computer?
- 2-1. via AutoPlay
- 2-2. via File Explore
- 2-3. via Android File Transfer App
- 2-4. via Photos App on Windows
As is known, with the development of smartphone, more and more phones have a built-in app for users to transfer data files including images from the old phone to a new phone. However, the connection between smartphones and computers depends on a USB cable or some other tools. So, you can find the best tools hand-picked by us here out the market regarding photo transfer from phone to computer.
Part 1. How to Transfer Photos from iPhone to Computer?
5 popular ways are introduced here to help you transfer photos from iPhone to Windows PC or Mac for your reference.
Method 1. Via WinX MediaTrans
- Available for photos transfer from iPhone (13 & earlier) to computer (PC & Mac). Safe & no need of network.
- Note: You need to install iTunes once and go to its "Preferences > Devices" to check the option "Prevent iPods, iPhones and iPads from syncing automatically" to stop iTunes auto-syncing and erasing your iPhone original data. Then you don't need iTunes any more.
WinX MediaTrans, as one of the best iPhone photo managers, enables users to easily copy and move pictures from iPhone to computer at fast speed or vice versa. 1,000 photos can be transferred from iPhone to computer in just 1 minutes f or backup so as to free up more storage space for your phone. It supports a wide range of photo formats, including JPG, PNG and HEIC, and recognize all iPhone Live/Portrait/Panoramas photos, screenshots, and pictures saved online. If needed, you can use it to convert HEIC to JPG for viewing with any photo viewer on different platforms.
Aside from photo transfer, you can also use WinX MediaTrans to transfer music, playlists, videos, movies, TV shows, iBooks, ringtones, etc. from iPhone to computer or from PC to iPhone with perfect copying and syncing. Any iPhone and iPad models are supported.
Step 1. Free download WinX MediaTrans, install and launch it on your Windows PC or Mac.
Step 2. Plug in your iPhone to computer with USB cable, tap Agree to trust your computer when there is a pop up message on your iPhone.
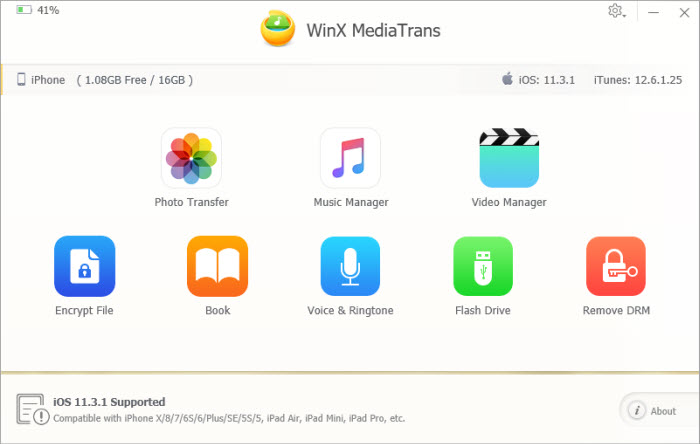
Step 3. On the main UI of WinX MediaTrans, click "Photo Transfer" button to access your iPhone photos in this software.
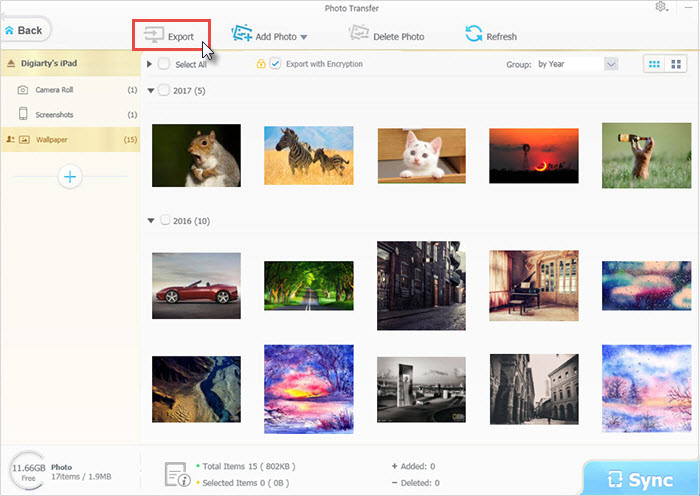
Step 4. Now, you will see your iPhone photos are classified as they are on your iPhone that you can easily find one in Live, Portrait, Panoramas, etc. part. Simply choose one or select more than one in bulk that you want to transfer to computer.
Step 5. Hit "Export" button and WinX MediaTrans will start transferring photos from iPhone to computer immediately and in seconds. Alternatively, you can drag and drop the selected photos to computer.
Method 2. Via Photos App on Mac
- Available for transferring photos from iPhone to Mac.
Without installing anything, you can make use of the built-in Photos app on Mac to transfer pictures from phone to Mac computer.
Step 1. USB-connect your iPhone to Mac, unlock your iPhone with your password, and tap Trust on iPhone to continue.
Step 2. The Photos app on your Mac should open automatically. If not, simply open it by clicking the Photos icon in the Dock, Finder window or Launchpad.
Step 3. Choose iPhone photos to send to Mac.
- Under the "Import to" menu, you can choose whether to move iPhone photos to your general Photos library or a new folder on Mac.
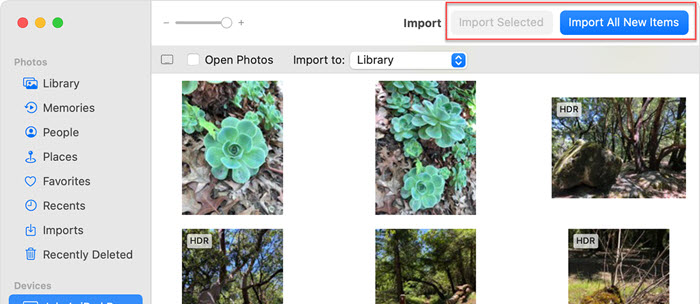
- You can choose "Import All New Items" in the top right corner to batch transfer photos that haven’t been transferred before from iPhone to Mac.
- To selectively move iPhone images, simply choose them and then click "Import Selected" button in the top right corner.
- If you want to delete photos from iPhone after transferring to Mac, you can select "Delete items after import" in the top right corner.
Step 4. After transferring, you can find the photos later on the "Imports" tab in the Photos app.
Method 3. Via Photos App on Windows
- Available for iPhone pictures transfer to Windows 10/8 PC.
- Disadvantage: iTunes installation is required before connecting iPhone to Windows 10/8.
On Windows 10/8, there is also a built-in Photos app for people to transfer photos from phone to computer. For iPhone users, there are a couple of additional steps and the first one is to install iTunes on PC.
Step 1. Download iTunes on your Windows 10/8 PC, so the necessary components for Windows PC to recognize iPhone handset are installed.
Step 2. Connect your iPhone to PC via USB cable, unlock your iPhone and tap Trust from a prompt to continue.
Step 3. On your Windows PC, open the Photos app by selecting the Start button and choosing Photos.
Step 4. Select Import > From a USB Device. Then, the "Import items" window will open.
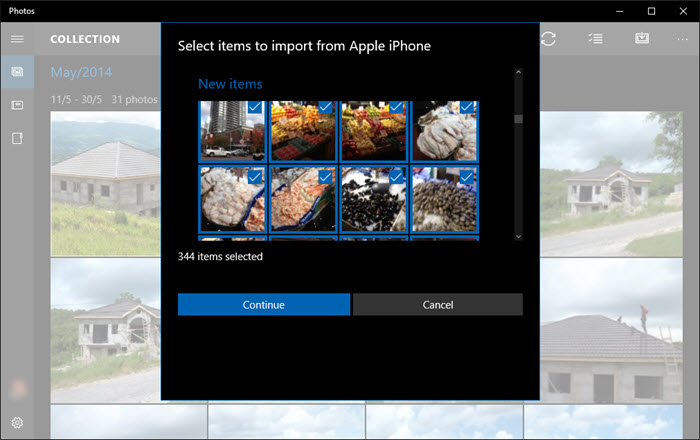
Step 5. Choose photos you want to transfer from iPhone to Windows PC.
Step 6. Click the Import button to start the transfer.
Note: On Windows 7, the AutoPlay window will pop up when you connect iPhone to PC, and you can choose "Import pictures and videos" to transfer photos.
Method 4. Via iCloud.com
- Available for both Windows and Mac users to download iPhone photos to computer.
- Disadvantage: iCloud storage limits may prevent you from transferring all photos from iPhone to computer.
iCloud is the natively cloud service from Apple for users to backup data on Apple devices automatically. iCloud Photos keeps your iPhone photos and videos and sync to all of your Apple devices on iCloud.com. As long as the iCloud photo storage is enough, you can always upload your original and full-resolution photos and videos to it to store, and get them on any device at will.
Step 1. Sync your iPhone photos to iCloud by turning on iCloud Photos on iPhone: Go to Settings > [your name] > tap iCloud > tap Photos, then switch iCloud Photos toggle on. Then, your iPhone photos will automatically be uploaded to the cloud service.
Step 2. On your Windows or Mac computer, go to iCloud.com in any browser and sign in with your Apple ID.
Step 3. When logged in, click Photos on the main UI and then you will see the upload iPhone photos.
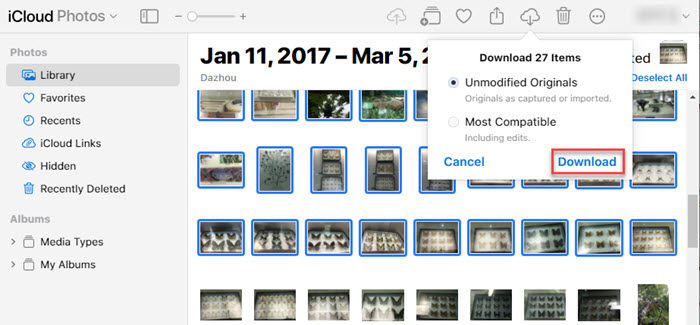
Step 4. Choose the iPhone photos you want to move to computer.
Step 5. Click Download on the top right corner to download the photos to computer.
Method 5. Via Image Capture
- Available for transferring images and video clips to Mac computer from a camera, including iPhone, iPad, iPod touch, or other device that has a camera.
Image Capture is convenient for Mac users to transfer pictures from phone to computer natively.
Step 1. USB-connect your iPhone to Mac, unlock your iPhone and tap Trust to continue when there is a prompt on iPhone screen.
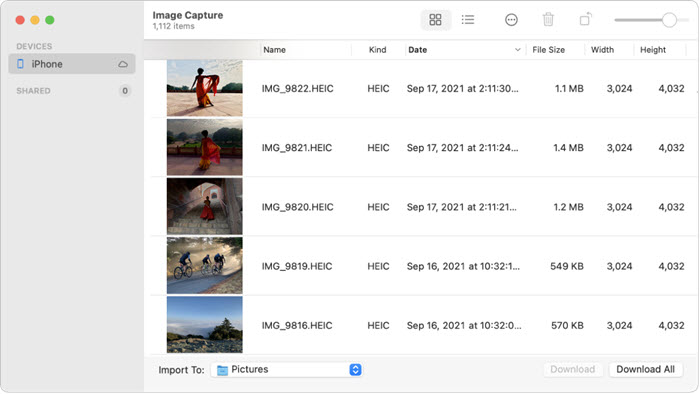
Step 2. In the Image Capture app on your Mac, select your iPhone in the Devices or Shared list.
Step 3. [IMPORTANT!] Select the images that you don’t want to transfer all of them.
Step 4. Click the "Import To" at the bottom of the window, and choose where to save the iPhone images.
Step 5. Click Download (if you selected images) or Download All. Then, your iPhone photos will be transferred to your Mac computer.
Note: You can click the Action button in the toolbar to deselect "Keep originals" or select "Delete after import" to keep or delete the original pictures on your iPhone.
Part 2. How to Transfer Photos from Android to Computer?
Method 1. Via AutoPlay on Windows
- Available for transferring Android photos to Windows 7 PC.
- Disadvantages: It only lets you transfer photos in camera roll, and you can’t choose specific photos.
Step 1. Unlock your phone with the password and turn on your PC.
Step 2. Connect your Android phone to computer via a micro-USB, USB-C or charging cable.
Step 3. Tap Allow on your phone when you see a pop up message.
Step 4. Simply drag down the pull-down notifications bar and touch "Transferring media files via USB" option > choose Transferring files on your Android phone.
Step 5. Now, go to your Windows PC.
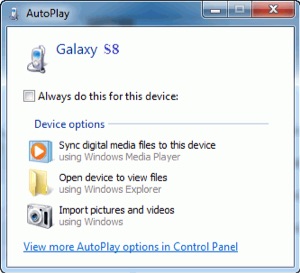
Step 6. Just choose the "Import pictures and videos" when the AutoPlay window pops up to start transferring photos.
This should be the easiest way for Android and Windows users to transfer photos between the two platforms freely at will. No need to install any software, a USB cable can make that happen.
Method 2. Via File Explore on Windows
- Available for Windows 11/10/8 users.
- Disadvantage: You need to find the wanted pictures one by one in different folders, which is very time-consuming.
Step 1. USB-connect your Android phone to Windows PC, open File Explorer and then find your device.
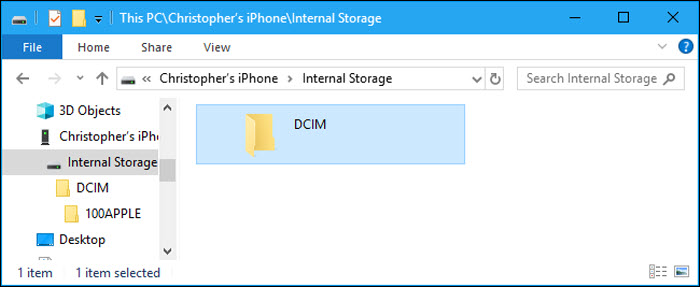
Step 2. Double click to open your Android phone, then open Internal storage or SD card folder.
Step 3. Open the DCIM folder > open a folder, where you can see your Android phone’s photos. Often the case, you will see more than one folder here.
Step 4. Find the pictures you want to transfer to computer from Android. Then, copy and paste them to the local folder of your computer.
Sometimes, you can use this way to transfer photos from iPhone to computer, but often the case you will encounter iPhone DCIM folder not showing up error which will prevent you from the photo transferring. Even you access the DCIM folder and see your photos, you will discover that your folders are in a confused order without specific names for you to identify easily. You have to spend a lot of time to find the photos and copy them to your computer from iPhone.
Method 3. Via Android File Transfer App
- Available for Android to Mac photo transfer.
Android and Mac are proverbially from two different ecosystems, so there is a need of third-party help to make a connection between them. Android File Transfer is picked as the best tool to help transfer photos from Android phone to Mac computer.
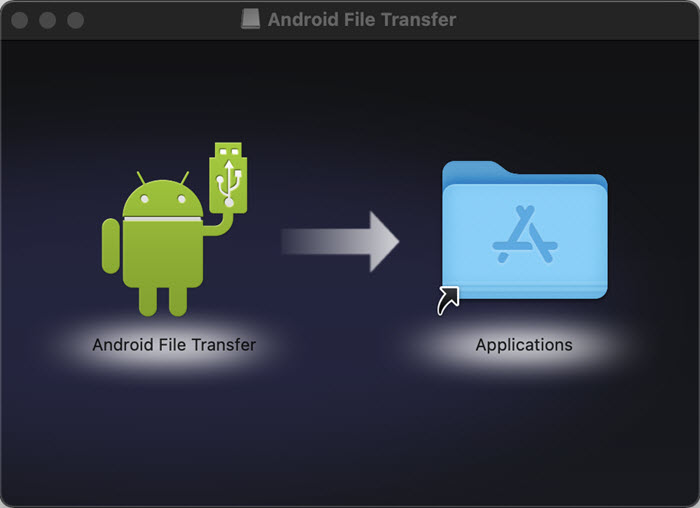
Step 1. Download Android File Transfer app on Mac. It is available on Mac shipped with macOS 10.7 or higher.
Step 2. Open AndroidFileTransfer.dmg and drag Android File Transfer app to Applications on Mac.
Step 3. Connect your Android phone to your Mac computer via USB cable.
Step 4. The app should launch automatically. If it doesn’t, go to Finder > Applications on Mac and double-click the installed software.
Step 5. Now, you can see photos on your Android phone, and you can drag the photos to Finder or the desktop on your Mac computer.
Method 4. Via Photos App on Windows
- Available for Windows 10/8 users.
- Disadvantages: Only camera roll photos on Android are available to transfer.
Step 1. Plug your Android phone to PC via USB cable.
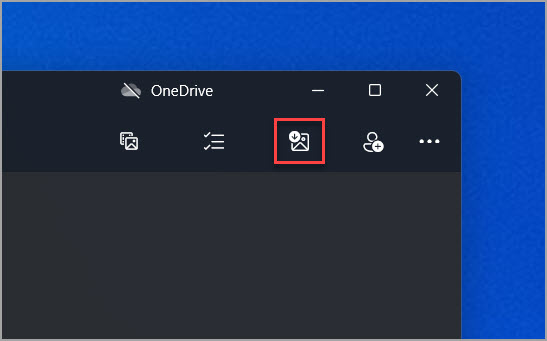
Step 2. Open Photos app on Windows PC.
Step 3. Swipe in from the bottom edge to see the app commands.
Step 4. Choose Import > select your Android device you want to import from. Automatically, it will search for all photos and videos that have not been imported.
Step 5. Select the pictures you need or just select them all.
Step 6. Click Import to start moving pictures from Android photo to computer.
To sum up, there are tens of phone photo transfer tools to help you, but the ones we selected here are the most popular and convenient ones. Simply choose one of them to transfer photos from phone to computer, be it iPhone, Android, Mac, or Windows PC.
Once again, we recommend WinX MediaTrans if you want to transfer pictures from iPhone to computer (Windows or Mac) without the need of iTunes. Also, transfer other files like music, movies, iBooks, ringtones, iTunes U, etc. between phone and computer.
WinX MediaTrans - Transfer Photos, Videos and Music between iPhone iPad and Computer.
- Sync music: Transfer music from/to iPhone iPad. Convert music to AAC/MP3.
- Transfer video: Sync videos between iPhone iPad and PC. Convert video to MP4.
- Photo transfer: Transfer photos from/to iPhone iPad. Convert HEIC photo to JPG.
- Free DRM: Transfer iTunes music, movies, audio books along with DRM releasing.
- iBooks manager: Transfer iBooks from/to iPhone iPad. Convert EPUB to PDF, TXT.
- Ringtone maker: Make free iPhone ringtones from any favorite song.
- Flash drive: Turn iPhone iPad into flash drives to store PDF, Excel, Word, etc.