


How to Make a DVD Disc on Windows 10/11 [with Pictures]
Making your own DVD disc is not knotty. You need a DVD authoring software to handle the DVD disc burning task on Windows 11/10. If you have no idea about any Windows 10 DVD burner software and have no clue on how to burn video to DVD disc, here we will show you the best way to make a DVD disc on Windows 10/11 with clear pictures, alongside with other free ways to burn varied types of videos to DVD on Windows with both speed and quality well balanced. Let's get it started now!
Best Free DVD Burner to Burn Any Video to DVD on Windows 10/11
WinX DVD Author - [100% FREE & No Limits] is able to make a DVD disc from MP4, VOB, ISO, AVI, MKV, MOV, MTS, MPEG, WMV, FLV, etc. any type of video on Windows 11, 10, and lower. 5-10X faster speed can be guaranteed thanks to its built-in advanced DVD burning engine and constantly upgraded algorithm.
Meanwhile, this top free DVD burning software allows you to create titles, menus, add subtitles, and do more settings to create a professional-look DVD with highest possible quality. All DVD types are supported.
Part 1. How to Create a DVD Disc with WinX DVD Author
Before you go, there are several preparation jobs.
● Files ready to be written to disc. You may need to make your videos or files smaller based on the DVD you're going to use for burning.
● A CD or DVD recorder drive. If your computer doesn't have a built-in drive, get an external DVD player.
● A blank disc. Not all the DVD types can be used to burn data or video. You need to get a blank and recordable CD or DVD:
- CD-R, DVD-R discs: this disc type allows data or music to be burned for a single time and cannot be erased.
- CD-RW, DVD-RW discs: this disc type allows data or music to be burned and erased for many times.
Well, when everything is ready, you can segue to the DVD burning process.
Step 1. Insert a blank DVD into your DVD drive.
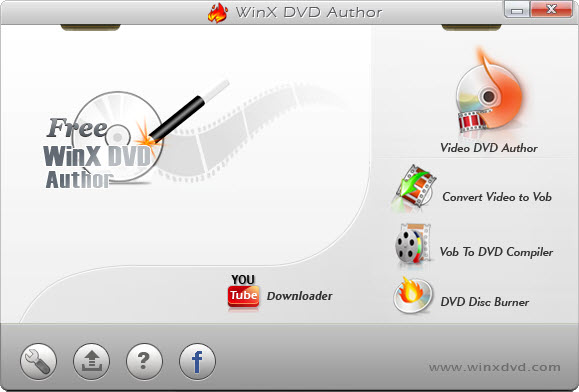
Step 2. Download, install, and open this free Windows 10 DVD burner. Then choose Video DVD Author.
Step 3. Click + button to browse and add the videos you aspire to burn to the blank DVD disc.
Once all the videos are loaded into the free DVD burner for Windows, you can arrange the file order by right clicking on a file and selecting "Move Up" or "Move Down". You can also trim video by setting start/end time, choose aspect ratio 16:9 or 4:3, set sub, add subtitle, etc.
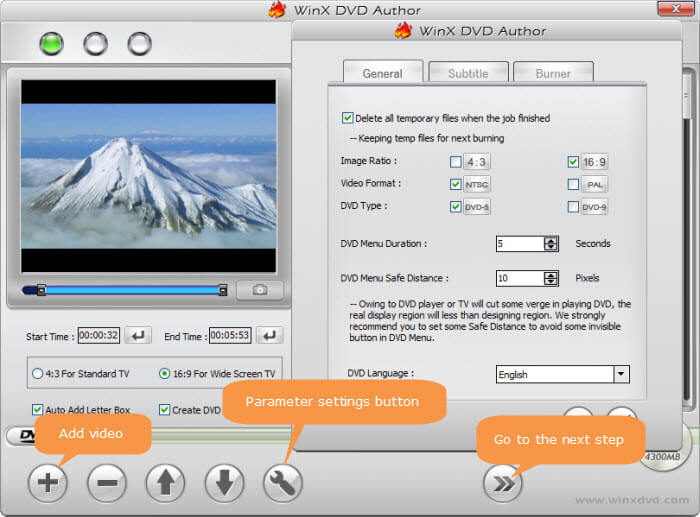
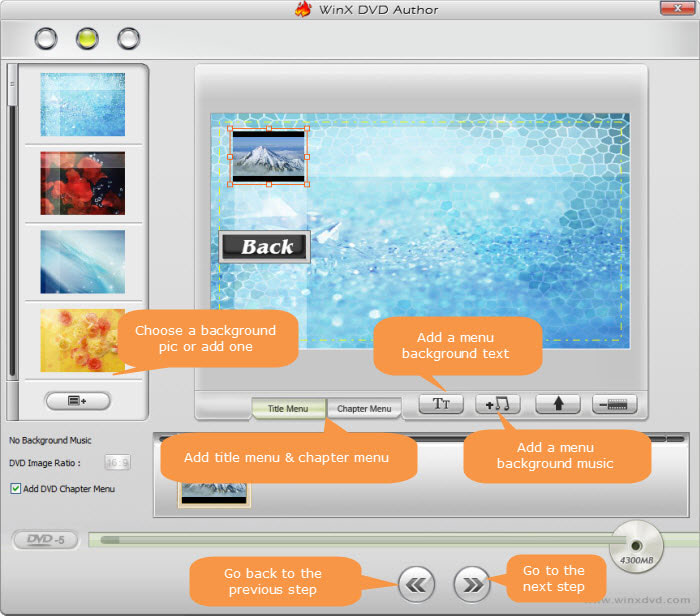
Step 4. Click the right-arrow icon ">>" to move to the next step. If you have Create DVD Menu option checked, then you will be directed to DVD menu creating panel. Again hit >> to move on once it's done.
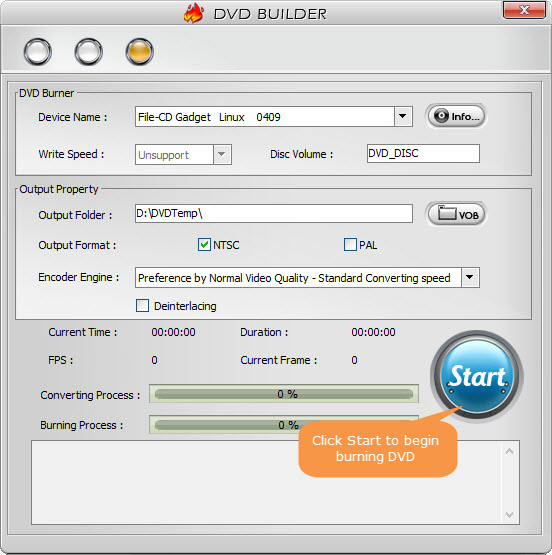
Step 5. On the DVD BUILDER panel, make sure the blank DVD is detected, choose output folder, output format NTSC or PAL, and encoder engine. Finally, hit the Start button to begin burning videos to DVD on Windows 11/10.
Part 2. How to Make a DVD Disc on Windows 10/11 without Any Software
All roads lead to Rome. If you don't want to install any DVD burning software on your PC, you can resort to File Explorer, which shines at letting you burn MP4 videos to DVD disc on Windows 10/11 without using any 3rd party tools. Of course, there is scarecely a man but has weak side. File Explorer is trounced by other rivals due to the lack of DVD menus and advanced editing functions.
Thus, providing you just need the basic DVD burning feature, you can stay here and read the below guides to make your own disc on PC:
Step 1. Insert a blank DVD disc into DVD drive on your Windows 10/11.
Step 2. Open the file folder that consists of all the files you want to burn to DVD.
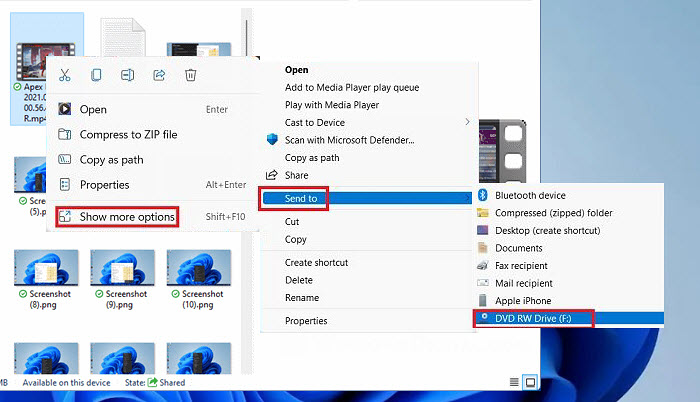
Step 3. Opt for the video files or folder you want to burn, click on the right mouse button, and choose Send to -> DVD drive option.
Step 4. When Burn a Disc window shows up, enter a disc title and choose how you want Windows to use this disc, like a USB flash drive or with a CD/DVD player. In case you select to use your disc "Like a USB flash drive", then the disc will work as a USB and you can simply drag and drop all you files into it.
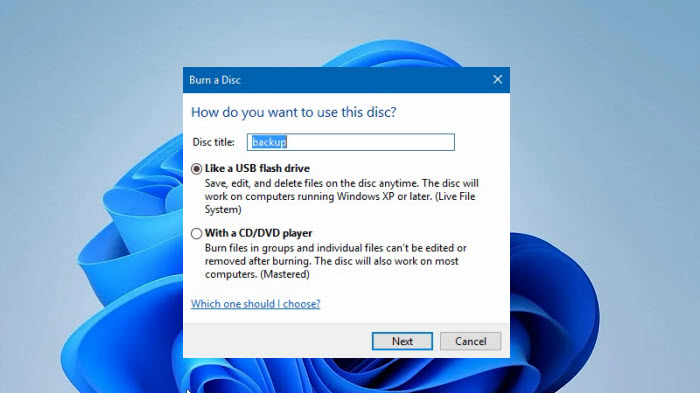
If you want to master a disc, choose "With a CD/DVD player". Then the File Explorer window appears with a header labeled "Files Ready to Be Written to the Disc".
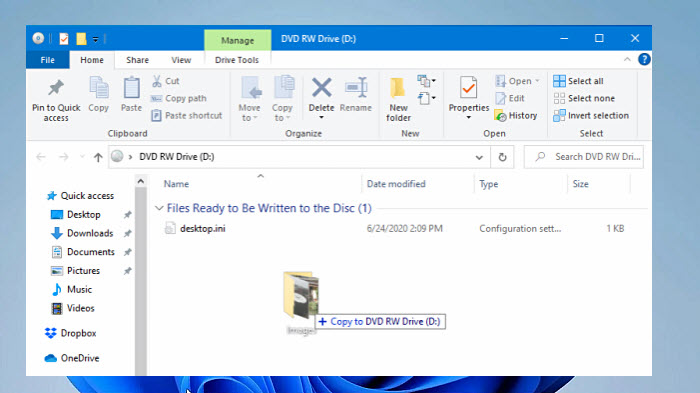
Step 5. Drag and drop all the video footages you want to burn to the Windows DVD burning tool below "Files Ready to Be Written to the Disc".
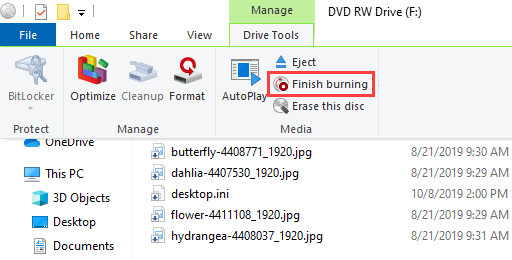
Step 6. Hit Drive Tools in the toolbar menu > tap Finish Burning.
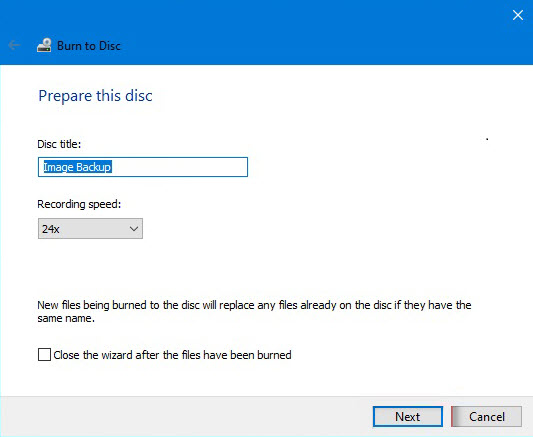
Step 7. At the pop-up Burn to Disc window, enter disc title and select recording speed. The DVD burner allows you to choose a recording speed from 4x to 48x. A higher burning speed means less time it takes to writing videos to DVD disc and greater chance of data loss or lower quality. Afterwards, click Next, and it will begin making a DVD disc on your Windows 10 or Windows 11.
Part 3. How to Free Burn a DVD with Windows Media Player
Windows Media Player is a free media file player, as well as a free DVD burning software that appeals to those users without many skills. It supports you to burn any videos to writable CDs, DVDs or Blu-ray discs. Meanwhile, it can be utilized to burn audio CDs, data CDs, and data DVDs if needed.
According to its official webpage, the capability of data DVD goes up to 4.7GB for music, video and pictures. Thus, you need to check your video file size before you burn. When everything is ready, proceed to write videos into a blank DVD disc:
Step 1. Type wmp into the search bar to find and open Windows Media Player on your Windows PC. If it's currently open and in Now Playing mode, click the Switch to Library button in the upper-right corner of the Player to enter the Player Library.
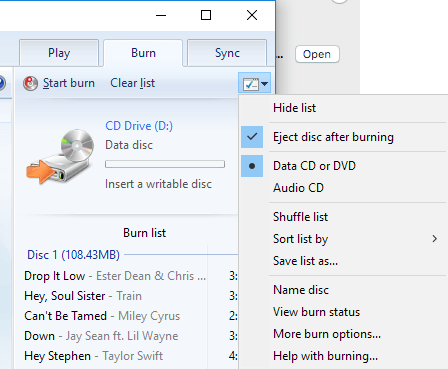
Step 2. In the Player Library of the free Windows DVD burner, click the Burn tab at the top right corner > choose Burn options > Data CD or DVD if you're intended to burn videos, audio, or images to a DVD.
Step 3. Insert a blank DVD into your DVD-ROM drive and close "Autoplay" if it appears. The drive will be recognized by this free DVD creator software with the free disc space listed.
Step 4. Open the folder that covers the files you want to burn to DVD disc > drag & drop them to the Burn list of Windows Media Player > drag the item and change the order, right-click on an item to delete it > add multiple files until the disc is full.
Step 5. After you have added all target files and put them in a desired order, simply click Start burn to begin burning DVD on Windows 11/10.
Note: a data DVD is usually used by computers and can't be played by most DVD players even if it is a video file. Therefore, suggesting you have the need to burn videos to a DVD-Video disc with recognizable file structure and format for a DVD player, try other DVD burning programs mentioned in this post.
Part 4. How to Create a DVD Disc on Windows 10/11 with Nero Burning ROM
Download the latest version of Nero Burning ROM and you can easily create ISO image, burn videos to DVD disc, as well as have original album art on MP3 CDs and MP3 DVDs. On top of DVD burning feature, this feature-rich toolkit also empowers you to protect your newly created DVD content via its SecurDisc 4.0 technology (with industry-standard 256-bit encryption). Thus, your personal privacy can be well protected via digital signature or password protection. No one but you can access your burned data library.
Want to make your own DVD disc and safeguard your burned content? Give Nero a shot!
Step 1. Free download and install Nero Burning ROM from its official site.
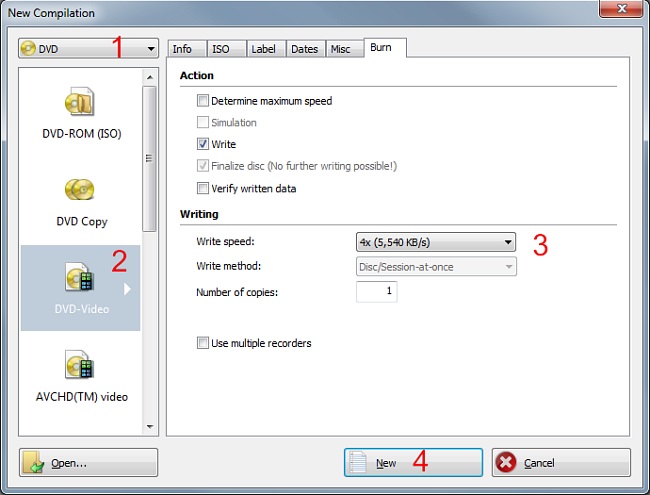
Step 2. Insert the DVD disc to your Windows PC and run Nero Burning ROM. Choose DVD from the drop-down menu in the New Compilation window and then DVD-Video.
Step 3. The tabs with the configuration options that are valid for this compilation type are displayed. Adjust the options you require on the tabs. Hit New.
Step 4. Select the files you want to burn to the DVD from the newly poping-up Window. Choose the output Disc later.
Step 5. Then you need to drag the files to the Video_TS folder on the left side. Make sure all your files are inside the VIDEO_TS folder. Afterwards, click the Burn icon on the top toolbar.

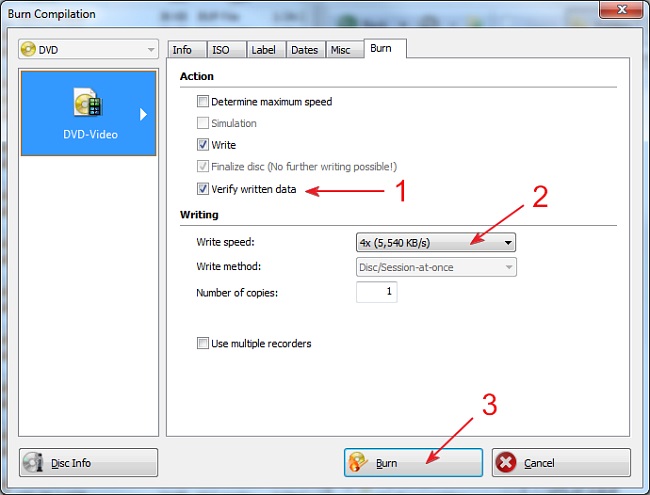
Step 6. Verify the written data if needed, which will cost some time > set the burning speed based on the writing speed of the disc and burner. For example, if both the burner and disc support a burning speed of 16x, you can set it to 8x. After that, click Burn and wait.
Conclusion
If you just want to burn a data DVD for backup or burn a CD, Windows' built-in DVD burning software File Explorer or Windows Media Player is up to the mark. But data DVDs are used for backup purposes and can't be opened by a standard DVD player. Providing you want to burn a professional-look movie DVD, you need a professional DVD burner WinX DVD Author. Best of all, it is free to use with no limitations. Certainly, if you require data protection, Nero Burning ROM can be your best option with its powerful data protection tech.
Well, above are the top 4 methods to burn DVDs on Windows 11/10. If you like this tutorial, please share it with your friends.


