


How to Fix 100% Disk Usage in Windows 11? 10 Ways Here!
Did you upgrade to Windows 11? Have you encountered with a situation that your computer is running very slow, even if you're using a brand-new computer? You try to troubleshoot it in Task Manager but only find that the disk usage on your PC is at 100 percent. This means some processes are eating up the full hard disk read or write processing power, leaving nothing for the others to perform routine operating system tasks.
If you're experiencing such an issue, the priority is to troubleshoot 100% disk usage in Windows 11. Here are some useful tips to solve the problem for running your Windows 11 PC smoothly.
Also see: Windows 11 not recognizing DVD drives
Fix Windows 11 100% Disk Usage
- 1. Stop SysMain (SuperFetch) Service
- 2. Update Your Device Drivers
- 3. Reset Virtual Memory
- 4. Disable Connected User Experiences and Telemetry
- 5. Disable Scheduled Defragmentation
- 6. Disable Startup Apps
- 7. Disable Background Apps
- 8. Perform a Malware Scan
- 9. Perform a Disk Check
- 10. Clean Boot Windows 11
1. Stop SysMain (SuperFetch) Service
SysMain, also known as SuperFetch in earilier times, is a service used by Windows 11/ 10 to preload apps into memory before you launch it. Microsoft takes advantage of this feature to launch programs as quickly as possible. However, according to the users reports, this seems the major reason for 100% disk usage in Windows 11 / 10, as it's engaged all the time while loading the program from disk to memory.
To fix 100% high disk usage in Windows 11, you can disable the SysMain service with the following steps. Note that disabling the service will marginally slow down app opening time, but that’s about it.
- Press the Windows 11 keyboard shortcuts "Windows + R" to open Run prompt. Then type services.msc and hit Enter.
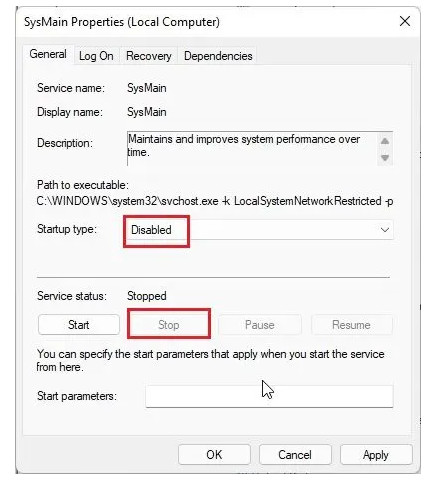
- Scroll down to find the "SysMain" or "SuperFetch", and double click to open the properties window.
- Change the Startup type to "Disabled" and click on "Stop" to immediately halt the service. Now, click on Apply > OK.
- Now, you can find that Disk usage is reduced instantly to 10-15% in Windows 11. You can restart your PC and check whether Disk usage is still spiking or not.
2. Update Your Device Drivers
The Windows 11 100% disk usage may also be caused by your device driver. It could not only get your disk stuck in a memory loop and make your Windows 11 PC slow down. To solve this issue, you should try updating the device drivers to the latest version. And here's how you can do that:
- Press the "Windows + X" shortcuts on your keyboard to open the quick links menu and open "Device Manager".
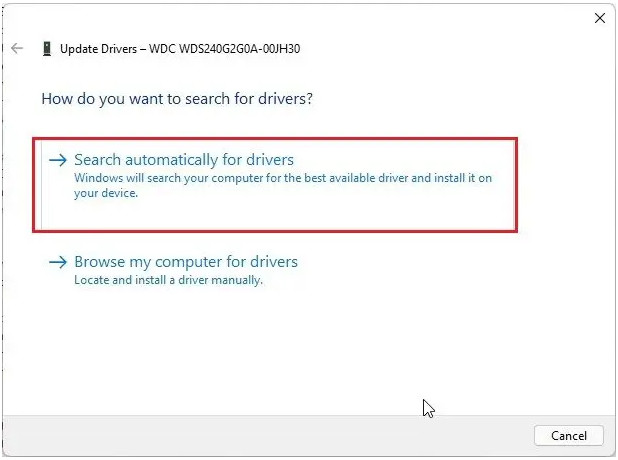
- Expand the "Disk drives" section and right-click on your disk. From the context menu, click on "Update driver".
- In the popup window, click "Search automatically for drivers". If there is a new update available for your disk drive, Windows 11 will install it and ask you to restart the PC.
- In case there is no update available with the Device Manager, you can also download the graphics driver on the manufacturer website. But you need to make sure the driver you're going to download matches with the graphics model.
3. Reset Virtual Memory
When your computer is short of RAM, your programs and files may be holded in the hard disk memory as a swap. If this takes up your major hard disk memory, you computer may run into 100% high disk usage in Windows 11. To get out of this case, you can reset the virtual memory, so that the Windows 11 operating system will not keep the hard disk usage engaged all the time. Here are the easy steps for this operation.
- Press Windows + R shortcuts on the keyboard, enter system.cpl and hit Enter to open the System Properties window.
- Move to Advanced column and click the Settings under the Preference section.
- In the Performance Options window, navigate to the Advanced tab. Then click the Change… button in the Virtual memory section.
- Uncheck the box next to Automatically manage paging file size for all drives. Select your window drive (the drive or partition that has Windows 11 installed on it – usually C:). Select Custom size to enter an Initial size and Maximum size for your virtual memory.
- Once you've entered your virtual memory values, click Set, then click OK to continue.
- Initial size: just enter whatever the number is in the Recommended category.
- Maximum size: about 1.5 times the size of your physical RAM. For example, a PC with 8 GB (8,192 MB) of RAM should have no more than about 12,288 MB virtual memory (8192 MB x 1.5)

4. Disable Connected User Experiences and Telemetry
Connected Users Experiences and Telemetry is a service that runs user svchost.exe. It basically tracks diagnostic data and sent it to Microsoft's servers. Many users complain that Connected User Experiences and Telemetry is one of the culprits of 100% disk usage on Windows 11. But once you disable it, the Windows 11 disk usage will be reduced greatly.
- Open the run prompt by pressing Windows + R shortcuts and type in services.msc and hit Enter to get an access of services window.
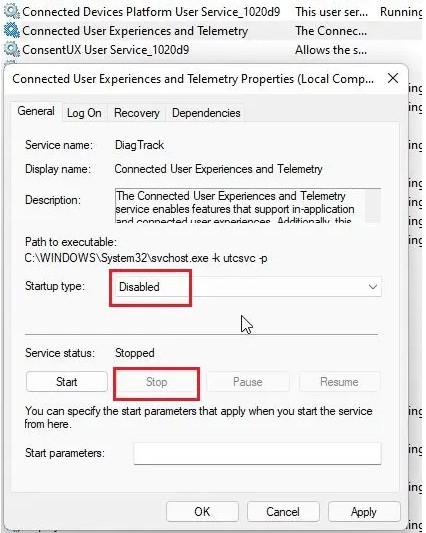
- Look for Connected User Experiences and Telemetry, and double click to open it.
- Set the Startup type to Disabled and stop the service right away. Click Apply > OK to save the changes.
- Also, you can disable the Connected Devices Platform Service (following the same steps of 2 and 3). Disabling both of these services should significantly bring down disk usage on your Windows 11 PC.
5. Disable Scheduled Defragmentation
Do you know that Windows 11 conducts defragmentation periodically of the hard disk? This feature does improve the computer performance but it also increases the disk usage to 100%, making the system slowing down and even unresponsive. To fix this, you're recommended to disable the scheduled deframentation on Windows 11. Here are the detailed steps:
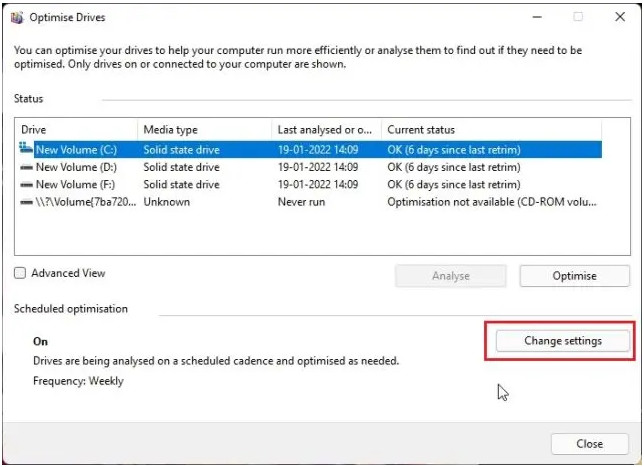
- Press the Windows key and type in defragmentation. Now, open Defragment and Optimize Drives.
- Click Change Settings.
- In the newly popped up window, untick the Run on a schedule (recommended) checkbox amd click the OK button.
When you're done, this will disable scheduled defragmentation on your Windows 11 PC and prevent disk usage up to 100%.
6. Disable Startup Apps
As you know, even if you open Windows 11 without openning any programs manually, there are still some apps running in the background. These are startup apps, which are launched automatically when you're openning the Windows 11 PC. Even though you may not use them actively, they also take a major share of the disk usage and make your computer slow down. Therefore, to fix the high disk usage on Windows 11, you need to make clear what programs you allow to launch on startup, and disable the unnecessary ones with the following steps.
- Press Ctrl + Shift + Delete to open the Task Manager.
- Click on the Startup section. If you see an app that you don't want it launching at startup, right-click on it and choose Disable to remove it from the startup apps list.
7. Disable Background Apps
Likewise, too many background apps opened on your Windows 11 PC will also occupy too much of disk usage as well. Even if you're not using them currently, background apps in Windows continue to perform actions such as updates and fetch up-to-date data. If you're precisely running your Windows 11 to 100% disk usage, try to disabe background apps to see if it's fixed.
- Press Win + I to open Settings.
- Open the Apps tab in the left pane.
- Click on Apps and features in the right pane.
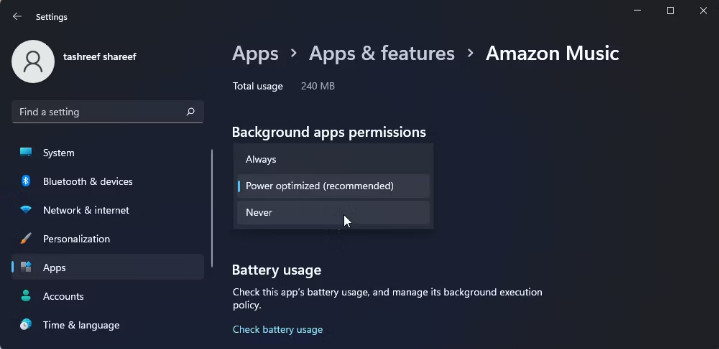
- Locate the app for which you want to change the background permission.
- Click the three-dots menu beside the app name and click Advanced options
- Scroll down to the Background apps permissions section.
- Click the drop-down for Let this app run in the background and select Never. This should disable the app from running in the background.
8. Perform a Malware Scan
If your computer is still stuck at 100% disk usage on Windows 1, you can perform a system scan to see if there are any malware or hiden rootkits to consume plentiful disk resources. Here are the steps to identify the threats and remove them.
- At first, press the Windows key and type Windows Security.
- Then, tap on the Windows Security.
- In Windows Security, tap on the Virus & threat protection.
- Next, click on the Scan options to see the detailed scan options.
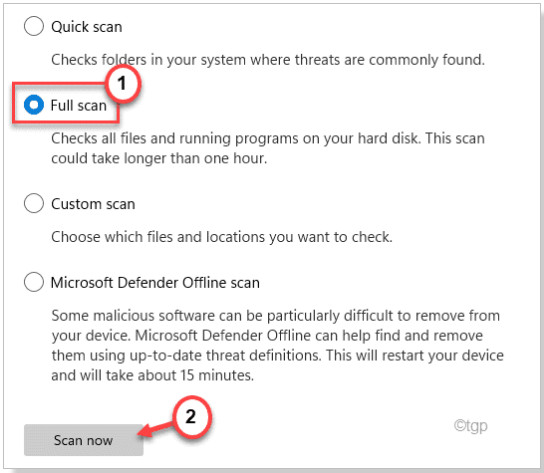
- Then, click on the radio button beside the Full scan.
- Finally, click on Scan now to start the full scan. This process will take a long time depending upon the files on your computer.
Windows will complete the process and remove/quarantine the threats from the system files. This will solve the disk usage issue that you are facing.
9. Perform a Disk Check
Bad sector on your disk can also lead to 100% usage of it on Windows 11, since it is unable to proceed the given operation and continues to use the disk abnormally in an attempt to execute the action. To get out of this issue, you're suggested to perform a disk check.
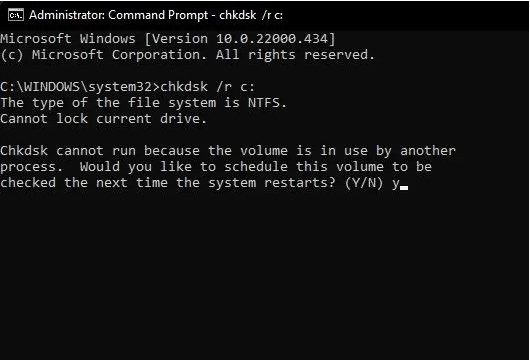
- Press the Windows key once and type in cmd. Now, click on Run as administrator on the right pane to open the Command Prompt window with admin privileges.
- In the CMD window, type Y and hit Enter.
- Now, restart your PC, and Windows 11 will check for all the bad sectors and logical errors and will fix them along the way.
10. Clean Boot Windows 11
There is a possibility that the 100% disk usage issue on Windows 11 is caused by some problematic apps or services. But you're not sure which one is causing the issue. For that, you can clean boot Windows 11 to find it out.
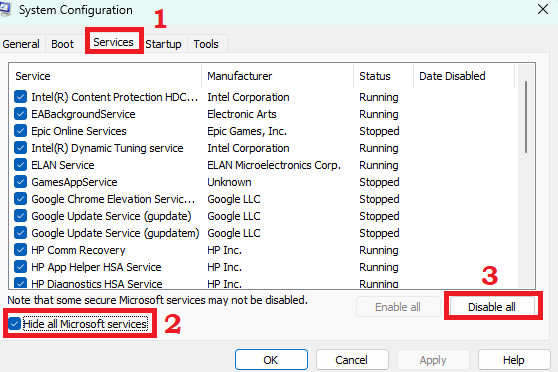
- On your keyboard, press the Windows logo key and R at the same time to invoke the Run dialog. Type msconfig and press Enter to open the System Configuration window.
- Navigate to the Services tab, check Hide all Microsoft services and then click Disable all.
- Select the Startup tab and click Open Task Manager.
- On the Startup tab in Task Manager, disable the programs you believe may be leading to the 100% disk usage issue. Once done, close Task Manager.
- Go back to the System Configuration window and click OK.
- Click Restart to restart your PC.
That's it for troubleshooting Windows 11 100% disk usage. If you have any other solutions to fix 100% high disk usage on Windows 11, feel free to contact us by email.


