How to Free Burn PowerPoint PPT to DVD on Windows/Mac
While Powerpoint is very useful in offering better visual impact, users can easily run into presentation issues on a different computer due to system problems, version issues, overwhelming information, materials, etc. Maybe the computer stops working. Or the PPT file won't open at all. Or the PowerPoint displays off-screen, etc. It is therefore a good idea to put Powerpoint files to DVDs to make them more accessible and shareable for multiple screens. In this post, we will show you how to free burn Powerpoint to DVD on Windows and Mac.
How to Burn PowerPoint to DVD(with Sound) for Free?
- Step 1: Turn PPT into a Video for Later DVD Burning
- Step 2: How to Convert a Powerpoint to DVD Free on Windows
- Step 3: How to Convert a Powerpoint to DVD Free on Mac
Step 1 Turn PowerPoint into a Video for DVD Burning
To put a PowerPoint to a DVD is much easier if you convert the PPT file into a video first. While most people know how to use PowerPoint to present slides live, few people know how to turn a PowerPoint into a video. In fact, PowerPoint allows you to export the presentation PPT file in a video in MP4 or WMV. And the process is pretty easy.
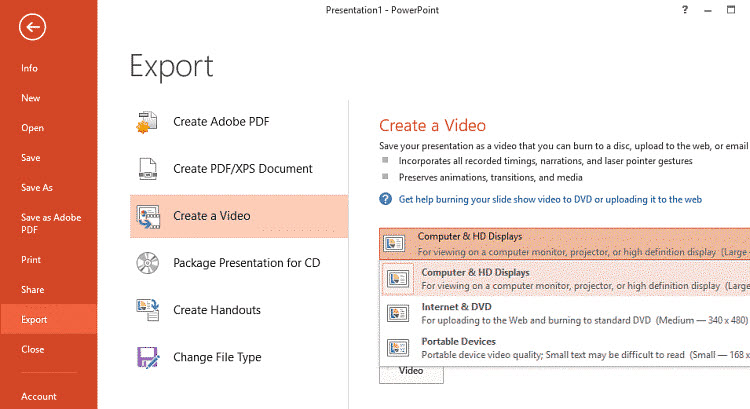
- Open the PowerPoint file and click File > select Export.
- Choose Create Video and select the video quality. To convert the Powerpoint file to a DVD, choose Internet & DVD to set the video resolution to 640x480.
- Next, set if you would like to use narration and timings. If you want to convert PowerPoint to DVD with sound, you need to record your narration in advance.
- Click Create Video.
- In the File name box, enter a file name for the video, browse for the folder to store the output video, and then click Save.
- In the Save as type box, choose either MPEG-4 Video or Windows Media Video.
Step 2 How to Convert a Powerpoint to DVD Free on Windows
After the Powerpoint file is turned into a video, there is another step: convert the movie file to a disc with a DVD authoring program. For Windows users, the 100% safe and free PPT to DVD converter named WinX DVD Author can help.
It can convert the PowerPoint MP4/WMV video to a DVD with Dolby Digital AC-3 audio for free. It also supports converting MKV, AVI, VOB, FLV, MOV, ISO, and other videos to DVD discs in high quality. Users can create menus, add subtitles, adjust aspect ratios, etc. Any users can put the PPT to a DVD in clicks.
Tools you need:
- A blank disc (Make sure the DVD capacity is enough based on the Powerpoint video.)
- A computer with a disc drive
- Download and install the free PPT to DVD burner
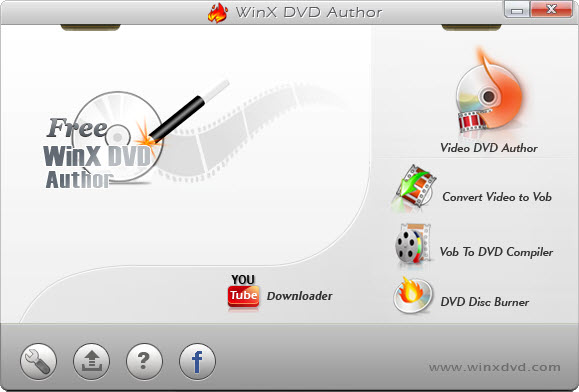
Step 1. Insert the blank disc into the disc drive of your computer, then run the free PowerPoint to DVD burner. Click the Video DVD Author button on the main interface and on the next window, click the + icon to add the PowerPoint MP4 or WMV video.
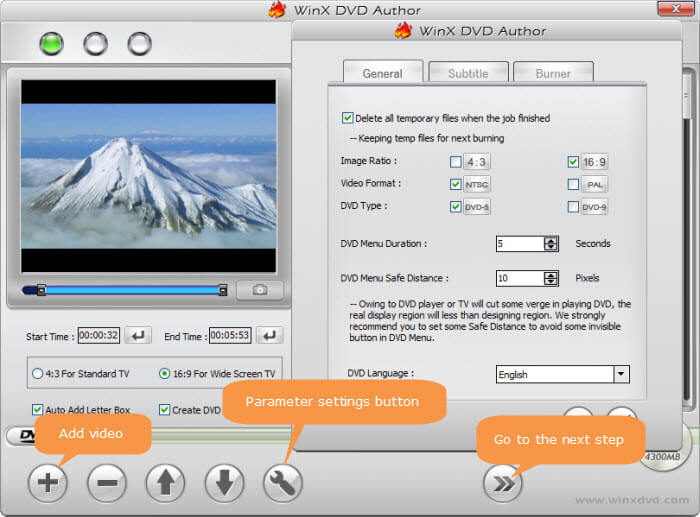
Step 2. Once the PPT presentation video is loaded into the free DVD burner, you can adjust the Start/End time to set the part of the PPT video you'd like to burn into the DVD, change the aspect ratio, and enable the DVD menu from the window. For more settings, click the wrench-shaped button to open the Setting window. There you can select the DVD format/type, add subtitles, customize the font size, language, etc.
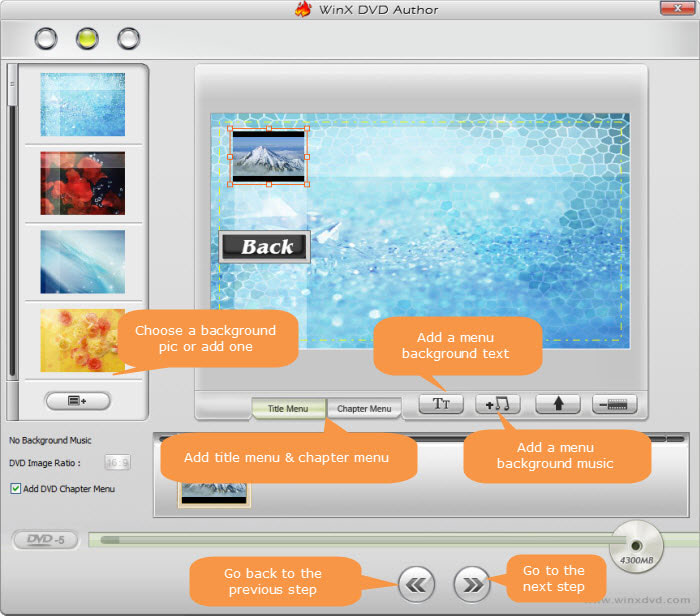
Step 3. Click the next button and in the window, you can enable Add DVD Chapter Menu. Create a personal title menu, chapter menu, and convert PowerPoint to DVD with audio music, pictures, etc.
Step 4. Click the Next button and in the window, you can specify the device, write speed, output folder, output format, and encoder engine. After all the changes, click the Start button to burn Powerpoint PPT to DVD.
Step 3 How to Convert a Powerpoint to DVD Free on Mac
On Mac, you don't even need to install any third-party programs to burn the PPT video to a DVD. Finder has offered a simple way to convert a video to a DVD. Please note Finder only works as a free PowerPoint to DVD converter, with no editing or other features available.
Tools you need:
- A blank disc (Make sure the DVD capacity is enough based on the Powerpoint video.)
- A Mac computer (with disc drive)
Step 1. Copy the converted PPT video you want to burn to the Mac and insert the blank disc to Mac's disc drive (If applicable, connect the SuperDrive to the Mac and insert the blank disc into the SuperDrive)
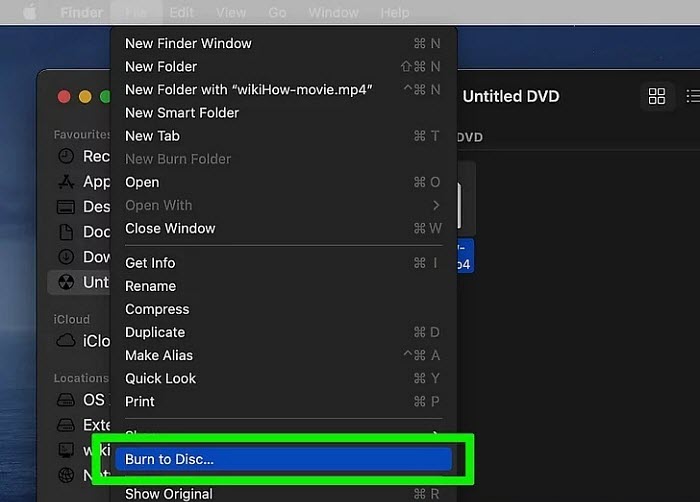
Step 2. Open Finder, abd select the PPT video you just moved to the Mac. With the presentation video selected, click File button on the top menu bar, and from the dropdown menu list, choose "Burn [name of the PPT video] to Disc".
Step 3. If you haven't inserted the blank disc, it will remind you to insert a blank disc with a capacity of at least [the size of the PPT video]. If the blank disc is inserted, choose the disc you want to save the Powerpoint video and set a burn speed. Then click Burn to start.
Step 4: The process of burning the Powerpoint video to a DVD might take a few minutes, depending on the speed of the drive and the size of the PPT video. The disc should automatically eject from the drive once finished.
