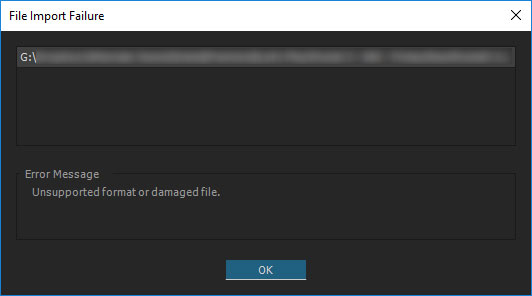
AVI Unsupported Format or Damaged File in Premiere Pro? Solved!
Adobe community, YouTube, Reddit and Quara, forums, social network platforms or Q&A websites are all flooded with the world-renowned Premiere Pro problems. Among them, the problem - "unsupported format or damaged file error message pops up when importing AVI into Premiere Pro" is one of the frequently asked questions. More importantly, those who raise this problem are in urgent need to get this trouble solved via effective solutions.

This post comes into being for this reason. Check the below workarounds if you still don't get this trouble tackled. It will cost you roughly 3-4 minutes. You can jump to the part you need if your time is tight.
Top Solutions to AVI Not Supported by Premiere Pro Issue
Solution 1. Change File Extension
Change the filename extension from .avi to .mpg. This makes Premiere Pro applies a different, more tolerant importer when you import your AVI file into Premiere Pro. That might help AVI sucessfully open in Premiere Pro.
Solution 2. Convert AVI H264/H265 to AVI XviD/DivX Codec
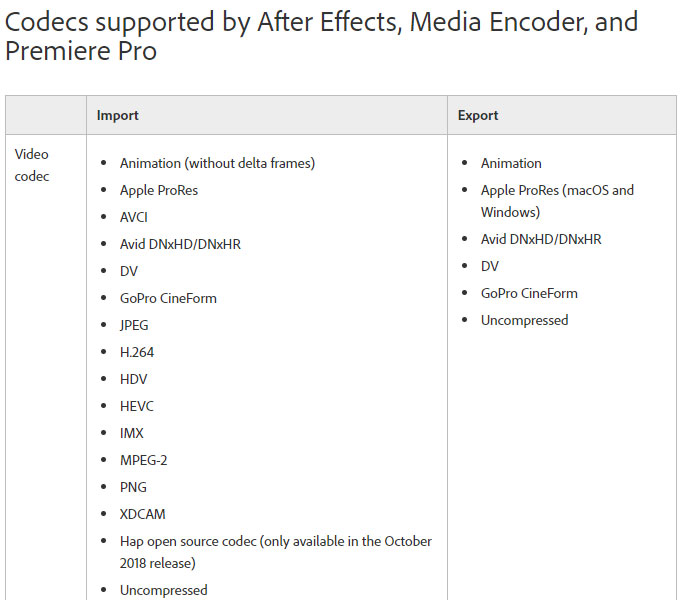
Check your AVI video codec first. If your AVI footage is encoded by H264 or H265 codec, Premiere Pro will show you "Unsupported format or damaged file" error message when importing AVI to Premiere Pro. That's because Premiere Pro doesn't support AVI H264 or AVI HEVC files. The most simple yet effective counterplan is to convert AVI from H264/HEVC codec to XviD/DivX codec.
To transcode AVI video from H264/H265 to XviD or DivX codec, give a try on HD Video Converter Deluxe, which is well-crafted to convert AVI H264/HEVC to AVI XviD/DivX, as well as any other video to MP4, MOV, M4V, H264, HEVC, ProRes, MPEG-2, etc. Premiere Pro supported video formats. Supporting hardware acceleration, it processes video conversion at 47x real time faster speed.
De-interlacing tech and High Quality Engine jointly helps you yield output AVI video with highest possible quality, up to 98% quality kept, visually zero quality degradation. It's always by your side when you need to edit AVI (trim, crop, merge, add subtitle...) or adjust AVI parameters.
Steps to easily convert AVI H264/HEVC to AVI XviD/DivX codec:
Step 1. Import AVI file(s).
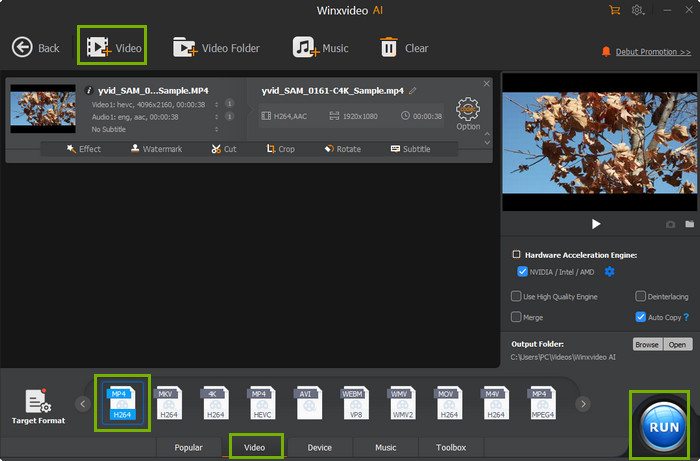
Launch Winxvideo AI. Choose Video Converter on the main UI, then click + Video button to open your AVI file. Bulk conversion is supported, too.
Step 2. Choose AVI Xvid or DivX as output format.
On the Target Format panel, you can choose a format that QuickTime prefers by going to Common Video Profile -> PC General Video -> AVI Video (DivX codec).

Step 3. Convert AVI Video Codec Now.
If you have done all settings, simply click the RUN button to begin converting AVI video codec to DivX at GPU hardware accelerated speed. Once it's done, load your output AVI DivX video to Premiere Pro to have a test.
Solution 3. Convert or Remux AVI to MP4
Though Premiere Pro doesn't support AVI in H264 or HEVC codec, it's compatible with MP4 format in H264 or HEVC codec. Meanwhile, some users get AVI footages from bandicam recording and wanna import those AVI video clips into Premiere Pro CC 2018, but the conduct is a flop. Cuz Premiere Pro CC 2018 stopped supporting of some codecs of the QuickTime 7 era. And AVI is not in the list of supported video formats. Therefore, if you don't want to decode and encode AVI video with codec conversion, and smoothly import AVI into Premiere Pro (CC 2018 incl.), you can remux AVI to MP4 format without codec change.

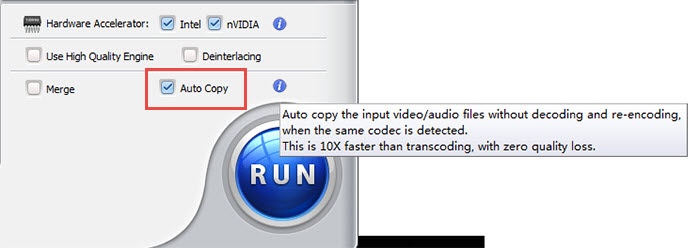
Still, HD Video Converter Deluxe can be your best mate in this part. With its "Auto Copy" mode, you can get a 1:1 lossless AVI video with nary a quality loss. This AVI video converter is able to copy the input video/audio files from AVI container format to MP4 container format, without decoding and re-encoding. It's just the external file format changed, no change in internal file data. And the whole remuxing will be running at 10X faster speed than video transcoding.

The whole processing is much of muchness with the above tutorial. The only difference lies in the manually ticking on "Auto Copy" mode on the right lower corner of the home screen.
Solution 4. Reinstall Fraps or Install FFDShow
Some AVI video footages are generated from Fraps game recorder. In some cases, those AVI footages are also rejected by Adobe Premiere Pro. Confronted with such case, try the below solution provided by Sarah Northway on the Adobe forum.
Step 1: Reinstalled Fraps. Head to Fraps site > access to the "Members Areas" to download the full version (free version should work equally well). It automatically installed the codec you need, and then Premiere could once again read the AVI files.
Step 2: Installed FFDShow. Install FFDShow with the default settings, nothing modified. If re-installing FRAPS doesn't work for you, try installing FFDShow. This solved the problem for Premiere CC 2015. It is once again reading Fraps AVI files.
Step 3: Shut down Adobe Premiere, and re-opened it. That's it! Afterwards, import the same AVI, everything worked as expected.


