iMovie Tutorial - How to Add Subtitles or Captions to a Video in iMovie
Subtitles have become an essential part of a video creation process. With them, the video content is more accessible to the deaf, many languages and nationalities, and user engagement is increased as well. Fortunately, iMovie makes the process of adding subtitles easy thanks to its intuitive design and interface. If you are in need of subtitling a video on your mac, want a subtitle in another language, for narration, or tutorial instruction, here we will walk you through the detailed guide on how to add subtitles in iMovie.
Don't know where to download subtitles for iMovie? Click to find the best free subtitle sites here >
What If You Want to Add a Subtitle File like SRT to a Video? Here Is a Solution!
Note: If you have already downloaded subtitles in SRT or VTT format, you cannot import the subtitle file directly into iMovie. And if you think it is tedious to copy and paste the text to each frame, especially when you are going to add subtitles to a lengthy viden, there is a U-turn.
You can try the iMovie alternative to add subtitles to a video or movie with Winxvideo AI, a video toolbox capable of saving online video, compress, convert, edit video and add external subtitles to MKV, MP4, MOV, AVI, and any other video file with ease.
Table of Contents
Part 1. How to Add Subtitles in iMovie Manually?
While iMovie doesn't yet have the option to automatically generate subtitles, it does offer the Titles feature that allows you to add subtitles-like texts and titles, along with simple edits like font color, size, positioning of subtitles, transitions, and duration of the video, etc. Here you can get all the details through.
Steps to Create Burn-in Subtitles (Open Captions) in iMovie
Step 1. Open iMovie and choose New project.
Step 2. Import your video you want to subtitle by clicking File > Import Media, and drag the video to the Timeline area.
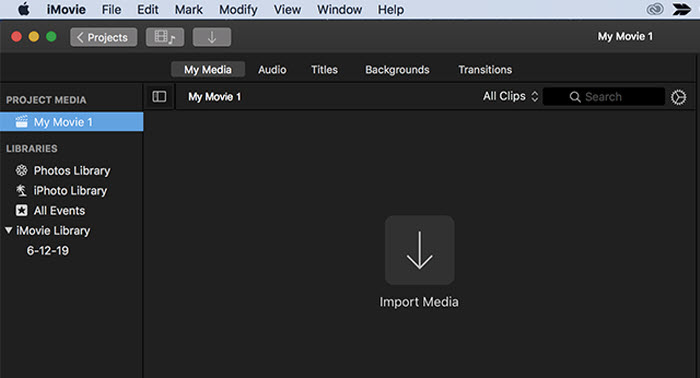
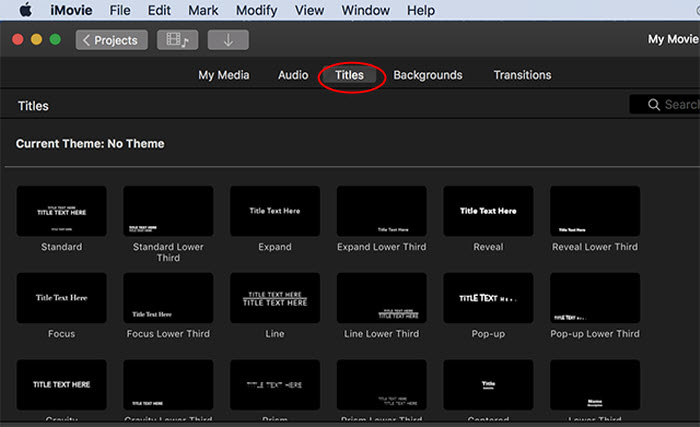
Step 3. Click on Titles located on the viewer at the top.
Step 4. Pick the title style as you want. Since you are looking for subtitling the video in iMovie, you can check the title options such as Lower, Lower third, Reveal lower third, standard lower third at the bottom of the screen. These options are the best take at a standard-looking subtitles. Here we choose the style called Lower Third. You can drag the option left to right, where a preview will be presented to you.
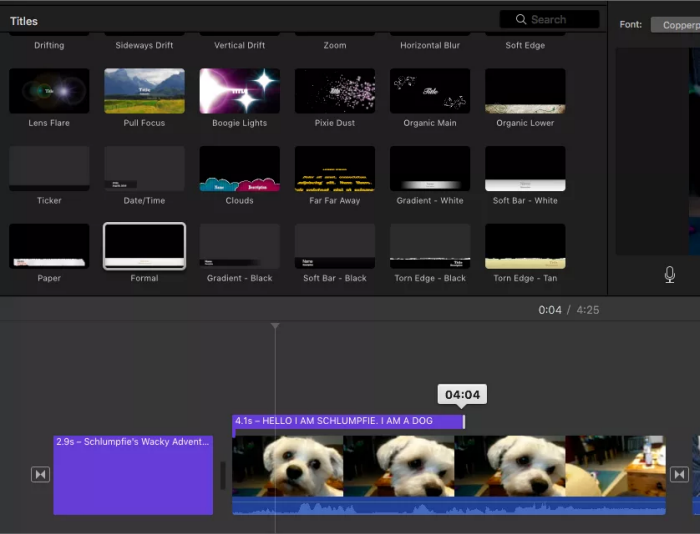
Step 5. Double click the preferred subtitle style to add it. Alternatively, drag the option chosen to your desired location on the clip.
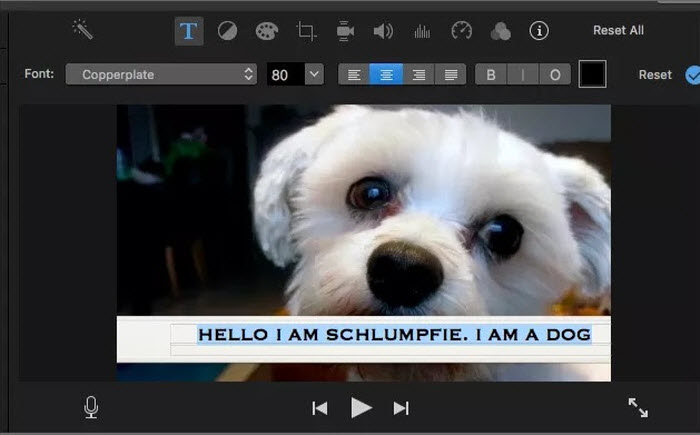
Step 6. Go up to the viewer and find a text box, add your text as you want. This title can be used as the subtitle or caption. Just type in the text of the video.
Step 7. Then you can do edits about your subtitles or captions, such as adjust the duration, add more subtitles to the video or movie clip, and more. Take your time on the following steps to get the look and feel you want for subtitles. It is tedious to go back and change the settings later on.
Here are some professional suggestions to edit subtitles in iMovie:
- To adjust the duration of the subtitles, here are the detailed steps: Drag any of the edges to length or shorten the duration, or remove excess text boxes. Or you can find the i icon above viewer, click the clip information, and enter the number of seconds you want to the duration to be.
- To change the text style: Click the title clip in your timeline, click the title setting icon at the top of the viewer, then you can change the color, font, style and even alignment of the subtitle.
- To trim and align your subtitle to the audio's dialogue: It's a must to make sure the dialogue is corresponding with the text in each segment of the video. To do this, just drag and drop the subtitle to the frame that starts the dialogue you are working on. Trim the title till it comes into congruity with the end of the dialogue.
- If the sound isn't dialogue but meaningful to the video, just place it in brackets within the subtitle.
- Preferably, you can use Avenir Heavy font, 70 pt font size, bold and outlined.
Step 8. Copy and paste your current subtitle to the new clip to start. Or you can press Command C to copy and Command V to paste the text all along the filmstrip. This will retain the text style and save your time especially when you need to start a new clip.
Step 9. Move the play head to the part in the timeline where the title doesn't exist. This will prevent subtitles from staying on top of each other.
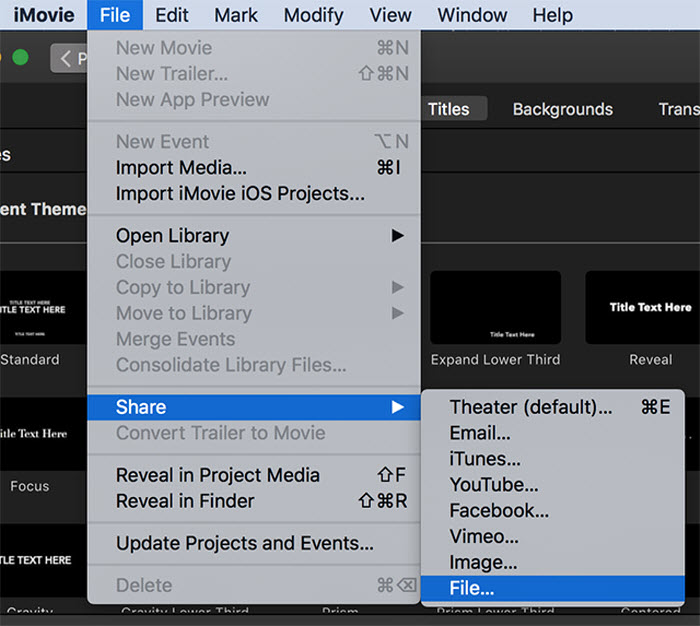
Step 10. After you have typed in all the subtitles or captions, and edited the fonts, style, and everything aligns with dialogue, you can now export your iMovie project with subtitles. Click File > Share > File… share the subtitled video as a file (MP4). Just click on the small share icon at the top right of iMovie, then share the file to the iMovie Theater, Facebook, YouTube, Vimeo, etc as you like. For the best results, export at the maximum resolution, quality and compression.
What to Consider while Adding Subtitles to Video in iMovie?
- Choose the correct video format for your social platform. Preferably, MP4 is the best option, compatible with most computers, mobiles, social media sites, or media players.
- Ensure the subtitles are properly positioned and sized so that they won't overshadow the video or ruin your audiences' experience
- Make sure there is a prominent contrast between the subtitles and the background.
Now you know how to add subtitles to iMovie video. Hopefully Apple will soon create a feature to auto generate subtitles in a video with iMovie. You can also do the same with SRT files.
Part 2. How to add subtitles in iMovie using an SRT file?
The above steps show you how to use open captioning to make subtitles in iMovie. It is relatively complex and tedious to manually subtitle a video in iMovie. It requires you to copy and paste the text for each frame. This can be stressful when it comes to a long movie. Fortunately, there are many alternatives to iMovies that helps to encode subtitles to your video automatically and getting the job done without an effort. Here we are going to talk about the solution – HD Vidoe Converter Deluxe. Here's how it works:
- Free download the subtitle tool on your PC or Mac. Install and load the program.
- Click + button to load the video automatically.
- Choose a preferred format. For the best compatibility, here we recommend MP4 H.264 as the final format.
- Click the Edit icon on the main interface to kick off the video editing feature.
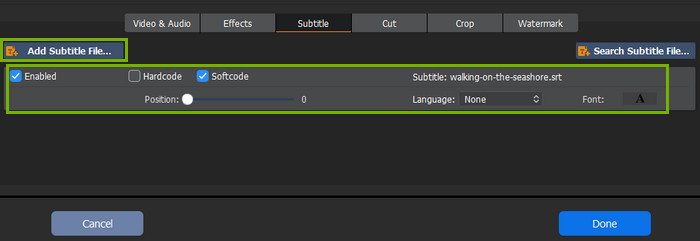
- Press Subtitle in the video editor window, after which you can choose preferred subtitles or add external subtitles with the iMovie alternative.
- Check the box Enable Subtitle > External > click Add to load external subtitle file > press Done.
- Press RUN button. It just takes a few seconds to finish the whole process.
Related: Check for detailed guide to add subtitles to movie easily.
Part 3. FAQ about Adding Subtitles
1. Can Your Add SRT subtitles to Video in iMovie?
No. You cannot import SRT files directly in iMovie for automatic subtitles. However, you can copy the text from the SRT file and paste it to the video manually as subtitle. Or you can add subtitles SRT file to video with software like deluxe.
2. How to add subtitles and captions in iMovie on iPhone?
If you've many movies or videos on your iPhone and you'd like to add subtitles to using your iMovie, here are the steps:
First of all, please launch iMovie on your iPhone or iPad. Then you can choose Movie and click + button to import the video you want to add subtitles or captions to. Move the video to the timeline and stop at the point where you want to add subtitles. Click the T button for more options. Choose the text style from Center or Lower to change the position of the subtitles appearing on screen. Type the subtitles after you delete the sampled text. And press Done after finishing your subtitles.


