


Home > WinX HD Video Converter for Mac > Solution to Convert Multi-track HD Videos
Multi-track HD video refers to a video file that contains multiple audio language tracks and video tracks. Movies recorded in Multi-tracks always have a better audio and visual quality. The purpose is to let audience choose their preferred language when watching HD videos. For instance, they can choose their favorite audio and subtitle when converting movies. Usually, Multi-track HD videos include BDAV, M2TS, MKV, AVCHD, HDTV and MPEG-TS video movies.
It is necessary to know which audio language you need before converting Multi-track HD videos. For Mac users, WinX HD Video Converter for Mac is the way to go. It allows you to freely choose language from different audio channels and provides you synchronized video playback. Furthermore, this powerful Mac HD video converter could also convert all HD and regular videos to recent prevailed devices, like, iPhone, iPad, iPod, PSP, Zune, Android and more. What's more, you can also use this HD video converter as website video downloader and video editor.

How to Convert Multi-track HD Videos with WinX HD Video Converter for Mac?
Please download, install and launch WinX HD Video Converter for Mac. In this tutorial, we take converting MKV to iPhone for example.
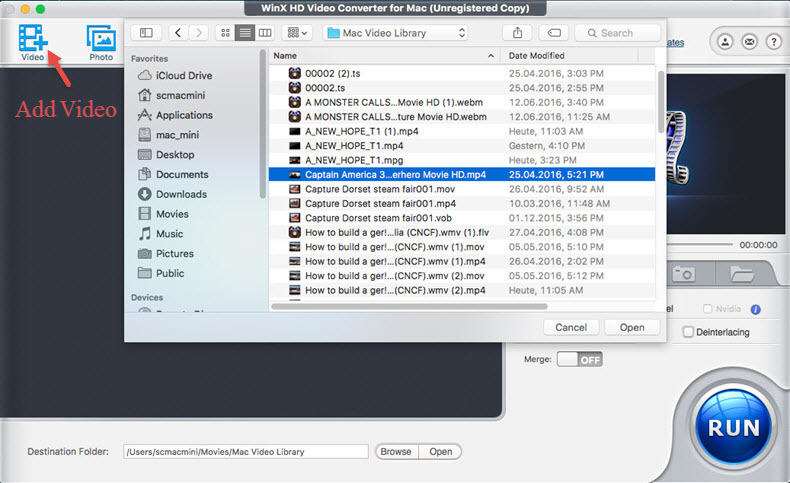
1. Import Multi-track HD video by clicking "Add Video" button or by dragging and dropping directly.
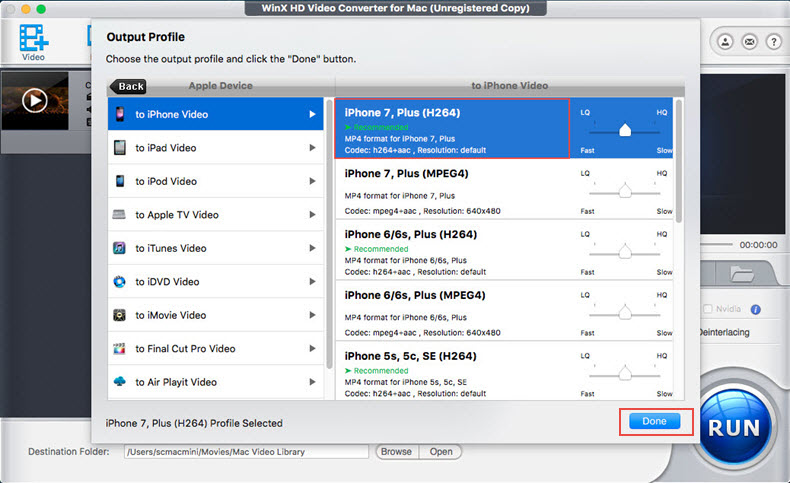
2. Select the output format according to your demand, like, Apple Device -> to iPhone Video -> iPhone 7, Plus (H264).
3. Click "Audio" and "Subtitle" button in the File List window and select the language track of audio and subtitle.

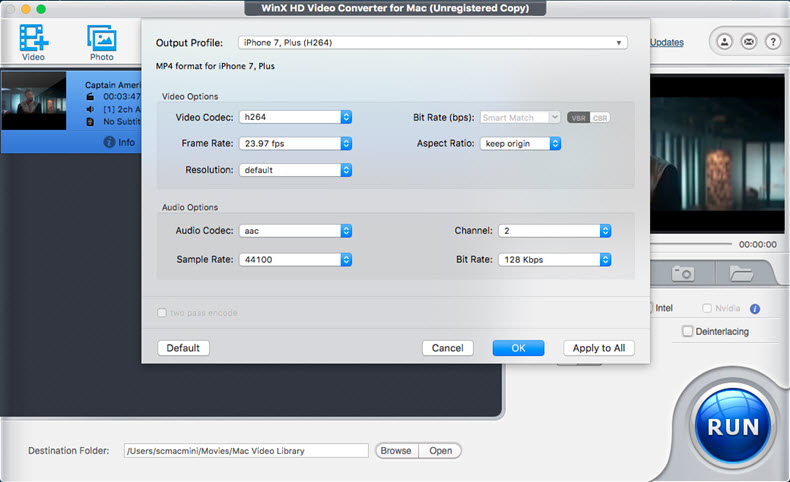
4. Audio Video Settings (Optional). Clicking "Tool" tab in the File List window, you can adjust audio and video parameters, like Video Codec, Bite Rate, Frame Rate, Aspect Ratio, Resolution, Audio Codec, Channel, Sample Rate, etc.
5. Click "Browse" button in output setting area and select a destination folder to save your converted Multi-track HD video.
6. Start converting via clicking "RUN". You can view the conversion progress and are able to cancel the converting process at anytime.
Other Useful Optional
1. Remand the video before converting via clicking "Rename" in the File List window.
2. Add subtitle, trim video segments, crop video size and add watermark by clicking "Edit" in the File List window.
3. Set "CPU Core Use" to speed up conversion process.
4. Choose "Deinterlacing" to convert interlaced scanning movie/video to progressive scanning video.
5. Select "Use High Quality Engine" for better image quality.